Hey Quietfire Fans! For today's project I'm sharing with you my Let Your Dreams Soar Tag. I combined a variety of dies, stamps and Modern Gilding Powders, which were all perfect for creating this tag. You'll want to grab a cup of your favourite beverage and learn how to recreate my Let Your Dreams Soar Tag at home.
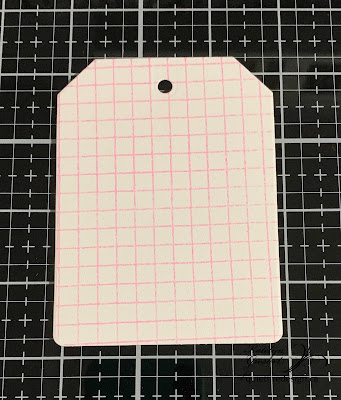
To start, die cut the small tag from the Planner Essentials - 2 die out of a piece of white cardstock. Apply Kitsch Flamingo Distress Ink to the Grid Background Stamp and stamp onto the tag.
Next, you'll need the Let Your Dreams Soar sentiment from the Soar Collection Stamp Set. Apply Emboss It Ink to the sentiment and stamp onto a piece of white cardstock. Sprinkle Copper Scroll Modern Gilding Powders over the stamped sentiment. Tap off the excess powder and emboss with a heat tool. Fussy cut the sentiment into two strips.
Choose two leaves from the Create a Wreath Die. Die cut one of the leaves once out of a piece of green paper. Die cut the other leaf four times out of the same piece of green cardstock.
From the Christmas Accents die, you'll need the large, medium, small and extra small flowers. Die cut the large flower once, the medium flower three times, the small flower three times and the extra small flower three times.
From the Christmas Accents die, you'll need the flower centres. Die cut the flower centres three times out of white cardstock.
Shape the flowers as desired. For one flower, adhere a large, medium, small and extra small flower as well as two centres together. For the other two flowers, adhere a medium, small and extra small flower as well as two centres together.
Adhere two matching leaves to the top left corner of the tag. Adhere the remaining two leave to the bottom left side of the tag. Adhere the single leaf to the middle left hand side of the tag as desired.
Foam square the large flower in the middle of where the leaves meet. Adhere one flower about the large flower and adhere the other flower below the large flower.
Use foam squares to adhere the Let Your Dreams Soar sentiment to the middle right hand side of the tag as desired.
To finish the tag, tie a piece of white crinkle ribbon through the hole at the top of the tag.
Here are a few closeup photos of the finished tag.
Here is the finished Let Your Dreams Soar Tag.
Quietfire Designs Supplies Used:
Other Supplies Used:
- Elizabeth Craft Designs: Planner Essentials - 2
- Tim Holtz for Ranger Ink: Distress Ink - Kitsch Flamingo
- Ranger Ink: Emboss It Dabber
- Graphic 45: Elegance 12x12 Patterns & Solids and Bird Watcher 12x12 Patterns & Solids
- Stella & Wolfe: White Ribbon
- Misc: White Cardstock
Thanks so much for joining me today and I hope that I have inspired you to recreate your own version of my Let Your Dreams Soar Tag at home.
- Katelyn


