Monday, December 30, 2019

Good Friends Are Like Snowflakes


Hello everyone!  Betsy on the blog today sharing this gorgeous elegant
friendship card that's so appropriate for the season.  It's an easy
card to make and gets the message across beautifully!

For today's project I used:


First I covered my A2 size top folding white card base with a silver pearl card stock.
Next I stamped my image.  Because Suzanne's calligraphy is so beautiful, I like to
be able to retain that meticulous elegance.  So, I stamped this with Versafine Clair
Nocturne Ink and then heat embossed it with Kells Gold Modern Gilding Powder.
This always gives me a crisp edge when embossing.

I added my patterned paper cut on an angle and adhered it to the base.  Then I added
a 1/4" strip of gold paper and adhered it to the edge.


I added some silver gemstones and a few snowflake sequins and my card was finished.
I am always surprised at how fast simple cards work up.  And yet the finished
project was every bit as elegant as I hoped it would be!


Quietfire Design Products Used:

Good Friends Are Like Snowflakes:
Modern Gilding Powders - Kells Gold

Other Products Used:
    
Versafine Clair Nocturne Ink
A2 Size top folding white card base
Silver pearl card stock
Silver & Gold Snowflake card stock
Glue
Silver gemstones
Snowflake sequins

Thanks for stopping by!


Tuesday, December 24, 2019

The ABCs of I love you

Merry Christmas Eve!  This post is not about making a last minute Christmas card because I am busy baking and cleaning for tomorrow.  Haha!   This card makes me feel ahead of the game which I am not usually.  Thank you for checking out this Valentine's Day card.  Of course, it works for anytime you need a romantic card.


This I Love You Alphabet stamp is one of my first stamps I got from Quietfire Design.  It's still one of the most beautiful design I've seen.  I paired it up with the Heart Spray die and the Marvelous Square dies by Spellbinders.


After die cutting the hearts out, I used red Copic markers to add some shading to the die cuts and then gluing them onto ta white A2 background.


After stamping the Alphabet onto white card stock, I die cut it out using the Marvelous Square die.  I did an extra one in gold card stock and adhered it behind the front panel just a bit offset.


I had some Wild Orchid Flowers from a while back so I added a floral spray to a corner with some pearl bling. Thanks for looking and have a wonderful day!


Merry Christmas!


I Love You Alphabet

Hearts & Pawprints Sprays - 2 Metal Cutting Dies


Thursday, December 19, 2019

Joy Christmas Gift Tag


Hey Quietfire Fans! It's hard to believe that Christmas is only 6 days away and I'm sure that you are trying to finish the last little bit of Christmas Shopping on your list. So for today's project, I decided I would share with you this quick and easy gift tag perfect to add to any Christmas gift. By combining a variety of stamps, dies from A Way With Words and the Modern Gilding Powders, they were all perfect for creating my Joy Christmas Gift Tag. You'll want to grab a cup of your favourite Christmas beverage and learn how to recreate my gift tag at home.

To start, you'll need a 2 3/8" x 4 3/4". Apply Emboss It Ink to the snow stamp from the Have Yourself a Merry Little Christmas stamp set and stamp randomly on the tag. Reapply ink to the stamp as needed until the entire tag has dots on it. Sprinkle Kells Gold Modern Gilding Powder over the entire surface of the tag. Tap off the excess powder and emboss with a hea tool. Distress the edges of the tag. Ink the edges of the tag using Black Soot Distress Ink and a Blending Tool with foam.


Die cut the Peace on Earth die out of White Soft Finish Cardstock. Apply Emboss It Ink to the die cut. Sprinkle Dragon Berry Modern Gilding Powder over the entire surface of the die cut. Tap off the excess powder and emboss with a heat tool. Once the die cut has cooled, cut the die cut in half. 


Die cut the Flourished Oval Frame out of White Soft Finish Cardstock. Apply Emboss It Ink to the entire surface of the frame. Sprinkle Dragon Berry Modern Gilding Powder over the entire surface of the frame. Tap off the excess powder and emboss with a heat tool. 


Die cut a 2 1/2" Stitched Oval out of White Soft Finish Cardstock. Apply Emboss It Ink to the tree stamp from the Have Yourself a Merry Little Christmas stamp set and stamp in the middle of the stitched oval. Sprinkle Copper Scroll Modern Gilding Powder over the entire surface of the oval. Tap off the excess powder and emboss with a heat tool. Distress the edges of the oval. Ink the edges of the oval using Black Soot Distress Ink and a Blending Tool with Foam.


From the Bright Holiday Words, you'll need the Joy sentiment. Apply Emboss It Ink to the Joy sentiment and stamp onto a piece of White Soft Finish Cardstock. Sprinkle Copper Scroll Modern Gilding Powder over the word. Tap off the excess powder and emboss with a heat tool. Fussy cut the Joy sentiment out. Ink the edges of the sentiment using Black Soot Distress Ink and a Blending Tool with Foam.


Adhere the flourished oval frame to the stitched oval. Adhere the other two flourished pieces to the left hand side of the stitched oval. 


Place foam squares on the left hand side of the stitched oval. Adhere the oval to the right hand side of the tag.


Adhere the Joy sentiment to the bottom left side of the tree. 


Add five gold dots around the Christmas tree. To finish the tag, tie a piece of Copper Ribbon to the top of the tag. 


Here are a few closeup photos of the finished gift tag.


Here is the finished Joy Christmas Gift Tag.


Quietfire Design Supplies Used:


Other Supplies Used:

- Elizabeth Craft Designs: White Soft Finish Cardstock and Stitched Ovals
- Tim Holtz for Ranger Ink: Distress Ink - Black Soot and Blending Tool with Foam
- Ranger Ink: Emboss It Dabber and #5 Manilla Tag
- Studio Katia: Gold Sparkle Crystals
- Misc: Copper Ribbon

Thanks so much for joining me today and I hope that I have inspired you to recreate your own version of my Joy Christmas Gift Tag. 

- Katelyn


Wednesday, December 18, 2019

Christmas Family


It's almost Christmas!  And here is a last minute card idea for you.  Oh, look!  It's a whole family!
I always like to see what new combination of A Way With Words diecuts I can come up with and I get so excited when you come up with something I haven't thought of before!  With over 100 words in the collection, there is bound to be quite a few!  This is the first time I've used this combination.


Here is what you'll need to make this card.  Of course you can use wherever colours you wish!

Flourished Deer  QFDECD
Flourished Christmas Minis QFDECD
Merry Christmas 3 QFDECD
Family QFDECD

Cardstocks in brown, dark kraft, light kraft, turquoise and pink
Micro Glue Dots
3D Foam Squares by Scrapbook Adhesives

  1. Form a tent-fold card base measuring 6x6" from brown cardstock.  Cut a square panel from dark brown measuring 5.25" square and a slightly larger mat from turquoise. Adhere them together.
  2. Die cut the Flourished Deer, one each from dark and light kraft cardstock.
  3. Die cut the little deer from the Flourished Christmas Minis, one for each child - in whatever colours you (or they) would like!
  4. Die cut Christmas and Family from your choice of colours and use Micro Glue Dots to assemble the deer together as shown.
  5. Adhere the assembly of deer and words to the brown panel and mat and use 3D Foam Squares to adhere to the card base.
What a sweet card!  Enjoy making your own special version!

Just ask if you have a question.  Merry Christmas!
Suzanne


Monday, December 16, 2019

Falalalala...But First Coffee! A Gift Card Holder.

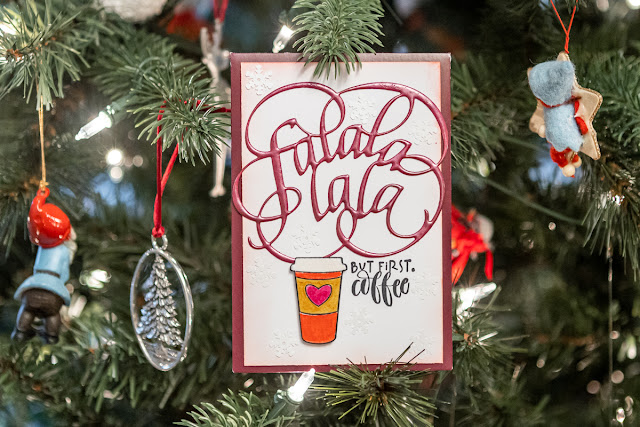
Christmas Gift Card Holder using Falalalala die and But First Coffee stamp set / Dragon Berry Modern Gilding Powders

Happy Monday! Kim here with a FUN gift card holder using the FALALALA die and But First Coffee stamp set! These two may not have ever been meant to”play” together, but play well they do! 

Falalalala die designed by Suzanne Cannon for Elizabeth Craft Designs
Quietfire Design But First Coffee stamp set
This past summer I purchased a set of pewter reindeer ornaments. They were each individually packaged in burgundy envelopes, perfectly sized at just over 3.25” x 5”. I saved all nine and have been decorating them to used for gift cards! [ reduce-reuse-recycle! ]

I started by die-cutting my FALALALA die from a scrap. These dies....cut like butter! 😍

Falalalala die to be used on Christmas Gift Card Holder


I then embossed the die cut using Dragon Berry Modern Gilding Powder. I used two coats to achieve this smooth, dimensional look. The colour is amazing and I LOVE how it keeps the details!

Dragon Berry Modern Gilding Powder and the Falalalala Die

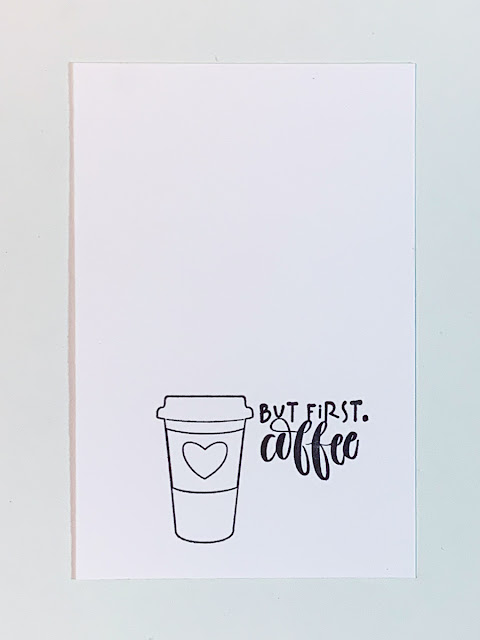
I stamped my coffee cup and quote onto some white Creative Scrapbooker Super Stock using Ranger Archival Black Ink.

But First Coffee stamped with Ranger Archival Ink onto Creative Scrapbooker Super Stock


Next, I edged my card using Distress Oxide Ink and adhered my embossed quote after running it through my Xyron. You could stop at this step, but why? 

Christmas Gift Card Holder using Falalalala die and But First Coffee stamp set / Dragon Berry Modern Gilding Powders


I stamped the coffee cup onto a scrap of water colour paper and quickly scribbled some colour on with my Derwent pencil crayons.

Water colours with Derwent Intense pencils


Using a water brush, I smoothed the colour out and cut along the lines of the image. 


I like to edge hand cut images like this with a black marker. I used a few small adhesive foam squares and placed it on top of my original stamped image. Randomly placed sequins snow flakes, finish the gift card holder perfectly!

Christmas Gift Card Holder using Falalalala die and But First Coffee stamp set / Dragon Berry Modern Gilding Powders


I have tucked in a $10 coffee card in a few of these. They will be the perfect little gift to say thank you to people who I want to acknowledge this time of year!

Christmas Gift Card Holder using Falalalala die and But First Coffee stamp set / Dragon Berry Modern Gilding Powders

I won’t be on the blog again until the New Year! HAPPY HOLIDAYS to you and yours!


SUPPLIES:


Creative Scrapbooker Super-Stock
Ranger Archival Black Ink
Ranger Distress Oxide
Xyron
Scrapbook Adhesives by 3L foam squares


Sunday, December 15, 2019

Winner of the Modern Gilding Powders!


Thanks to everyone who commented on our posts and who played along for our Gilded Christmas week!  The winner of our set of Modern Gilding Powders is (drum roll, please)

Judy Frank

Congratulations!

Judy please send me an email to confirm your address - I have one, but it might not be up to date!

I've kept the sale on till the 18th!  Happy Gilding!
Suzanne

Friday, December 13, 2019

Gilded Week Giveaway!! "All Hearts Come Home"

Welcome to the Gilded Christmas on the Quietfire Creations blog!  We’re going to share a whole bouquet of inspiration, let you chime in and at the end of the week we’ll have a giveaway!  We’ll be featuring the new Modern Gilding Powders throughout the week because we love them so much! 

You’ll need to comment on all the blog posts from now till next weekend (December 14, 2019), then we’ll choose a winner from those who commented.  The prize is a complete set of Modern Gilding Powders*!  The Gilding Powders (and accessories!) are on sale for the week. If you happen to be the winner and you already have the Gilding Powders, you’ll receive a Quietfire Gift Certificate!

For my project I am sharing a Gilded Christmas card using the luxurious Kells Gold Modern Gilding Powder
Kells Gold
And the so yummy Dragon Berry
Dragon Berry
Both Gilding powders were used in numerous places on the card front.  First, I dry embossed some light Kraft card stock, rolled Versamark (using a brayer) and heat embossed using the Kells Gold.  Next I applied Versamark to the edges of small flower petals and heat embossed using the Dragon Berry.
Next, a die cut wood heart had Kells Gold applied.  A scalloped edge square had more Dragon Berry applied.  Last (and certainly not least!) the stamp All Hearts Come Home was heat embossed.  It is so pretty in the Dragon Berry!
The end result is phenomenal!  It is a gilded beauty.  :)

Product used:
Dragon Berry Modern Gilding Powder
All Hearts Come Home stamp


Thanks so much for stopping by!
Good luck on the draw.
Big Hugs,
Kathy Jo

There are many gifts under the Christmas Tree-Gilded Christmas

Hi Y'all!
Robyn here welcoming you to
 The Gilded Christmas on the Quietfire Creations blog!  
Gilding inspiration galore
with you chiming in and at the end of the week we’ll have a giveaway!  
We’ll be featuring the new Modern Gilding Powders throughout the week because we love them so much! 

You’ll need to comment on all the blog posts 
from now till next weekend (December 14, 2019), 
then we’ll choose a winner from those who commented.  
The prize is a complete set of Modern Gilding Powders*!  
I’ve put the Gilding Powders (and accessories!) on sale for the week. 
If you happen to be the winner and you already have the Gilding Powders, you’ll receive a Quietfire Gift Certificate!
The sentiment is gilded with a mix of  Acanthus Teal and Kells Gold.
The stars are stamped in Delicata gold, let it dry a bit and sprinkle on the Kells Gold for a vintage textured look.
Gilded with a mix of Dragon Berry and Kells Gold

Supplies


Thanks for joining us this week- there is more to come, be sure to comment!
Popup surprises inside.
Shout out to Robert Sabuda


Visit us 24/7at
Suzanne Cannon Fan Group on Facebook
Related Posts Plugin for WordPress, Blogger...