Showing posts with label Spring. Show all posts

Monday, March 30, 2020

Gilded Tulip Garden


Happy Monday! [...just in case you need to know the day of the week] To those essential workers who are still heading to work ~ THANK YOU! To those who are now home social distancing ~ THANK YOU! In the midst of all this change in the past weeks, I do find some comfort in my craft room, even if my creativity struggles to surface.

This week I played with the newest colours added to Quietfire Design’s Modern Gilding Powders line. The colours are gorgeous, soft and swoon worthy! I wanted to used them all, so decided to make a garden of flowers...in hopes of finding some spring vibes in our very, winter like weather!


I added some Distress Oxide inks to some watercolour paper, to create an illusion of grass, sky and sunshine. I chose watercolour paper so I could “pull” some colour from my Tombow markers in another step.


After my background was completed, I made a stencil from cardstock using the Elizabeth Craft Designs Butterflies and Star Sprays die, designed by Suzanne Cannon. I used a foam makeup sponge to tap some acrylic paint onto my background through the butterflies. Every garden needs butterflies!


Next to make some flowers! I very loosely drew tulips and cut them out out cardstock. Using an Emboss It Dabber from Ranger, I covered my tulips with embossing and poured my Gilding Powders over top! Guess what...even the worse drawn flowers will look amazing, so give it a try!


I cut out the word Spring from the 4 Seasons die and embossed with Dragon Berry Modern Gilding Powder, a favourite from the first release of colours.


With my flowers and quote all ready, I decided how I wanted my placement. With my Tombow markers, I drew stems for my tulips and used my water brush to “pull” the colour. This allows for more of a water colour effect and softer lines! I did the same for some grass and added a few pencil lines for depth.


In signing off today, I encourage you to play. This is not my favourite card I have ever created, it did however let me play with product that has been waiting for me, it took my mind away from the constant chatter of COVID 19 news and play lets your creativity grow...it’s part of the process.


Have a healthy week!

Wednesday, March 18, 2020

Spring Love


It's time to welcome spring!
Today is group post day over on the Elizabeth Craft Designs blog and the theme is Spring!  I thought this was a fun opportunity to use the new spring colours of Modern Gilding Powders and combine some dies!

Here are the supplies:
4 Seasons   ECD
Baby Love QFD | ECD
Flourished Frame  QFD | ECD
Flourished Night Sky QFD | ECD
Stitched Rectangles  ECD
Modern Gilding Powders: Celtic Mint, Armenian Pink, Dilly Dilly Lavender, Dragon Berry, Acanthus Teal
white cardstock
pale pink cardstock (I used Bazzill Tutu Pink)
Wordwin Petallic Spring Larch coverstock
Glue Dots - Micro
Scrapbook Adhesives 3D Foam Squares

Instructions:

  1. Form a 5x7" tent fold card base from Petallic cardstock.
  2. Die cut the Flourished Frame and larger Stitched Rectangle from Petallic cardstock.
  3. Die cut the smaller rectangle from pink cardstock.
  4. Die cut 3 flowers and their leaves from white cardstock as well as Spring and Love.
  5. Use the Modern Gilding Powders to gild the flowers.  I used Dragon berry and Dilly Dilly Lavender for two and then a combination of Armenian Pink and Dragon Berry on another. These are absolutely gorgeous colours!!
  6. Gild the leaves with the brand new Celtic Mint and Acanthus Teal.  Assemble the flowers with Glue Dots by tucking the leaves behind.
  7. Gild Spring with Armenian Pink and love with Celtic Mint.
  8. Assemble as shown.  Use foam squares between the rectangle layers and card base and to attach the assembled flowers.  Use Glue Dots for all the other elements.
  9. Now you have a sweet and cheery card!  Welcome Spring!
Thanks for visiting.  Just ask if you have any questions!
Suzanne


Wednesday, March 20, 2019

Welcome Spring!


Today I'm sharing a project for the Elizabeth Craft Designs Group Challenge.  The theme is spring and flowers!  Spring has arrived with a blaze of sunlight this week - but it's been unseasonably cold here on the west coast, so I pulled out the spring colours and had some fun.

Here is what I used to make this fast and easy, but still elegant, card:

Supplies:
A Way With Words


Soft Finish Cardstock 100lb White  ECD

Other items:
Ranger Distress Ink: Worn Lipstick, Wild Honey, Bundled Sage
Ranger Ink Blending Tool
Glue Dots
Kool Tak Clear Foam adhesive

Instructions:
  1. Form a 6 x 6" tent fold card base from white cardstock. Die cut the Rosebud Wreath and backing pieces as well as Welcome and Spring from white cardstock.
  2. Blend Worn Lipstick and Wild Honey on the small flower backing pieces and adhere to back of wreath.  Mount wreath on card base with clear foam adhesive as shown.
  3. Blend Bundled Sage on the Spring diecut leaving more colour at the top of the word.
  4. Blend Worn Lipstick and Wild Honey on the Welcome diecut leaving more colour at the top of the word.
  5. Adhere Welcome and Spring to the inside of the wreath using Glue Dots.  Designer Tip: Slightly roll the Glue Dots if they are too large.

Thanks for visiting!  Please feel free to ask any questions.  Happy spring!
Suzanne

Tuesday, March 13, 2018

Fairies and Flowers


Hi and it's so nice for you to drop by and see what is new on the Quietfire blog today.  It's Teresa here today with a share for all of you looking forward to spring coming in the weeks ahead.  I found some brand new paper called Cherry Blossoms from Prima and i thought it was a perfect match to go with the stamp i had called "A Rustle in the Wind".  This is a set of 4 stamps, 2 are sentiments and both are just adorable.  

To make my card i created a simple layered backround and then added a few beautiful die cuts in white to frame the sentiment.  Then i added some beautiful flowers from Prima and just a few pearls to make it sparkle a little more.  


I also did a card a while back with the bottom sentiment so i thought i would attach it below so that you can have 2 ideas for this set.  Its fun to add extra glitter to this one with stickles or even use some of that superfine glitter you have stashed away for something special.  


Tuesday, May 17, 2016

New Die Release - Hello Spring

Hello, Connie Nichol here today.  I am absolutely thrilled with the new 4 seasons metal cutting dies just released from Quietfire Designs.  The words Spring, Summer, Autumn and Winter make beautiful titles for many scrapbook layouts, alone or combined with other words.  So many possibilities.....


Here are the 4 seasons dies
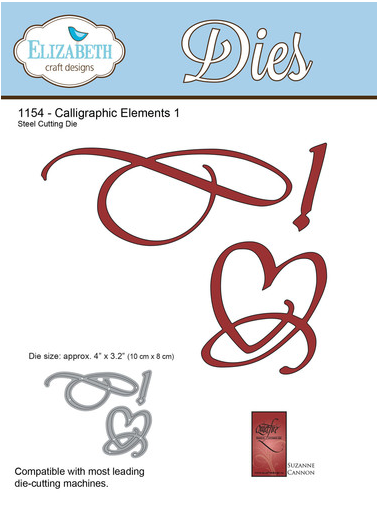
I combined the word 'Spring' with the Hello die and a flourish from Calligraphic Elements 1.

The lily of the valley embellishments are Quietfire Design cut files - aren't they pretty?  I cut these with my Sizzix Eclips2 electronic die cutter, but they are also available in the Silhouette Design Store here.

Supplies Used:  Close to my Heart cardstock, Crafter's Workshop stencil, Clearsnap Smooch Spritz, Sizzix Eclips 2 electronic die cutter, Elizabeth Craft Designs A Way with Words and clouds dies, washi tape.


Thursday, March 27, 2014

Spring! Winter 2014 CHA Swag Challenge

Suzanne, Queen of Quietfire attended the Prime Publishing Blogger event at Winter CHA in January (you can read about that here).
She graciously bestowed a box of swag on her loyal DT Shepherdess (moi!) to see what fab projects could spring from said swag, donated by several craft companies. 


 This package came from Elmers 

 and opened to reveal these items featuring their Painters Pen , a water based, permanent when dry paint marker, with a  versatile medium bullet tip.
I love a challenge, and still I was stuck, until I got the latest Quietfire Digital Cut files in the Silhouette Store!
Products:
Instructions:

Cut digital files from paper, making several copies of the word spring.
Here is the screen shot of the files.


Here they are ready to assemble.
Layer up the word using the glue marker to make a strong dimensional element, with the mirrored paper on top.  One piece tore, so I put that in the middle! Be patient taking these off of your mat. Use your tiny spatula.


Put the Elmer's Painters pen into the spritzer and spray randomly onto the pot. Draw as you will for added accent.
Adhere the doily and border with Dotz.


Shape your flowers using dry embossing tools.
The paper petals easily go from flat to fancy by pushing the paper with the tool into a mat or mouse pad. Quietfire has a nice set of tools, these I've had forever.
Adhere the flower elements with Dotz.

The sentiment is held up with a memo holder. Glue a heavy washer to the bottom to add weight.
The top is an alligator clip, hidden by the flower.

Place the holder in the pot and stuff with the shredded paper.


Instant Spring!
We till have snow! so the wildflower planting will have to wait.


Comments and Questions always welcomed.

Lots more was in my swag box, so subscribe by email and Like us on Facebook so you don't miss a thing!


Related Posts Plugin for WordPress, Blogger...