I’m very excited to be a Guest
Designer for Quietfire this month! I’ve been a huge fan of Suzanne, and all
things Quietfire, for a long time! To be sharing some projects here is really
thrilling for me. Never mind all the fun I had making them!
Today I have a card to share with
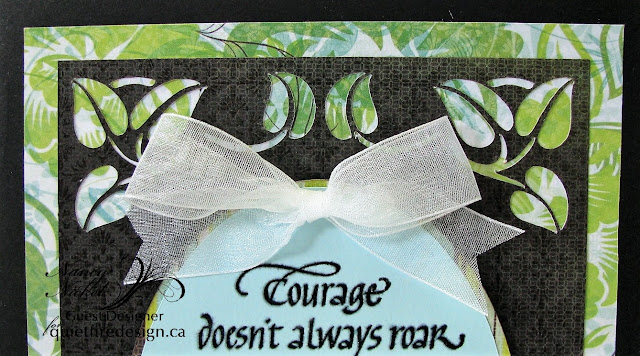
you. This card features the very lovely Leafy Garden Frame Card Cutting File.
These layers come together so easily to create a really beautiful card. The
hardest part is choosing the papers. I often like to use black on a layered
card like this. It’s always pleasing to my eyes, and really allows the focal
sentiment to stand out. This is such a lovely sentiment too.
I began with a black cardstock card
base. The next layer was the pretty patterned paper that had lots of colours.
On top of that came the corner cut piece. For this I chose the black with the
gloss texture on it. It offers some interest but doesn’t compete with the layer
under it, or the design showing through in the corners. Next, I moved on to the
ovals. The small one that would contain the sentiment, I cut from a light
turquoise cardstock that matched the patterned paper. The larger oval that
matted it, I cut from a coordinating multi-striped paper, from the collection. Since
it’s between two solid colours, it doesn’t get too busy.
Now it was time to stamp the sentiment. I used a stamp positioning tool to do this. I stamped it in black ink.
What a lovely impression it gave…just beautiful!
At this point I decided that I wanted the sentiment to be glossy, to match the
gloss texture of the black background. I left the stamped sentiment in place on
the stamp positioning tool, and patted it with the anti-static pouch. I cleaned
the black ink off the stamp, and inked it up with the embossing ink. I
re-stamped the sentiment with the embossing ink. I removed the stamped oval,
sprinkled it with clear embossing powder, and heat set it. In the close-up
photo of the sentiment, you can see the beautiful shine on the words. I then
adhered this oval onto the striped oval. I added foam tape to the back of the
striped oval. Then it was just a matter of adhering everything in place, from
the bottom up. Finally, I added a pretty white shimmer ribbon bow to the top of
the oval, and my card was done!
This same design can be used over and
over again. Just a change of papers, and different sentiment stamp, and you
would have an entirely new look! It can even be used horizontally! I know it’s
a cut file that I’ll go back to again and again!
Quietfire Designs Products Used:
Other Products Used:
Kaisercraft Paper Pad - Chapter One;
Cardstock – Black, Light Turquoise;
Memento Tuxedo Black Ink;
Stampendous Clear Embossing Ink;
Sparkle N Sprinkle – Clear Embossing Powder;
White Shimmer Ribbon;
Tools: Stamp Positioning Tool, Anti-static Pouch,
Heat Gun.
Cardstock – Black, Light Turquoise;
Memento Tuxedo Black Ink;
Stampendous Clear Embossing Ink;
Sparkle N Sprinkle – Clear Embossing Powder;
White Shimmer Ribbon;
Tools: Stamp Positioning Tool, Anti-static Pouch,
Heat Gun.
Thank you so much for stopping by!
I look forward to sharing a second
project with you soon!
Nancy :o)
Thanks to Nancy for sharing this wonderful card! You may find her online in these places:
Facebook: https://www.facebook.com/MyNickelNook/
Instagram: https://www.instagram.com/thenickelnook/
Pinterest: https://www.pinterest.ca/nickelnook/


No comments:
Post a Comment