Thursday, May 12, 2016

New Quietfire Dies! Spring and Summer -15 minute wonders!

Hi Y'all!
Robyn running by with a quick post.
I was honored to receive pre release dies from the new 
by Suzanne Cannon for Elizabeth Craft Designs.
All dies are pre- order at this time.

In less than 15 minutes:
  • Adhere fun foam and Shimmer Sheetz to Elizabeth Craft Designs  Double Sided Adhesive
  • Cut the die from the foam and shimmer sheets
  • Adhere fun foam cut to Artist Trading Card- 2 1/2" x 3 1/2"- mine are from never ending stash!
  • Adhere Shimmer Sheetz cut to foam cut.
  • Admire! and gift or trade your new cards!
You can stop there and be done, or embellish to your hearts content.
I'm a busy girl and tickled to show you how much you an do with so little


Here a few Elizabeth Craft Design Peel Off Stickers and a bit of ink add some interest!

The New Dies are in the mail to the rest of the Design Team so check back often for inspiration!
Comments and Questions welcomed and be sure to post your creations to our FaceBook Page!


Wednesday, May 11, 2016

New Die Set - 4 Seasons


Good Morning.  This is Selma Stevenson with a post using one of the new A Way With Words die sets that will be available later this month.  I used the "Autumn" die from a die set which includes all 4 Seasons - Spring, Summer, Autumn and Winter.

4 Seasons, Set of 4 - Metal Cutting Dies - Pre-Order

4 Seasons, Set of 4 - Metal Cutting Dies - Pre-Order
One set of dies which includes all 4 Seasons.  

When I think of Autumn, I always think of fields of beautiful sunflowers that are in bloom just before the trees begin to change colors.  For my card today I have used the "Autumn" die from the new 4 Seasons die set.

This is a 6x6 inch card.  The white frame is one of the new Dotted Scallop Oval dies, the yellow frame is one of the Bead Oval Frames, and the yellow border on the bottom is one of the new Bead Strings 2 dies, all from a new release from Elizabeth Craft Designs.  The Sunflower was created with Garden Notes Sunflower dies, and the yellow corners were die cut using one of the Corners 1 dies, also from Elizabeth Craft Designs. For added interest to the background, I used the discarded circles from the Corners.

These beautiful die cut Seasons will be perfect for your scrapbook pages and cards.  Below is the link to this set.

9500-1195 4 Seasons


Tuesday, May 10, 2016

New Dies, New Stamps!

It's Suzanne here today and it's bumper crop week here at Quietfire Design!


The BIG, exciting news is that we have new dies!!  You may have seen Connie sneaking a peak of one of the new dies on Saturday on National Scrapbooking Day, but now we're over the moon happy to be sharing them all.
 
We have six new dies; two singles and one set. Over the next few weeks, you'll be seeing lots of artwork from the Design Team.  In fact, next week will be wall-to-wall creations using the new dies.  They're so new that most of the Quietfire Design Team doesn't even have them yet!
 
Here they are!  You are able to pre-order on the Quietfire site, but dies will not be shipped until after May 25, 2016.  Elizabeth Craft Designs has a whole new exciting release of dies. Check them out on their blog this morning.


And for those who want it all....


Since we are lucky enough to have seasons as dies, it was natural to create some seasonal quotation rubber stamps.  And as there are four seasons, here are four new stamps.  I'd like to give the Quietfire Design Team a big shout out for their help!  When I asked for suggestions for quotes, they stepped right up with some beautiful suggestions!  If you wish to have a closer look at each stamp with more information, simply click on the caption (as opposed to the image).

And if you need the all the seasons quotes, you get a little price break....

 
The seasons quotes started me off on a nature/garden/flowers theme, as so I've added these to the stamp collection. 
 
 
And from there, to here....
 
Here is something new and different....
These are our Life Journey words
in sizes less than 1"


And I think this just might be my favourite! This set was suggested by Diana Nguyen on the Quietfire Design Team. I can hardly wait to see what she does with it! (You can be assured *I* won't be using "How often you are right" for a card for my husband - unless he does something really spectacular!)
 
Please note all these items are available for Pre-Order and any orders containing these items will begin shipping on May 25, 2016. 
We will not be shipping any orders from May 16 to 24, 2016
 
I hope you like our new items!
Happy creating! Suzanne

Monday, May 9, 2016

Sunshine, freedom and a little flower

Hi everyone it's Teresa here on this beautiful Monday with a pretty spring card that i did with the brand new stamp "Just living is not enough".  I wanted to really bring out the idea of the flower that was in the sentiment so i did it with some pretty papers from Teresa Collins i had in my stash.


I wanted to keep it simple and only use the papers so i layered a light cream piece of the printed paper on a white card and on top of that another layer of green and then the coral dot.  And i have lots of doilies so i slid one under the oval that i stamped on to give it a little lacier effect.  


I stamped the card with Ranger Archival ink in coffee to match the paper and then added some tiny white pearls dots around the outside edges and let them dry.  And to finish it i fussy cut one of the flowers out in the paper and then added 2 yellow ones over it and a few tiny roses.  It's super easy and simple and you could make a couple of them to send out to friends tonight.  

Thanks so much for stopping over and hope you have a wonderful day!!

Saturday, May 7, 2016

Happy National Scrapbooking Day!! Plus a sneak peek!

Hello there, Connie Nichol here today wishing you all a very happy National Scrapbooking Day.  It is  an unofficial holiday observed every year on the first Saturday of May and an opportunity to celebrate our hobby and share it with others.  I have been scrapbooking since 2002 and my love for preserving memories has not waned a single bit since that time.  And that's what it's all about - preserving memories.  We forget, so quickly, the details of why we took a photograph, when it was taken and sometimes even who is in the photo.  Be sure to capture the story behind the picture;  at the very least, jot down the date and the names of people in the photos.

I am very excited to show you a very sneak peek of one of the Way with Words dies that will soon be released by Elizabeth Crafts Designs.  Stay tuned for further information.....  The word  'Memories', in Suzanne Cannon's beautiful calligraphy, is a die that is just perfect for many scrapbook page titles, either alone or paired with other words as I have done here.


This is a simple layout, using mostly just cardstock and a variety of Elizabeth Craft Design dies but the memories it captures makes me smile every time I look at it.  These are the Way with Words dies that I used - Memories (not yet released), Friends, the 'with' from With Sympathy and the Flourish from Calligraphic Elements 1.  


I also used other Elizabeth Crafts Designs dies - the palm tree, the stitched circles and the crab.  The leaves on the layout are ECD velvet leaf stickers that I grabbed from their clearance section, but you could easily cut these leaves in whatever colour you wanted with the ECD Triple Leaf die.  I also used a little of the Through the Lens Wood patterned paper.  Happy Scrapbooking!


Supplies Used:  Core'dinations cardstock, Elizabeth Craft Designs dies, stickers and patterned paper, Colorbox Smooch ink, Brother sewing machine.


Thursday, May 5, 2016

Never Give Up! + the winner babycard


Hello everyone,
Yvonne here with a simple yet elegant card in bright happy colours to send someone some needed encouragment not to give up.
For my card I used the Quietfire Design stampset "Courage doesn't always roar", a set of 2 stamps.


Used materials:

In my blogpost of April 24th I promised to give away the babycard I showed you.
Thanks so much for all of your lovely comments!
The randomly picked winner is:

It's so gorgeous it made cry ..... I love the colors - so soft and pretty. The font for the Congratulations is something I have been looking for in a die for ages as is the stamp you used to welcome the little one.....I would be in 7th heaven if I won this card. I would also LOVE to make a card like this. Where do I order the products? Are they available in Canada? I am very new to this site (joined yesterday) and already I'm blown away by the beauty of the cards I have seen, but I must say that this is the first card that made me cry because of it's beauty. Stunningly gorgeous.

Scottygirl: congrats on the card!
Please send me your adress (email: phoebeez(ad)xs4all.nl or click here)
and I will send you the card asap :-)


Thanks for stopping by and wishing you a great day.

Hugs from Holland,

Wednesday, May 4, 2016

Congratulations - As You Dream - Reminding One Another - Easel

 
Yogi here today... I don't make too many congratulation cards... but a friend needed one... Then I'm taking a "Clear & Sheer" class from Jennifer McGuire and the 1st 2day's projects dealt with various ways of adhering vellum and some nice techniques. I decided to combine both days projects into this card. BIG GRIN

I'm using an "A Way With Words" die from Elizabeth Craft Designs "Congratulations" also available on Quietfire Design HERE

I'm also using a couple quote stamps from Quietfire Design  ("As You Dream..."); ("Reminding One Another...")


I cut out a piece of heavy weight plain vellum and stamped the various floral elements (AlteNew "Peony Scrolls") using Distress Picket Fence. Turned the vellum over (wrong side) and started tracing the images using a small balled stylus on a piece of fun foam. PS don't press too hard or your tool will go through the vellum... After tracing all the lines, used the same tool to added some shading, then used a scraping type tool to add a bit more shading. Colored the images using Spectrum Noir alcohol pens in a deep pink tone in the bottom sections of each petal and a very pale pink all over, blending the deeper shade. Did the same technique with the leaves starting with a darker shade.

Placed my largest die (Elizabeth Craft Designs "Stitched Ovals") over the colored design, marking where the die would cut through my leaves. Fussy cut around the leaves and brought them above the die, then ran the die trough my machine. I used the stitch line to fussy cut around the oval so it would sit within the stitch line of the die cut from white cardstock.

Stamped the quote using Versafine "Blue Lagoon" and clear embossed.

 Adhered the vellum using Glossy Accents in the painted areas and in the stamped quote section.

Scored and folded my aqua toned cardstock (7"w x 4.5"h easel closed). Adhered the oval to the front area.

Die cut the "Congratulations" (also on Quietfire HERE) from the same aqua cardstock. Used the die to cut a shadow layer by following the contour of the die with my x-acto blade. Adhered the 2 layers together then on to the card front. Added the white half pearls.
On the floor: Stamped the quote using the Lagoon and clear embossed on white cardstock. Die cut using Spellbinders "Scalloped Ovals". Adhered to floor using 3D foam tape.

Stamped the peonies on CP watercolor paper (smooth side) using the Picket Fence and embossed with white detail embossing powder. Colored the flowers with various watercolors, adding some gold powder. The leaves were stamped with Versafine Black Onyx, all was fussy cut (or in my case eCut). One of the flowers was adhered with the 3D foam tape. The rest were adhered to the floor.

Click on any image to enlarge. Enjoy

Tuesday, May 3, 2016

Always be my friend

Hello!  It's been a while since I played with my color bursts - and they are just as fun and easy as ever!  I used half a sheet of watercolor paper and Alizarin Crimson so that I would have plenty for this card.  


I then die-cut out two sets of roses from Elizabeth Craft Designs Roses and A Way With Words "Friends" out of the color burst sheet. I also cut the Friends out of black card stock for a shadow effect and the outline of the roses was done in white card stock.


I thought this sentiment from the "Always be my friend" went perfectly with the word die so I stamped in in Versafine black ink in the lower right hand corner.


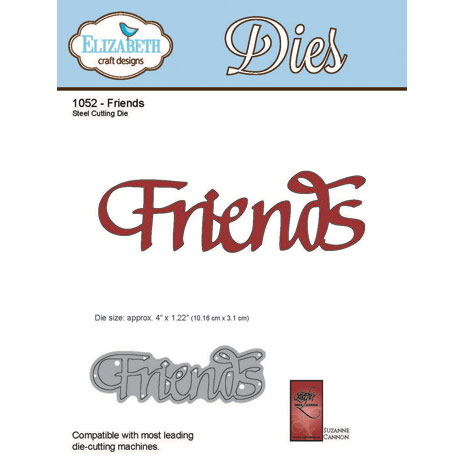
Friends - Metal Cutting Die


Always Be My Friend, Set of 3 Stamps - Mounted


Monday, May 2, 2016

You Are Amazing Gift Box - Connie Powell, Guest Designer


Connie had a wonderful time thinking outside the box for this project!  She has created a gift box filled with a beautifully scented potpourri and topped it off with a You Are Amazing tag.  Guaranteed to delight the lucky recipient!


You Are Amazing


Instructions:

Box base:
  1. Score a 12 x 12" sheet of cardstock at 4" on all sides. This will leave a total of 9 scored boxes on your 12x12 paper.
  2. Lay paper flat and at the corner boxes, cut each corner box in half diagonally to create a paper that has an octagon shape as your end result.
  3. Gather to make a box and glue.
Box lid:
  1. Cut piece of card stock measuring 5 7/8" x 5 7/8".
  2. Score at 7/8" on all 4 sides.
  3. Cut up to score line on one side each to start forming the lid and adhere to make lid. Only cut 4 times so pieces can overlap.
Decorating the box:
Use spray adhesive to attach lacey fabric to the box and trim the edges. Use an acrylic stamp block to press the fabric lace onto the cream card stock so your hands don't get sticky. Hot glue the string of pearls around the box and tied it into a bow. That was tricky, so make a bow first then glue it on. :)

Decorating the Lid:
Adhere lace around the edges using the same spray adhesive and application as the fabric lace on the box.

Flowers:
Tear pieces of Paper Egg Cartons (pre-colored) and hot glue to form flowers. Dust with a white ink stamp pad for some color affect.
 
Top off the box by stamping the beautiful sentiment "You are Amazing" on heart shaped cardstock and nestling it within the flowers.

This is dedicated to all my wonderful Facebook Friends, Family and Quietfire Designers who gave me this opportunity to be guest Designer, who inspire me, compliment me and are just Amazing People!! Thank you Everyone, "You Are Amazing!"


Related Posts Plugin for WordPress, Blogger...