Monday, February 29, 2016

Celebrate!

Hello, Connie Nichol here with a scrapbook layout featuring two Quietfire A Way with Words dies manufactured by Elizabeth Craft Designs.   I am slowly scanning and scrapbooking 35 mm slides from my childhood.  My parents did not take a lot of photos when I was growing up and always used slide film, and these days, who sits down with a slide projector to look at a picture?  So, it is a bit of a process to turn these slides into digital and hard copies, but well worth it.


The Celebrate die is perfect for a birthday page title and the flourish and exclamation point from the Calligraphic Elements 1 add that extra emphasis.


The background paper is a old piece of kraft Stampin Up paper from my stash.  I dressed it up a bit by repeatedly stamping Happy Birthday from the Quietfire Happy Birthday Plain and Simple stamp set. (The musical note background is very subtle, and if you want the exact same look, you could stamp the musical notes stamp included in the Quietfire Crows stamp set  using clear embossing ink).

All the square page embellishments are Shimmer Sheetz from Elizabeth Craft Designs that have been dry embossed with two different Elizabeth Craft Designs embossing folders.  I just love the beautiful colours and shimmeriness (is that word?) that they add to the page.  I cut some of the leftover pieces into little triangles to make a banner.  Then I added a few birthday candles I had purchased from the dollar store.  Done!  Have a great day and be sure to scrapbook the pictures from your childhood.
Supplies:  Quietfire Design stamps, Elizabeth Craft Designs A Way with Words metal cutting dies, green and pink iridescent shimmer sheetz and Swirly Curves and Trendy Tiles 1 embossing folders, Clearsnap ink, Stampin Up patterned paper, twine, candles.


Friday, February 26, 2016

Celebrate your life

Hi everyone it's Teresa here on this beautiful Friday and welcome to the Quietfire blog.  Today i have a card to share that i did with one of the new "Way with Words" sentiment dies.  It's called "Celebrate" and i really love the way this one came out.  It's one of the those dies that you could use for so many occasions.  Weddings, Birthdays, Anniversaries and even for just those little milestones in life that you reach!!


My card is made with new paper from Kaisercraft called Fairy Dust.  The beautiful shades of aqua and purple made it easy to make a layered card and add the beautiful "Celebrate" sentiment on the top.  The flowers are simply fussy cut from the paper so you don't really need much to create it other than paper, adhesives and the die set.  


Directions to make this:

1. Cut aqua card to measure 5 1/2 x 5 1/2 inches.
2. Cut purple paper 5 1/8 x 5 1/8 inches and glue on card.
3. Cut light grey paper 4 7/8 x 4 7/8 and then cut white printed paper 4 3/4 x 4 3/4 and glue together. Cut a small piece of the aqua fairy print 4 3/8 x 4 3/8 and glue them all together on card as shown.
4. Cut 2 small ovals in purple print paper.  Glue the larger oval on the card and then adhere the smaller oval with 3D Foam Squares.
5. Fussy cut flowers from paper and arrange on both sides of the card.  Hand cut leaves from the green printed paper and add to flowers.
6. Die cut the "Celebrate" die with white paper and glue on to the center of the card.  Enjoy!!

Thank you so much for stopping over and if you would like directions for other cards be sure and leave a message so i can do them for other projects for you... Have a fun and crafty day!


Wednesday, February 24, 2016

Just Living Is Not Enough and Live Craft Die


Hello!!  It's Wanda here today to share a card using one of the brand new Quietfire Design stamps, Just Living Is Not Enough, along with the Live Die.

I started with a 5" square of Glossy Cardstock.  I stamped the flower image (Tim Holtz) with Versamark Ink repeating until I had as many images as I wanted.  Over this I inked with Distress Inks Vintage Photo and Barn Door using a Mini Blending Tool.  The Versamark Ink resists the Distress Ink and the flowers pop.  I then stamped the flowers again using Barn Door and dried the ink with a heat tool.  Next I pressed a damp towel over the whole panel and dried it which gave the ink a light speckled look.  I stamped the quote with Archival Ink Jet Black, dried it with a heat tool and then cut it from the background using a Stitched Square Die (Elizabeth Craft Designs).  I distressed the edges of the background, layered it to Glossy Black Cardstock, and attached the square with Kool Tak Clear Adhesive Foam exactly where it had been cut from.  This means the background images flow right across the square even though it is popped up from the background.  A White Paint Pen (Posca) was used to put dots right on top of the dots cut with the die.  The edges of the black panel were distressed, black twine tied around the layered panel and it was attached to the folded red card.  Live was die cut from white cardstock and from black cardstock, adhered together offset a bit and attached to the card as shown.    


Monday, February 22, 2016

Butterfly Background Tutorial- Friendship card

Hello Crafty Friends!  Kathy Jo here sharing a bright and cheerful butterfly friendship card using Quietfire Design's butterflies from the Butterflies/Dragonflies stamp set:
Butterflies/Dragonflies set of 7 stamps
and the beautiful Friendship Isn't a Big Thing stamped sentiment:
Friendship Isn't a Big Thing - Mounted
The card background is so much fun to make and too easy to do.  So grab a cup of tea and enjoy the background instructions!  Please note: all items (especially your lovely stamps) should be washed immediately after use to ensure the paint does not dry and ruin your stamps, brushes, etc.
Cut a piece of white card stock larger than your card base.  Place a small amount of Distress Paint (Scattered Straw and Antique Linen) on a craft mat.  Take a toothbrush (not one you or another family member are using- LOL) and press gently in the Scattered Straw paint.  Lightly swipe toothbrush up card stock.  Re-dip into paint and swipe down.  Continue until you are satisfied with the coverage.  Air or heat dry.  Repeat with Antique Linen.  Rinse toothbrush and set aside.
Place a small amount of white acrylic paint onto craft mat.  Take a very flexible paint brush and dip the tips of the fibers in the paint.  Point the paintbrush towards the paper and run a finger along the edges of the fibers.  The paint will randomly spray on the background.  Rinse brush and set aside.  Allow background to dry or dry using heat tool.  Below is a close-up of the paint flicks:
Next are the butterflies!
Place two small amounts of Distress Paint in Blueprint Sketch onto craft mat.  Add white paint to one of the Blueprint Sketch amounts and mix to create a light blue color.  Either dip or lightly paint the small butterfly stamp into the light blue.  Practice stamping butterfly on scrap paper.  After you are satisfied with your stamped image, stamp butterfly randomly on background.  Repeat using the larger butterfly stamp and the Blueprint Sketch paint.  Wash stamps thoroughly.  Do not clean up light blue or Blueprint Sketch paint...you will need both colors one more time.
Cut background to size and mount onto white paper and then a tent fold dark blue card base.  (My card base was 5.5" x 5.5", the white mat was 5.25" x 5.25" and the background was 5" x 5".)
Stamp the Friendship sentiment onto white card stock using Blueprint Sketch paint.  Wash stamp immediately.  Air or heat dry completely.  Die cut and emboss using Spellbinders Fleur de Lis Squares.  Using toothbrush, apply light blue paint along edges.

Dye ribbon- Two methods can be used to dye the ribbon: Using a craft pad, "stamp" Distress Inks in Scattered Straw and Antique Linen on a couple of spots near each other. Spritz with water. Crinkle up the ribbon and place in watered ink.  
Or- dab Distress Stains in Scattered Straw and Antique Linen onto craft mat.  Crinkle ribbon and place in stains.  Air or gently heat dry.  
Below are the results for each dyeing method.  I used the Distress Stain method for a lighter colored ribbon.
Cut dry die cut sentiment as shown.  Use foam dots or foam tape to elevate.  Create crinkle bow and tie with twine.  Adhere as shown.  Optional: add pearls.
Isn't the sentiment just gorgeous?  And the butterfly background is too happy.  This could be a bright card for a dear friend.  :)
Thank you so much for stopping by!  I do hope you enjoyed the tutorial!
Have a happy crafty day!
Big Hugs,

Saturday, February 20, 2016

Welcome to our New Stamps!

We are here to tell you all about them and share some ideas for using our brand new stamps!

The first one is a quote I first lettered about 10 years ago and it seems to me it was a challenge for the byhandartists.  But ahem.  Those details escape me!  If anyone remembers, let me know!

I always thought this was the sweetest little quote.  It makes me think of spring.  Our croci (crocuseseseses?) and baby iris(es) are blooming their hearts out and it's a beautiful day on the westcoast.

Just Living is not Enough can be found HERE.


 Our second new stamp struck me as a wonderful quote for Father's Day. But I'm sure there are many more occasions where it can be used.
The Greatest Strength can be found HERE.

The Quietfire Design Team has been itching to get their fingers on these stamps.  Those that have them already have created great beauty to share with you. I've added links to their blogs and their projects will be along soon so you check all the details on each gorgeous work of art!

by Robyn Josephs

by Robyn Josephs

by Selma Stevenson

by Wanda Hentges

by Wanda Hentges

Aren't these beautiful samples?  My thanks to Robyn, Selma and Wanda.
These stamps are available now to ship!
Happy creating!  Suzanne

Friday, February 19, 2016

I Wouldn't Have Missed Being Your Friend


Good Morning.  Selma Stevenson here today sharing a card designed featuring the Quietfire Designs "I Wouldn't Have Missed Being your Friend" stamp.  Do you have a friend that would love to receive this card from you?

I Wouldn't Have Missed Being Your Friend - Mounted

 This is the beautiful stamp used.  It was framed using one of the Accordion Fancy Labels dies from Elizabeth Craft Designs.  The design paper, and the hummingbird, are from a Graphic 45 design pad.  The hummingbird was fussy cut then VersaMark Ink patted on, then clear embossed, to give it body.  The flowers were created with Susan's Garden Dogwood dies from Elizabeth Craft Designs.   A rope border and corners were added to complete the card.  

 
Here is the LINK to the beautiful stamp used:
 

Thursday, February 18, 2016

Celebrate....


Hello everyone,
Yvonne here with a new card using one of Quetfire Design/ECD  A Way with Words metal cutting die.
This card is really simple and quick to make.


Here's how to make the card:
The silver lines background is made using  ultrafine silver glitter.
To get the shiny stripe effect: simply glue self-adhesive tape stripes upon some white cardstock and peel of the tape.
Then poor some microfine glitter upon and gently rub the glitter over the tape stripes and voila....
Die-cut the the text Celebrate from shiny gold and from black cardstock.
Glue to gold die-cut upon the black die-cut with the black die-cut leaves a shadow.
Glue the text upon the card using 3D foam squares for an extra dimensional effect.


Used materials:

I hope you like the idea and am looking forward to your comments.
Thanks for stopping by!

Hugs from Holland,

Wednesday, February 17, 2016

ECD Laugh, Celebrate, Happy Birthday

Yogi here today with a Pyramid card for a guy. It's that time of year again, for me, when I need a couple guys cards... It's been eons since I last made one and I forgot how much I enjoy them BIG GRIN. They look complicated but are really easy and so much space to decorate. This one ends up being 5"w x 6"h (when closed) and folds flat for mailing.

Used a couple of the Elizabeth Craft Designs A Way With Words dies "Laugh", "Celebrate"; also available on Quietfire Design HERE and HERE. And I'm using a sentiment ("Happy Birthday") and part of a quote ("Home, Congratulations" 5pce set) stamp.

I started with an 8.5" X 11" piece of deep brown textured cardstock, scored and folded it (see cutting/folding image below). Also created a template slightly smaller of the triangle shape. Used it to cut 3 pieces from 90# hot press watercolor paper.

I created the background pieces with a wax crayon resist technique. Inked the watercolor paper triangle, direct to paper, with Distress "Salty Ocean", ran through my embossing machine using Sizzix "Blueprint" for side 1; "Gears" for side 2; & "Steampunk" for side 3. Kept the paper on my embossing folder and used a white wax crayon (any wax crayon will work depending on the look you want) and hit the high points here and there. Removed from folder and used Distress stains "Vintage Photo", misted with water, smoodged with my finger a bit, then went here and there with "Tea Dye", dried. Adhered to card sides. On side 1, I cut off one leg and adhered to the under piece so they matched up. Love the distressed look it gives.

Created eCut files for the gears (Gel A Tin "Shifting Gears") and also die cut one of Tim's "Gadget Gears". PS you can use any gear images you have either die  cut or stamped and fussy cut, or even electronic images. Just get a nice assortment in small to medium sizes. Inked the stamps with Versafine Black Onyx and embossed with a mix of embossing powders. A touch of "Kettle Copper", a touch of "Chic Camo" and a touch of "Turquoise Shimmer". All these are Emerald Creek Hot Stuff embossing powders. I did this on a piece of scrap paper leaving the excess powders on the sheet as it fell to press the other gears into, adding powder as needed. Love the verdigris/rusted kind of look.


Die cut the word "Laugh" and the word "Celebrate" from white cardstock, inked with the ocean and embossed with the Turquoise Shimmer. Adhered to card.


Stamped the "Happy Birthday" with the ocean and embossed with the turquoise on white cardstock. Die cut with Spellbinders "Grommet Tags", sponged some brown around the edges, removed from die and sponged "Old Paper" lightly all over to tone down the white. The grommet was a bit too long for my side, so cut of the ends...

Added a screw head brads in the gear centers.

Inside Flap:


Die cut the lower case letters for "Birthday" (Elizabeth Craft Designs "Alphabet 2 - Lower Case") from various decorated scraps. Adhered to card.

Stamped the quote ("Home, Congratulations" 5pce set), minus the word "Home" using the black and clear embossed.

Added an adhesive backed Velcro closure.

PYRAMID INSTRUCTIONS:
Start by finding the mid point on your long side. (it can be any size you want). For this card it's 9"w with a mid point of 4.5".

Measure from the mid point to the end (A1), Then place a tic mark on the side edge (A2) using the same measurement (mine is 4.5").

Score from those 2 marks. Repeat on other side.

Along that score line, use the same measurement as for A2, starting from the mid point (A3). Repeat on other side.

Using a quilting or right angle ruler, lightly draw a line to connect and create your bottom point. This should be a square shape.

Now draw a line to connect your outside edges to the center square and cut along that solid line.

Score down the middle

You are ready to fold and decorate.


Tuesday, February 16, 2016

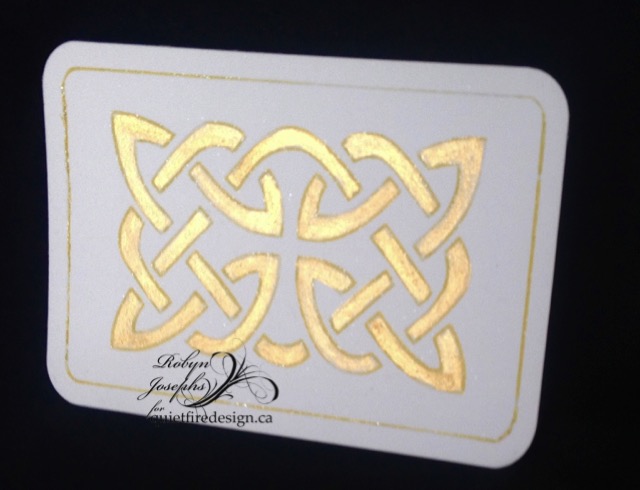
Cut of the week! St Patrick's Day Celtic Knotwork Card! 15 Minute Wonder!


Hi Y'all! Robyn here ready to go green!
I knew I had less than an hour to  make the cuts and write this post and I was still able to make 3 cards!
This weeks new digital files in the Silhouette store 


Celtic Knotwork on the Mat
close up of the knotwork

and of course I made an ATC out of it!

More to come this one- new stamps to be reveal soon!

Gotta run! Show me what you can do!
Comments and Questions Always welcomed!

Related Posts Plugin for WordPress, Blogger...