Showing posts with label Love. Show all posts

Monday, June 3, 2019

Planning the Wedding Stationery!


A big part of planning the perfect wedding is the stationery!  Here are some ideas for adding your handmade love to a special day!  If you've been following this blog and the Elizabeth Craft Designs blog you will have seen some of these projects before.  I've finally completed the set and assembled them together!  I'm sure you could come up with even more ideas by combining different A Way With Words dies.

Hop over to the Elizabeth Craft Designs blog today to see other wedding themed inspiration!

You can just choose a few important dies and stamps for your wedding creations or all of them shown here.

Rosebud Wreath and Elements  Quietfire | ECD
Save the Date  Quietfire | ECD
You're Invited  Quietfire | ECD
RSVP  Quietfire | ECD
Love  Quietfire | ECD
Welcome  Quietfire | ECD
Menu  Quietfire | ECD
Thank You 2  Quietfire | ECD
Long Stem Rose  Quietfire | ECD
Gable Box  Quietfire | ECD
Months & Numbers Clear Stamps  Quietfire | ECD
Please Join Us Clear Stamps  Quietfire | ECD
Soft Finish Cardstock 110lb White
Soft Finish Cardstock 90lb White

Others:
Ranger Distress Inks: Bundled Sage, Worn Lipstick
Ranger Ink Blending Tool
Glue Dots - Micro and Mini


Save The Date

Sending this out will certainly alert everyone that there something really big happening!  How exciting!


For this wedding set, I used Soft Finish Cardstock in white, both 90lb and 110lb.  The heavier cardstock makes a great cardbase so make sure you use that!  Soft finish cardstock has a wonderful delicate pebbled surface that softens blended inks.  It's very classy!


All the stationery features ink blending using Distress Worn Lipstick and Bundled Sage.   They vary a bit with placement in these samples, but you can be consistent throughout the collection. Adhere the elements with Micro Glue Dots.


Last summer Kathy Jo did a gorgeous wedding set using these dies.  Here is her Save the Date.  I'll share a few of her samples here, so you can see how she has used the same dies, but with a different design theme.  You can find even more of her ideas using these dies here including the Mr and Mrs die set.


Kathy Jo used a stamping platform to stamp out the information on the inside of the card!  Please Join Us and Months and Numbers were used to create this with formal black stamp ink!

You're Invited

Here it is!  The card they've been waiting for!  Add all the details inside and don't forget to include an RSVP card!

You're Invited is made the same way as Save the Date, simply change the diecut to You're Invited!


In this version the flourish from the Flourished Frame has been added underneath and the elements are cut from foiled cardstock.  Gorgeous!


And in it's simplest form....


RSVP


Along with the invitation, you'll need an RSVP card.  Print the information on a separate paper and insert it with a couple of Glue Dots to the inside.  I've underlined the RSVP with the coordinating Long Stem Rose diecut.  So pretty!

Here is the variation.


Welcome


Once your guests have arrived, you might want to give them an Order of Service or Program.  Why not create a Welcome card!? 
This one is designed to unfold to all the information on the inside.  I've underlined the Welcome with the Long Stem Rose to coordinate with the RSVP.


Menu

After the ceremony, it's time to party!  If you're having a sit-down meal, you might like to include a menu at each place setting.  For these I've used the Menu diecut in two different ways.
The top one simply has the menu printed on a sheet of linen paper and then it is topped with the Menu diecut and Long Stem Rose, designed to continue the look of the RSVP and Welcome cards.


The second variation is a tent-fold card with Menu and Long Stem Rose on the front and the menu printed inside.


Favour Boxes

Give your guests a sweet memory of your special day with a tiny thank you gift box.  The Gable Box is a "fan favourite" for this job!


In this variation, I've used the little flourished rosebuds from the Rosebud Wreath and Elements die set.  These are some of the elements!

.....and the variation.


Thank You

After the happy day, it's time to send out Thank You cards.  Continue on with the elegant look of your stationery by using Thank You 2 inside the Rosebud Wreath.


....and the variation.


Love

And last but not least....  It never hurts to have a little Love card handy if you're giving a gift or.....
This one uses the flourished rosebuds from the Rosebud Wreath & Elements and the A Way With Words Love diecut.


Thanks for having a look today!  I hope it's inspired you!
Have fun and don't stop making awesome things.
Suzanne

Tuesday, December 18, 2018

Elizabeth Craft Designs December Designer Challenge


I'm excited to be sharing a post for the Elizabeth Craft Designs Designer Challenge for December.  This month the challenge is to use any of the Garden Notes - Frame It/Stitched Nested Dies.  There are four different die sets in this collection … squares; rectangles; ovals and circles.

You can join in the challenge for a chance to win a prize OVER ON THE ECD BLOG by answering the challenge question, Which of the Garden Notes - Frame It/Stitched die sets would you use on a project and how would you use it?


These dies are a wonderful addition to your collection as they leave the stitch marks on the piece the shape falls out of.  I thought it would be really fun to use them to make a shaker card.  

Cut a 6" square piece of 100# Soft Finish Cardstock.  Die cut the Frame-It Square and Heart Spray from the piece as shown.


Add adhesive around the square opening on the back of panel and attach a piece of clear plastic (transparency) over the opening.


Cut another piece of 100# Soft Finish cardstock to 3 3/4" square.  Stamp hearts (I used the heart created with all the little "love" words) across paper with Archival Ink.


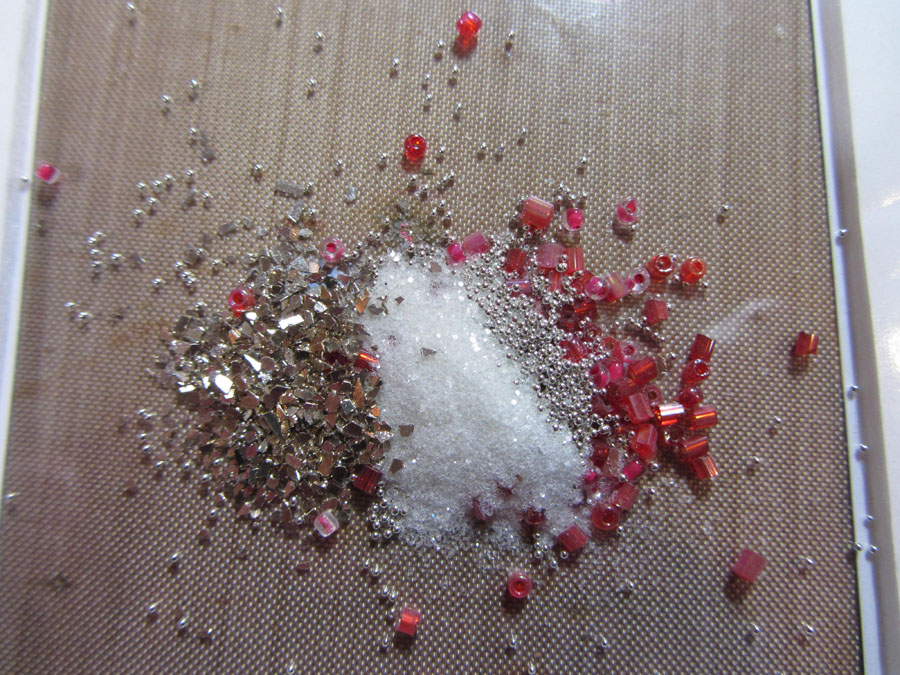
Back to the first panel.  On the back (the side you adhered the clear panel to) add foam tape all the way around the square opening.  You want the foam tape to match up at the corners and not leave any gaps so that nothing can fall out.  *I did take a picture of this but somehow that picture is damaged*  Add whatever you want on the inside of your shaker to this area.  I used some small beads, some holeless round beads, and chunky glitters.  Carefully remove the liners from the foam tape taking care that none of your pieces pop up and sticks to the tape.  Place the stamped square of cardstock over your shaker area, stamped side down so it will show through the window.


Add pieces of foam tape for support around the edges of the panel and in the Heart Spray area.


Cut a piece of red cardstock to attach over the back.  This will finish the back and show through the Heart Spray cut out area.  Back another piece of the same red cardstock with Clear Double Sided Adhesive and cut the word Love and the Hanging Heart element.


Stamp "Mine! You're all mine!" on a scrap of card, ink the edges and add a gold bow.


Die cut the Ladder Fern three times, ink and shape.  Die cut the pieces for Rose 2, ink, shape and assemble.


Ink the edges of the front panel.  Attach all elements as shown. 


I hope you've enjoyed this project.  If you have any questions, please don't hesitate to ask.

Hugs, Wanda


Supplies --

A Way With Words, Hearts & Pawprints - (QF or ECD)
A Way With Words, Love - (QF or ECD)
A Way With Words, Calligraphic Elements 3 - (QF or ECD)
Love & Hearts Collection Clear Stamp Set - (QF or ECD)
Garden Notes, Frame It/Stitched Squares - ECD
Garden Notes, Rose 2 - ECD
Garden Notes, Ladder Fern - ECD
Soft Finish Cardstock - 100 lb. - ECD
Clear Double Sided Adhesive - ECD

Cardstock - Red, Green
Gold Ribbon
Archival Ink - Ranger Ink
Distress Ink - Ranger Ink
Foam Tape
Clear Plastic or Transparency
Beads & Chunky Glitter


Thursday, November 15, 2018

Joy, Love, Peace, Merry Christmas word tree - What Is Christmas


Yogi here today with and Xmas word tree inspired by something I recently saw and that clicked in my brain... an Xmas word tree rubber stamp, so I thought I'd create one using Suzanne's word dies. BIG GRIN

I'm using an A Way With Words dies  "Flourished Circle - Joy, Love, Peace"; 4pce set, I used this love because I wanted something larger than what was in the flourished circle set... "Love" and  "Merry Christmas" from Elizabeth Craft Designs, also available on Quietfire Design HERE, HERE and HERE
I'm also using one of the newest quote and design element stamp sets from Quietfire Design  ("What Is Christmas..."2pce set)

 
I scored and folded my red textured cardstock to create the easel structure. Cut another piece same size as card and adhered to front.

Dry embossed white cardstock using Sizzix "Flowers" embossing folder. Trimmed down and adhered to front.

Die cut all the words using various cardstocks, red, DoCraft gold mirror, gold decorated Kraft, and a pretty tissue box cardstock. Adhered to front. Cut a small rectangle to mimic a tree trunk, inked with Distress browns and adhered to tree. Die cut the star from the gold mirror cardstock.


On the floor: Stamped the quote onto white cardstock using Verafine Black Onyx and clear embossed. Die cut with Elizabeth Craft Designs "Stitched Rectangles" die set. Adhered to floor with 3D foam tape to act as my stopper.

Stamped the flourished stars with Versafine "Toffee" and embossed with Queen's Gold embossing powder. Fussy cut around the image. Applied Quickie glue to the stars and sprinkled with gold micro fine glitter.


Monday, February 5, 2018

Masculine Valentines by Judi Kauffman for Quietfire Design


My husband has always scoffed at Valentine’s Day, declaring it a conspiracy between florists and candy makers, but since it’s one of my favorite holidays (I love chocolate!) he gives in and celebrates. Of course, this leaves me with two tasks: Making a special dinner and a special card.

Masculine Valentines can be tricky. The usual color combination often skews too far toward feminine. My solution: Start with Suzanne Cannon’s elegantly hand lettered word die – Love. Combine it with simple motifs – hearts and stars – and a quirky color combination. I chose speckled red cardstock for a weathered feel and mixed it with ivory, gray, and bright orange!


The cards are 5.5” and 6” top-fold squares. I used black ink to stamp a striped background, creating a wonky plaid when it’s turned crosswise. Good alternatives include crackle pattern or wood grain.


Monday, January 8, 2018

Together forever....


Hello everyone,
Welcome to the Quietfire Design blog.
With a new year begun it's time to start thinking about Valentine's Day cards.
Yvonne here sharing a "love themed"card, using one of my many most favorite Quietfire design stamps ;-)


Used materials:

  • Quietfire Design: Together forever #6390 (red rubber mounted stamp)
  • cardstock: white, pink, patterned
  • die-cuts, mulberry flowers, ribbon, rhinestones
  • paper trimmer, scissors
The card is really easy to make...it's all about simple layering.
First stamp the sentiment onto white cardstock and then position a die-template over it to choose the best place for the sentiment before die-cutting.
Use soft  colored cardstock for creating a romantic card.
Layer the die-cut using 3D foam squares for a 3D effect and finish the card with flowers, leaves, ribbon and some sparkling rhinestones.


Uhmmmm....while making my card and playing with my stamp I simply could not resist...
(p.s. it's temporary/just Archival ink!) ;-)


Well, I hope you got inspired to start making your own Valentine's Day cards.
Thanks for stopping by and
wishing you a happy, crafty day!

Hugs from Holland,


Tuesday, July 18, 2017

Christmas Love - ECD Designer Challenge


 This month’s Designer Challenge for the Elizabeth Craft Design Designers is to choose a technique from Els’ Technique Friday videos and use it in a project! I’ve chosen Coloring on Soft Finish Cardstock, a tutorial from over a year ago, but a timeless technique.  You may view Els' video tutorial HERE.

Soft Finish Cardstock has a pebbled surface that is just perfect for creating beautiful color blends.  I must give a nod to Anita Izendoorn who is the master of this technique!
I had a card all planned out and then realized this was going on the Quietfire Creations blog, so did a quick shift to a Christmas theme to match our Christmas in July weeks!

Here is what you will need to make this card!  It seems like a long list, but I'll be you already have a lot of it!


Supplies:
Baby love die set   Quietfire Site | ECD Site
Flourished Frame Stencil  Quietfire Site | ECD Site
Sprig with Berries   ECD Site
Soft Finish Cardstock   ECD Site 100lb White, Ladybug Red, Olive Twist
Gold Cardstock
Distress Stamp Pads in Barn Door, Crushed Olive, Peeled Paint
Beacon Kids Glue  ECD Site
Clear Double Sided Adhesive  ECD Site
Foam tape
Removable tape 

Instructions:


1.       Form a 7 x 5.5” tent-fold card base with red cardstock.  Cut a rectangular panel from white cardstock measuring about 7 x 6".
2.       Use removable tape to hold Flourished Frame stencil on white panel and sponge Crushed Olive ink through all parts of the stencil, but more lightly along the top edge.  Sponge Peeled Paint on only the bottom half of the stencil. Apply colour by first patting with the blending tool and then use small circular motions.  Be careful not to move the stencil while you're sponging! Remove the stencil and allow to dry.  Trim to 6.25 x 4.5” and mat with olive cardstock.
3.       Die cut Christmas (from Merry Christmas 2), Love (from Baby Love) and Sprig with Berries from white cardstock and gold cardstock.  Sponge Barn Door ink on love and berries.  Sponge Crushed Olive all over Christmas diecut, but less colour on the top half.
4.       Sponge Crushed Olive on only the bottom half of Christmas.  Designer Tip: By applying the colours this way it will appear as though the card is being lit from above.
5.       Adhere Christmas with rolled bits of Clear Double Sided tape as shown in photo.  Adhere Love with glue. Trim bits from the Sprig and adhere to card with berries.
6.       Layer panels onto the card base with foam tape.

I hope this has started your creative ideas flowing.  I just love the Soft Finish Cardstock - you should try it!
Happy creating, Suzanne


Related Posts Plugin for WordPress, Blogger...