Monday, November 4, 2013

To Give Thanks in Fall Colors!


Good morning!  Sherry here today with a quick and easy Thanksgiving card using the new set, To Give Thanks. 

ThanksgivingCard

The flowers are stenciled (with the top two trimmed out and popped up over the others). 

Using watercolor paper as my base, I stenciled the base flower in Rusty Hinge Distress Ink and then die cut/embossed the image with Spellbinders 5x7 Matting Basics A.  The other flowers were stenciled with Aged Mahogany and Mustard Seed and then trimmed out from the watercolor paper. 

ThanksgivingCardCLOSEup

Because I have a tendency to stamp my sentiments a little crooked, I decided to stamp “Happy Thanksgiving” on a separate sheet of paper and then die cut it out.  I used Spellbinders Small Ovals to die cut/emboss the sentiment, then punched a hole in opposite ends so I could run my ribbon through.  I found the ribbon in my stash jar, and I’m pretty sure it was dyed with Rusty Hinge, even though it looks a little too dark.  The edges of the background and the sentiment were sponged with Antique Linen while they were still in the dies, leaving that pretty white edge.

That’s all I have today.  Thanks for stopping by and joining me!


SHERRY SIGNATURE


Project Supplies:


Friday, November 1, 2013

TO GIVE THANKS - CARD

Hi Everyone! Holly here, with a technique card for thanksgiving.
 
I chose the Happy Thanksgiving stamp from the TO GIVE THANKS set.
This technique uses dollar store white glue and napkins. Begin by separating the layers of napkin and use only the top colour layer. Cut a piece of white cardstock to size. Mine is 1/8" smaller on all sides, than my basecard, which is 4" x 8".
Spread out a small puddle of glue, using a scrap piece of plastic from packaging. You want to spread the glue, thinly, from edge to edge, completely covering the cardstock. My card uses two pieces of napkin, so I covered each area with glue, as I was ready to apply the napkin.
Smooth down the napkin, tapping gently then pressing with your hands to smooth it out. Expect some wrinkles in the finished product. They add character, I'm told. Once dry, trim flush to the card stock, and sponge all around the edge, same as the scallop circle, which follows.
I stamped the sentiment, then die-cut around it using SPELLBINDERS NESTIBILITIES SCALLOP CIRCLES , then sponging edge with RANGER DISTRESS INK in Brushed Corduroy. The foliage from the pumpkin stamp was stamped on diagonal sides with Dried Marigold, as well as light sponging all around. I added dots of copper paint for accents.
I added a strip of card stock covered with a strip of burlap, over the seam of the two napkin pieces, then adhered the scallop circle with foam squares.
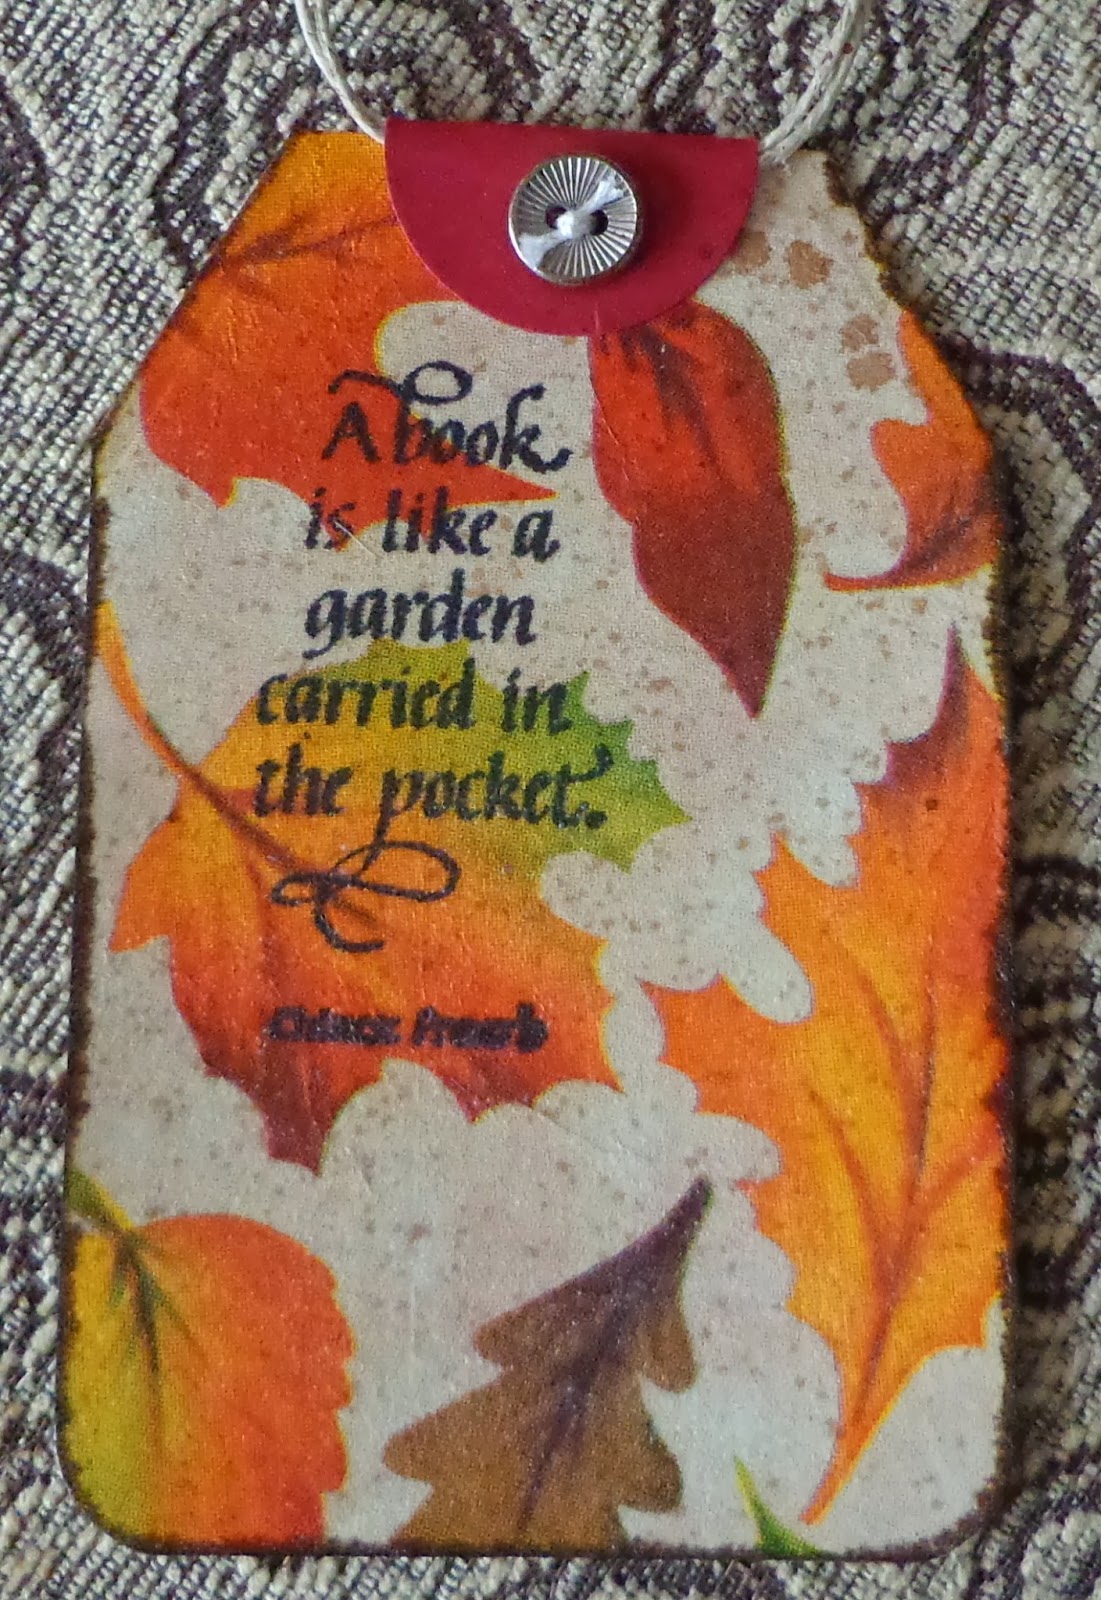
I used the same technique for the tag/bookmark, but a different napkin design.
The stamp is from NATURE QUOTEMARKS 
I really like how it works for the bookmark.
Instead of sponging, I pressed the tag/bookmark edges into the Walnut Ink distress ink pad. You can see how it bled into the napkin a bit. I think it adds to the feel of fall leaves.
 
 
There are other techniques out there using napkins on your card stock, this is but one. I have also tried it using the patterned tissue and it works well. Just pat it all gently and once it sticks, press flat, expecting to have character wrinkles.
 
Have fun with this and have a wonderful Thanksgiving- everyday!
Thanks for stopping by.


Wednesday, October 30, 2013

Special Family Card today...

Hi Everyone it's Teresa here today to share
a special card I did with a really pretty family stamp
by Quietfire Design # 5572 that you could make to send out
or even create something special and put it up in a frame somewhere.


I have someone special in mind to send this to and since
it is Breast Cancer Awareness Month I think that the last
line is a good one to remember how a crisis in a family
can make you so much stronger.  No matter what it is-- it
is easier to get through it knowing you have family by your side.


For my card I used papers from Prima's Nature Garden
6x6 paper pad and used Spellbinders Lacey Circles
to stamp the Quietfire sentiment in black ink.  I also cut two smaller
circles to add on either side.  To make the border at the top
and bottom of the card I cut and embossed it with a fun
die called Curved Borders Two.  The flowers are from Prima
and I added some tiny sprigs in the sides using the Die D-lites
Sprigs die in matching paper just to give it more of a garden 
feel.  To finish it I added a few rhinestones around the 
outside edge just to give it a little more sparkle.  

Thanks for stopping over to see my card and I hope
I inspired you to create something gorgeous for
a very special family member that you have.

Monday, October 28, 2013

Friends Are Those Rare People


Good Morning!  Debbie with you this today to share a care in honor of Breast Cancer Month.  It's always hard to find the right words to say to a friend who has gone through or going through treatment for this awful disease.  What do you say???   It's not an easy journey.  I have been surrounded by Breast Cancer.  My Mother is a Survivor of 5 years.  My best friend of 35 years passed away within 6 months of being diagnosed. I had an aunt pass away years ago, when they had no treatments at all....she was only 46.  It's simply one of those things that you just never know who will be next.  I created this card to give to a friend, it can be used for any occasion but I thought I'd do it in pink in honor of all Breast Cancer Survivors.


I used this beautiful stamp by Quietfire Design, you can find it in the store here.

Thanks for stopping by the Quietfire Creations blog today!

Debbie


Friday, October 25, 2013

CAS - Perfect Pearls - Xmas Cards

hi there, Yogi here today with a couple CAS cards for Xmas...

PS the card below shows the Perfect Pearls background to better advantage...

Both cards start of with a side folded 5.5" x 4.25" white cardstock. I taped off a 1/2" border all around (ps if you're doing multiples, just make yourself a stencil for the border from thin cardstock or clear plastic).
Stamped the Textured Holiday Word stamp repeatedly using Versamark (can use Perfect Medium or Distress Emboss pad as well). While the ink was wet, dusted on Perfect Pearls (Perfect Gold, Rust, Forever Green). Wiped off the excess with a dry paper towel. Removed my tape and drew a border around my stamping. Red Zig marker on one and a Faber Castell Artist Pen "Copper " for the other.

On the first card I stamped the tree/deer image (Memory Box) with Versafine Black Onyx.

On the card at right I stamped the Holly leaf flourish with Versafine "Spanish Moss" and embossed with "Queen's Gold" and some "Olive Leaf" embossing powder.

To create the raised leaves, I stamped them again in black, scanned them, and cut with my electronic cutter, then applied some of the Moss and embossed with the same powders. (PS if you don't have an electronic cutter, you could just hand cut them.

I adhered them to the card so the leaves were raised, (see detail pic below) and added a large red rhinestone.

The sentiment was stamped with the Black and clear embossed.

Hope you give it a try if you're looking for something quick and easy. The Perfect Pearls give such a nice background.

Thursday, October 24, 2013

What's Not to Like? Halloween Card


And now for a change of pace from a lady who really knows how to have fun!


Judi Kauffman shared a Halloween card that combines the Quietfire Design stamp with her quote on it and two vintage stamps from her collection (candy corn = Rubber Stamps of America, pumpkin lady = Rubbermoon). She mixed in a glittery foam pumpkin, pumpkin and ghost brads, and glittered crow stickers. Her theory: Halloween is not a time for minimalism! Make substitutions to create your own version, using any other stamps, stickers, and embellishments that coordinate with the quote. Hand cut a simple pumpkin from glittered or plain old orange cardstock.

Thanks Judi!  You always make me smile at Halloween!

Wednesday, October 23, 2013

May You Have the Gladness - Martine Smith

Here is the second creation by our guest designer Martine Smith!  You may see the first project here.


Martine made a circle, cut up the Branching Out Spellbinders die set (as she did in her first project for us) and added some leaves and berries to form a wreath.  She then added a bow with a poinsettia .

She stamped the image and put the wreath over the stamp.
 
The berries and leaves are from her personal stash.  The Poinsettia and Crochet Corner are from Memory Box. 
Some of the other items are shown below in the thumbnail links.  For more directions, we'll just have to all go visit Martine!  In the meantime you may find her on her blog here!

Thanks for sharing your beautiful work Martine!  We really love your creations!


Monday, October 21, 2013

To Give Thanks!


Good morning!  Sherry here today and I have a quick and easy card to share using the new set To Give Thanks.

ThanksgivingCard

I had the idea for the image before I started anything else with the card.  The background pumpkin was stamped in VersaMark, sprinkled with copper embossing powder and then the embossing powder was rubbed off.  (I actually came up with rubbing the embossing powder off after a few trial and errors while trying to get this image to work.)  The pumpkin and leaves were water colored with markers and the excess water was dabbed off to create a softer look.  “Happy Thanksgiving” was then stamped over the image and embossed in copper.  The sentiment was then die cut/embossed with Spellbinders Small Ovals and while still in the die, was sponged with Antique Linen.  Coordinating paper was die cut/embossed with the Large and Scalloped Ovals.

ThanksgivingCardSentiment

I pulled out some old KaiserCraft paper from my stash that I thought would go with Thanksgiving and used it for the card.  The edges were distress and then inked with Antique Linen Distress Ink.  The ribbon was dyed with Bundled Sage Distress Stain.  The bottom border for the card was die cut with Spellbinders Scalloped Borders Two.

ThanksgivingCardAngle

That’s all for me today!  Thanks for joining me.

SHERRY SIGNATURE

Project Supplies:


Friday, October 18, 2013

THANK YOU-CARD


Hi Everyone! This is Holly with a sweet and simple Thank You card.
I began by selecting four print papers from PRIMA-Melody  6x6 Paper Pad, and one matching plain paper for the base layer. Once I decided on the order of the papers, I cut 4 at 1 1/4", 4 at 1 1/2" and 4 at 1 3/4". The finished card is 4 1/4" x 5 1/2". Two opposite corners on each piece were rounded with a corner rounder punch.
 
The base piece was adhered to the card base, then all the pieces were sponged around the edges using ARCHIVAL INK  in sepia colour. I applied a foam tape square to one tip and adhesive to the other. The foam tips were all placed to the outside and the adhesive tips were pressed down flat in the center of the layout.
 
The THANKS stamp was inked with ARCHIVAL INK  in jet black. I added some flat-back black beads from my stash, to finish the card. I didn't time it, but it was a nice, quick card. The longest time was spent choosing the paper because so many beautiful choices are available.
 
Thanks for looking today!


Wednesday, October 16, 2013

To Give Thanks Card

Hello Everyone, Terre Fry here with a card from one of my favorite season's....FALL! There are so many things in my life that I am thankful for and I just love this sentiment from Quietfire Design new release "To Give Thanks".

For this card I used a few of my favorites, Spellbinders Diamond Effects Card Creator die template, Botanical Swirls and Accents die template, Want2Scraps Swirls Finesse Brown Rhinestones, Tsukineko Memento Tuxedo Black ink, Beacon Adhesives Zip Dry and Copic Markers.

Isn't that sentiment just great? I just love creating with Quietfire Design sentiment, they just say it all.

 
Thank you for stopping by my blog post today, I hope you all find inspiration and remember to visit the blog daily for even more inspiration. Crafty Smiles, Terre
Related Posts Plugin for WordPress, Blogger...