Friday, November 29, 2013

Time to start trimming the tree

Hi Everyone it's Teresa here today and I am sure you all
are out shopping but when it's time to settle down for a 
rest maybe you can create some cute snowflake ornaments
for your tree or as gifts.  Today I created a simple round
ornament made with chipboard and paper and used a
really cute stamp Snowflakes are Kisses from Heaven #6248 that is perfect for Snowflake anythings.

 This was a super quick ornament that you can do lots 
of to fill your tree using red, tan and white papers and
layering the Spellbinders 2013 Heirloom Ornaments,
S5-185 2013 Snowflake Pendant,  Create a Flake
Five die and one of my old favorites Lacey Ovals.
  I added some superfine glitter to them and
just a few rhinestones to make it glisten just a little more.  


Here is a photo of the stamp and I used Momento Luxe
ink from Tsukineko in Rhubarb Stalk with clear embossing
powder to match the paper.


Thanks for stopping over and I hope you get a chance
to make a few special ornaments for your tree this year.
We have lots of Christmas stamps that are perfect
to make any tree a little more festive!


Wednesday, November 27, 2013

Holiday Wishes

Hello everyone!  Debbie here today with my last post for the Quietfire Design Team!  I cannot tell you how much I have enjoyed my time here! Quietfire stamps are among my favorite. I have so much trouble finding words for my cards and Quietfire  makes that so much easier for me.

Today I want to share my last card as a team member.  I used non-traditional colors for this card and you can find the stamp here.

 
I want to wish you all a Happy Holiday Season and  a Prosperous New Year!

Thanks you Suzanne and the Quietfire Team!!

Debbie

Monday, November 25, 2013

Easel Ho Ho Ho - I'm Telling You

Yogi here & it's my turn on the Quietfire Creations Blog today. My past couple cards have been quick and easy/CAS type cards. Today I decided to get a bit more involved and make a scene... Even though it's more involved, it's not hard to do. BIG GRIN.

Suzanne came out with one of the newest e-cut files Ho Ho Ho, which was the prompt for this card.

I scored and folded my white cardstock to create the easel 7"w x 5"h card closed. The top portion was scored in half at the 2.5" point to create the easel front..

Dry embossed the front with Cuttlebug "Swiss Dots" embossing folder, then added narrow embossing using Sizzix "Snowflakes" & "Holly Branch"


Electronically cut the "Ho Ho Ho" from white cardstock and also cut a shadow of the words.

Applied Versamark on the top layer and Stamp n Bond, heat activated and sprinkled with Distress "Star Dust" glitter. Pressed the glitter into the glue and re heated to ensure bonding.

Applied Versamark on the under layer and sprinkled with Pearlescent embossing powder on the snowflake area and Old Island Red Tinsel embossing powder on the rest. Adhered both elements together using Golden's Soft Gel Medium. (ps place some release backing on words and then under some weight to ensure good adhesion).

Creating the fireplace scene: emboss the floor of card using Sizzix "Bricked" embossing folder. Sponge lightly with Distress "Vintage Photo", "Pumice Stone" and then a touch of a dirty red sponge.

Stamp the quote "I'm Telling You" on black cardstock, using Versamark and white embossing powder. Cut out in the shape of a fireplace opening. (PS I used an oval punch to aid in cutting the top area). Adhere to card floor.

Cut a thin rectangle to use for the mantle. Sponge some brown and adhere to edge of front.

Stamp a holly branch (Sheena Douglas "Holly Branch") using Versafine "Black Onyx" then fussy cut around the image or use an electronic cutter. Color with Distress markers and a waterbrush. Trim of excess leaves if necessary and adhere to mantle.


Adhere the Ho Ho Ho words to the edge of the front fold, making sure it's not adhered above the fold...

Punch out some pine sprigs from green decorative paper and adhere here & there under the holly leaves.

Stamp the "Love & Laughter" quote with the black and clear emboss. Die cut with Spellbinders "Floral Oval" die set. Sponge with a dirty red sponge around the edges. Score between the words love & laughter and fold, then adhere the bottom portion to card floor. This will act as the stopper for the front.

Hope you give making a scene a try. Most of the elements can be interchanged with what you have. Enjoy.

Click on any image to enlarge.

Friday, November 22, 2013

Christmas is the Day - Stamping & Digital Cutting


Happy Friday!!  
Wendy Jordan, guest designer, checking in again today with another fabulous Holiday Card made with a Quietfire Design's Christmas is the Day set.


I love Suzanne's designs from the Silhouette America store.  I think by now, I own them all!!!
The Christmas Tree Calligraphic image available at the Silhouette America Store is also an image from the Christmas is the Day set of nine stamps.


I used a dark card stock and I will explain why in a moment.
The settings I used on the machine were for plain card stock


  • Speed 3
  • Thickness 33
  • Blade 3


With a bit of spray adhesive on the back I placed my die cuts where I wanted them on my card stock.  I them colored the entire sheet with my Copic Air Brush system.  I used an array of greens until I achieved my desired color.


Desired color and airbrushing complete.


To finish the card panel I stamped both sizes of trees from the Christmas is the Day set in between my masked trees.  The Merry Christmas is also from the same set.  I stamped and heat embossed on vellum and added a bit of brown ink to the vellum.


The reason I like to use dark card stock as masks is that I can add color over the top, as in this case. I cut black Christmas trees, was able to air brush over the entire top of them with multiple shades of green and I am still able to use them as black trees on a different card.  The sentiment is another from Quietfire Design, Hold on to the Spirit of Christmas.

Thank you for joining me today!!  I hope you enjoyed this post!!
Happy Stamping and cutting!!

Wednesday, November 20, 2013

Snowflakes are the Fairy Dust of Winter!


Good morning!  Sherry here with you today and I’ve used one of my favorite Quietfire sentiments, Snowflakes are the Fairy Dust of Winter, along with some of my favorite snowflakes on a card today. 

SnowflakeCard

The base of the card was made with watercolor paper, that was die cut/embossed with the largest die from Spellbinders 5x7 Matting Basics B.  A second layer was die cut/embossed with the largest die from Matting Basics A.  The designer paper (old Christmas from MME) was die cut/embossed using Matting Basics B.  A border was die cut/embossed with A2 Bracket Borders One. 

The sentiment was stamped with VersaMark and embossed with Queen’s Gold Embossing Powder.  It was then die cut/embossed with Labels Four.  A background layer was die cut/embossed with Grand Labels Four.

SnowFlakeCard CloseUP

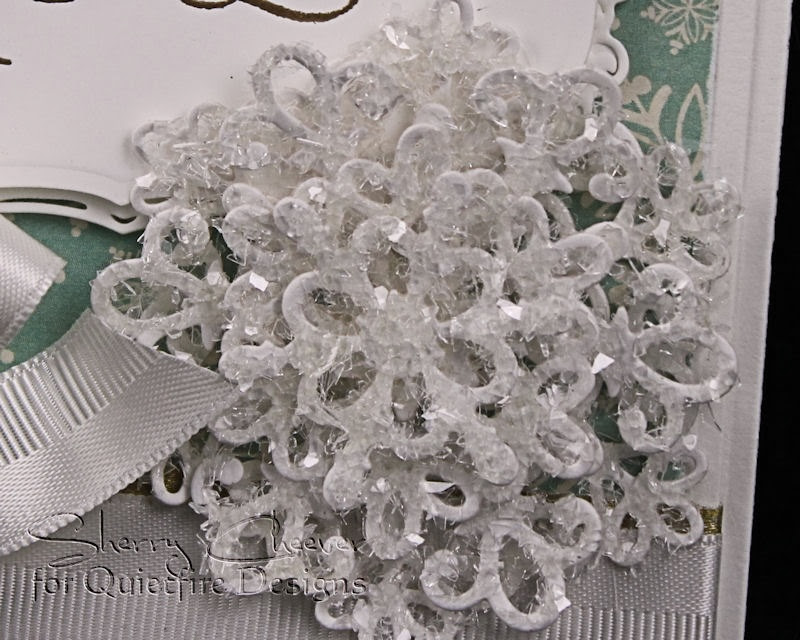
The snowflakes were die cut/embossed from mixed media paper, covered with Glossy Accents and then sprinkled with vintage glass glitter.

SnowFlakeCard CloseUP Snowflake

I added some white May Arts Ribbon on the front, over a base ribbon of gold.

SnowflakeCard2

That’s all for me today except to say thanks for stopping by and joining me!

SHERRY SIGNATURE

Project Supplies:


Monday, November 18, 2013

CHRISTMAS IS THE DAY, & OTHERS- ONE SHEET WONDER 16 CARD STASH BUILDER

Hi Everyone! This is Holly, and I'm hoping that today I can show you a fun way to build up your Christmas card inventory. Sixteen different cards, all simple, and you can bling them up way more than I have. Keep them simple for mailing, or go over the top and hand deliver. Or create a box :)
The first photo shows the cards created, and a bonus tag from the leftovers.
Let me show you how.
 
On a 12x12 sheet of white cardstock, I randomly stamped the following:
From the Christmas Cuddlers stamp set, I chose the JOY stamp and used it with Fired Brick Distress Ink. From the Christmas Is the Day set, I used the two trees with Peeled Paint and Shabby Shutters Distress Inks. Forest Moss Distress Ink was used with the holly stamp from the Deck the Halls stamp set. The snowflakes were inked with Stormy Sky Distress Ink.
Once the stamping was done, it was time to add some sparkle-always fun! You can add glue and glitter, emboss with metallic or sparkly embossing powder, doodle with glittery gel pens, add flat-backed rhinestones...whatever you want.
 
This is the 'designer' paper I created.
 
This is how I cut it up.

These are the measurements of my pieces. You can cut up your designer sheet the same, or do your own thing. The idea is to make up a lot of card elements. You can always trim a piece, as you go, if you need to.
I folded 16, 81/2" x 51/2" pieces of white card stock for the card bases, and added some coloured cardstock to match the inks as closely as possible. I dry embossed lots of the coloured card stock pieces with Spellbinders M-Bossibilities  folders.

The Merry Christmas stamp is from Christmas Is the Day set and stamped with Jet Black Archival Ink.


The Believe stamp is from Textured Holiday Words and stamped using the same black ink.


I kept these cards very simple to show you how easily this One Sheet Wonder design helps you create a stash of different cards. Lots of them can be mailed "as is" and others can be blinged up.
I've used traditional Christmas colours here but anything you want, goes. How about monochromatic? How about no images, just words? Stamp onto ready-made designer paper.
You can find it all at Quietfire Design, and create a nice supply of cards in a very short time.
What I've shown you today, could be done in a couple evenings.
 
I hope you try this and create a great batch of cards, in plenty of time for mailing.
Thank you for looking today!

Friday, November 15, 2013

Christmas is the Day Ornament

Hello Everyone, Terre here with another holiday ornament using Quietfire Design stamps. I like creating handmade ornaments to give to special friends and neighbors for the holidays. My oldest daughter Dominica and my youngest daughter Leahandra like to make homemade cookies and other yummy snack and we wrap them all up in a pretty package and top them off with these adorable handmade ornaments. What a lovely gift to go along with the yummy treats.

For this holiday ornament I used Christmas Is The Day stamp from Quietfire Design, they have the most amazing stamps, I know I keep saying that but it is so true!

I took assorted red and white buttons glued them on to a scrap piece of white cardstock and cereal box chipboard using Beacon Adhesives Zip Dry. I brushed the buttons with the Zip Dry and sprinkled a little glass glitter to make them glisten. Stamped my sentiment using Tsukinenko Tuxedo Black ink and embellished with some vintage trinkets. So I hope I have inspired you to create some of these cute and adorable ornaments. Remember to like us on Facebook and stop back by the blog for more inspiration from the other design team members. Crafty Smiles, Terre

Wednesday, November 13, 2013

Happy Thanksgiving

Hi Everyone it's Teresa here today and I was just thinking
that the holidays will soon be here and it's a good time
to start making some special cards to send out to family
and friends for Thanksgiving so today I have a pretty
card to share with the new Thanksgiving stamp set
just released called "To Give Thanks" #6386.


I wanted to do something with the pretty fall colors we see now and saw 
this paper pad by Kaisercraft that had just that but just a touch of
rose and teal.  I used the Spellbinders Majestic Labels Twenty Five
to create the layered back round but I wanted to make the beautiful
saying stand out a little more so I stamped it in dark brown ink
to match and cut/embossed it with the Classic Scalloped Ovals
die.  And I inked around the inside just a little bit with Tim Holtz
Tea Dye Distress ink and a dauber to make it pop out even more.
 The flowers are from Prima and I added a little
jute in it just to give it a little more country feel.  


It was super easy and quick to make and would be perfect to send
out to the special people in your life that you are thankful for!


Here is the stamp set.  It has lots of gorgeous pieces that you can
use to create some very special cards to send out....

Thanks for stopping by today for a little bit of Quietfire Design
stamping inspiration and don't forget to leave a comment
letting us know how you like the new set...

Monday, November 11, 2013

Gratitude Journals - To Give Thanks

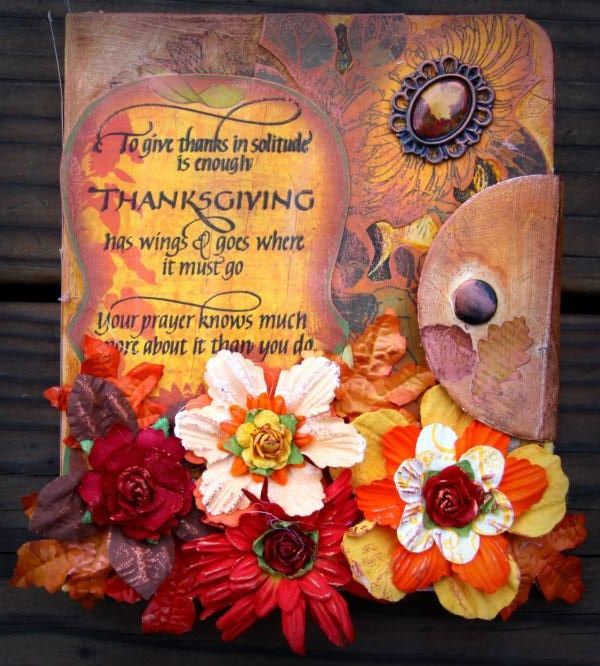
Good morning!  Debbie here today with a project that reminds me everyday is a gift.  I like Gratitude Journals to write it down....sometimes when you write it down you are easily reminded of all the great things in life. Taking life and the people in it for granted is easy to do.  Forgetting to be thankful is easy.  This little journal makes it easier to remember.


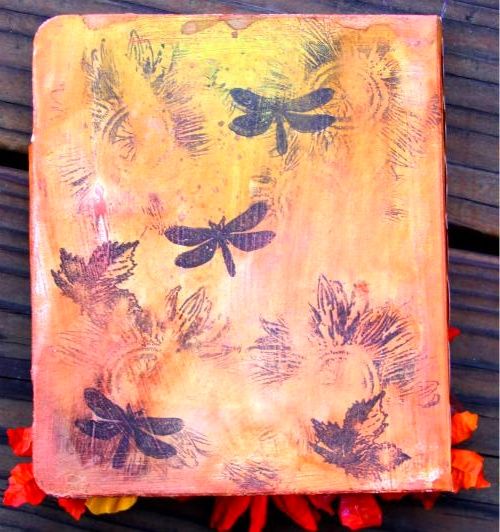
Back of the Journal.


The stamp is by Quietfire Design and is called To Give Thanks.


To Give Thanks - Set of 4 Stamps


It's a beautiful sentiment and perfect for your holiday cards and journals. I will leave this on my dining table so that my guests can write in it if they choose.

Thanks for stopping by the Quietfire Designs Blog today!

Debbie


Friday, November 8, 2013

Season's Greetings & Joy Cards


Yogi here today with some easy Christmas Ornament cards...

The balls were made first by stamping a background stamp (Penny Black "Crystal Patterns") using Distress "Dusty Concord" all over the stamp, misting the stamp with water and stamping on to a piece of white cardstock, leaving the stamp in place to activate the moisture with the ink. Stamp removed and cardstock set aside to dry. Rubbed a Versamark pad all over and sponged Pan Pastels Metallics gold (hard to see in the pic but it adds a nice color layer), die cut the balls in 3 sizes using a Spellbinders circle die set.

Cut a rectangle strip, inked with Versafine Toffee and embossed with Queen's Gold, then cut off pieces for the hangers. Adhered the balls in place without gluing the hanger sections. That way I was able to glue the strings and hide the ends under the hangers.

I side folded my white card (4.25"w x 5.5"h) and adhered a piece of Ruche white cardstock, leaving about  1/4" border all around.

Electronically cut the word "Joy" from white cardstock, inked with the toffee while still on the mat, removed it from the mat and embossed with the "Queen's Gold". Adhered to card.

Final touch on the the 1st card was to add dots of Viva Silver Glitter Pen.


On the 2nd card, embossed the center portion of the card front using a diffuser and a Craft Concepts "Merry Christmas" embossing folder. Lightly sponged some Distress red using a dirty sponge.

The balls made the same way as above using "Festive Berry", and silver embossing powder for the hangers.

The word joy was embossed with Stamp n Bond, and Glitter Ritz micro fine glitter applied (some Ruby Red & Star Dust). The word was layered on to a shadow e-cut sponged with Distress Black Soot.

Final touch used a Quickie glue pen and more Ritz silver glitter for the dots.

Both cards have stamping on the inside of the card. I used an ornament border stamp (Lili of the Valley "Christmas Baubles") using the toffee and embossing with the gold (1st card) or the silver (2nd card).


The sentiment was stamped with Versafine "Black Onyx"

Click on any image to enlarge. Enjoy.

Wednesday, November 6, 2013

Snowflakes Spray and Christmas is the Day Card

Wendy Jordan here from Paper Therapy so thrilled to be able to guest design for Quietfire Design this month!!!
 I am the owner of  Designed By You, an embroidery and personalizing gift shop.  I also love creating with stamps, stencils, markers and pretty much anything else I can get my hands on.  I am currently a designer for Dreamweaver Stencils and have had the honor to design for Stampendous and Skipping Stones Designs.

Quietfire Design has beautiful calligraphy word art stamps as well as GREAT cutting files and Silhouette America Cut files.

I started my project with the Snowflake Spray Card cut file that can be found in the Silhouette America Online store.

The file is designed to cut a spray of snowflakes and the card base with a perforation for folding in one cut.  In my Silhouette software I had to do a few modifications to make the mask I was looking for to achieve my background.  Here are the steps I made…

  •  Ungrouped the image and removed the cut for the card base and the perforation
  •  I duplicated the image, flipped it vertically AND horizontally.  In the below photo, I also added a gray background so you could see what the cut file will look like on your screen. 
My end result  is a mask, so it is important the cut is exactly how I want to place it on my card base.


For this project, I cut removable clear Contact Paper.


I cut a piece that would be fitting to the size of my project, placed it on the Silhouette cutting mat, with the paper protective backing down.   The contact material was face up on the mat.   My settings for cutting this type of material are:

  1. Speed #1
  2. Thickness #9
  3. Blade #2


With the above settings, I achieved a great cut, that didn't cut through the protective paper backing.  

Once the design is cut, remove all of the extra pieces that are unneeded while the paper protective backing is still attached to the Contact Paper.  In this case, I removed all of the cut snowflakes, because I will be applying ink to those areas.  In the photo below is what the mask lookes like after I have removed all the extra snowflakes and removing the paper backing, but before applying it to my card stock.


You will now understand why it is important to be using removable Contact Paper.  Place your mask, sticky side down onto your card stock and trim around the edge of your card stock.  You will want to trim, so ink isn't applied where it isn't wanted.  Apply your ink, chalk, paint or the medium desired to the snowflake area.   Due to the sticky nature of the Contact Paper, you will see that ink is only where the snowflakes will be.  The mask isn't shifting, making unclear images.  Once the desired color and coverage has been achieved remove your contact paper.


THE PERFECT BACKGROUND!!!  I LOVE IT!!!


I was lucky enough to stamp two gorgeous images from a Quietfire Design new release, Christmas Is The Day, a great set of 9 stamps.  

The sentiment was stamped with embossing ink and heat embossed with Detail White EP from Stampendous, my fav!!!

The Flourished Holly Circle was stamped with Memento Rich Cocoa and I used Copic Sketch Markers to color the holly leaves.  (Copic Sketch G40, G43, G46).  The Flourished Holly Circle is accented with Spellbinders Parisian Motifs die cut.


The background, the decorative circle and sentiment were given an extra element of shimmer with Dreamweaver Stencils Iridescent Memory Mist.  The is the best shimmer spray in the market.  


Thanks for taking  peek at my Quietfire Design creation today!!  
See you in a few days for another fun design!!


Related Posts Plugin for WordPress, Blogger...