Wednesday, July 30, 2014

Personalize Your Patterned Paper - Thank You Card

Hello, Jutta here with a colourful thank you card project today!
For my card sentiment I chose to use the wonderful Quietfire Design large thanks! 
I think those tiny hearts on the beautiful letters are just too sweet!


Front view of card showing the coloured flowers, leaves and
blue background made by daubing over onion bag mesh.

Back of card showing the original patterned cardstock.

Close up to show the die cut layers, Rhinestones and glitter.

Supply List:

Stamps - Quietfire Design -Thank you - set of four
Cardstock / Paper -(Base) Kanban Patterned Cardstock - Shabby Chic Floral B&W, White Cardstock, Vellum
Ink / Marker - Staz On Jet Black, Distress Ink -Peacock Feathers, Distress Markers -Peeled Paint, Spiced Marmalade, Mustard Seed & Barn Door

Dies -Spellbinders Card Creator - Mystical Embrace 5x7
Ribbon - Olive
Glitter Pen - Wink of Stella
Embossing Powder - Silver
Misc. - Double Sided Tape, Rhinestones, Sponge Daubers, Onion mesh for stenciling.

Thanks for joining me today, happy creating!
Jutta

Tuesday, July 29, 2014

Tuesday Winsday - Kaisercraft Chanteuse

This is an excerpt from small article I wrote for the newsletter recently and rather than let it slip away, I thought I'd share it here and combine it with the Tuesday Winsday!

I simply adore scrapbook papers.  The designers who create them have a gene I must be missing, so I'm happy they do it for me!

Usually the collection is themed in some way and includes appropriate images.  To me the best part is the colour themes and combinations.  From one 6x6" pad you will have at least two colour pathways available, often more.  Usually there are tags or specialty pages included in a pad.  Calligraphers can even letter on a lot of the papers with pen and ink.

Recently Kathy Jo shared a gorgeous set of cards all done using the Kaisercraft Chanteuse papers.


Click HERE to go to the blog post and see the details of these beautiful cards and you'll appreciate the variety Kathy Jo acheived all from one pad of paper! 


So if you want quick coordination for your cards, don't ever rule out designer papers. 
You can find them
here on the Quietfire site.


This week's Tuesday Winsday is the Chanteuse 6 1/2" Paper pad which you my find here on the website.
And here is your "entry form"!  Good luck!

a Rafflecopter giveaway

Monday, July 28, 2014

Happy Birthday to You...

Hi Everyone it's Teresa here today on this wonderful Monday
to share a birthday card i did you with the Happy Birthday Plain and Simple
set and a few Spellbinders dies that i had in my stash....


The Spellbinders dies that i used are called Lucious Labels One
and Fancy Tags Three. To make the frame i just put the smaller die
in the center when i cut/embossed it and then popped it up with tiny
3D Foam dots to make it stand out a little more.  The ribbon is Bias
ribbon in black and i added tiny pearls and roses to give it a more
vintage garden look.  I hope you like it :)


Thanks for stopping over and don't forget to stop back in for Tuesday/Winsday!!

Friday, July 25, 2014

Sassy Shaped "Sit by Me" card

Happy Friday!  Kathy Jo here to share a sassy shaped card using Quietfire's Sit by Me stamp.  The stamp is great to use for making cards for your girlfriends.  I wanted to make this card girly and sassy to capture those moments with our friends when we are just talking and having a grand time.

The card front is layered as follows from the bottom up: Spellbinders Reflective Moment in black, pink card stock cut to size, Spellbinders Tranquil Moments in felt leopard, Spellbinders Floral Flourishes in faux black leather paper and the smallest die from Spellbinders Tranquil Moments.  
The beginning of the quote "If you can't say something good about someone" fits perfectly on the Tranquil Moments die.  Black pearls were adhered on either end.  The frilly rosette is a strand of feather ribbon formed into a circle and glued.  A ribbon rose was adhered on top and a pearl pin was stuck through the assembly.
The card is a tent fold but the back of the card is black card stock cut to 10 3/8 x 3 1/4 and folded at 4 7/8.

The inside is more of the leopard paper...
...and Tranquil Moments in pink. "Sit Right Here By Me" was stamped and die cut using the same Tranquil Moments die and then cut as shown.
So, what do you think?  Is this card full of sass or what?  It was so enjoyable to make!
The stamp used is part of the Garden Bench Collection stamp set which contains all of these beautiful stamps:
Garden Bench Collection - Set of 4 Stamps

Hope you enjoyed the card! Thanks so much for stopping by and have a wonderful weekend!
Hugs,
Kathy Jo  

Wednesday, July 23, 2014

Iridescent Accents - Papillon Bonne Fete

Yogi here today... I had a play morning with my friend a couple days ago... She brought me a big pile of Somerset Studio magazines that a friend of her's gave her... She said pick a mag and pic a page to try. So I closed my eyes and came up with Mar/Apr 2002 page 50 - an add for Dr Martin's Iridescent Accents which I didn't own but looked like Perfect Pearls...

I side folded my cream tone cardstock (5"w x 7"h)

Stamped the butterflies onto black cardstock using Versamark (Perfect Medium also works). Using the fluffy brush that comes with Perfect Pearls, I pounced on some pink and some green, then swirled it to blend. Wiped off the excess with a tissue.

Stamped the butterflies again onto some thin cardstock with black ink and fussy cut around them to create masks.

Placed the masks over the butterflies on the black cardstock and stamped the background stamp (Just Rite) using the Versamark. Pounced gold Perfect Pearls all over and wiped excess off. Pity you can't see the shimmer...

Used an anti static powder, then stamped the "Papillon" and "Butterfly" words using the Versamark and embossing with white embossing powder.

Trimmed the piece down and layered on to a gold ribbed textured cardstock, then onto my card front.

Stamped the "Bonne Fete" with Versafine "Toffee" and embossed with Queen's Gold embossing powder, then shadowed the letters with a fine tipped Micron pen.

Did a ruched effect with some Sari ribbon. Finally touch added some square amber rhinestones.

Hope you give the technique a try. Enjoy.

Tuesday, July 22, 2014

Tuesday Winsday - Glue Dots and Dispenser!

You know how much I love Glue Dots.


They are listed on virtually every supply list for every project I make. They are *the best* for adhering my digitally cut words to my projects.
 

 If you follow me on Twitter, you might recall how thrilled I was when Glue Dots responded to one of my Tweets!  Amazingly, I was fortunate enough to meet the person at the end of that tweet when I was at the Craft and Hobby Association show in January.  Her name is Elizabeth.  Too sweet!


Now, even better for you, Elizabeth and Glue Dots are giving away the new Glue Dots Dispenser and some refills to the lucky winner of this week's giveaway!


About the new Glue Dots Dispenser:

Pre-loaded with 300 Mini Glue Dots®, the new Desktop Dispenser is designed to keep the adhesive roll wound tightly, preventing it from unraveling if dropped and protects it from being crushed if stored in a bag, tote or drawer.

I love my dispenser!  It sits front and center on my new worktable!  I'm leading the movement to have the dispensers made in other colours so I can have my Minis, Micros, and Removables colour coded!!  {I just bought some of the Permanent GlueDots today and I'm dying to try them!}


Many thanks to GlueDots for sponsoring this week's givaway! You can find their blog
here.  
Find them on Facebook here and on Twitter here.
Pop on over to their Facebook page and thank them for their giveaway at Quietfire!
Good Luck!

This week you have loads of opportunities to enter!  If you already subscribe to our newsletter and follow us on Twitter and Facebook, you're well on your way to winning!

You can Glue Dots on the Quietfire site here.

a Rafflecopter giveaway

Monday, July 21, 2014

Come Sit By Me on the Garden Bench!

Good morning!  Sherry here today and I have a 5.5 square card to share with you.  When I first got the idea for this card, I was actually thinking about one of my favorite movies . . . Steel Magnolias . . . and all the great one-liners.  One of my favorites is, of course, “if you can’t say anything nice, come sit by me.”  Quietfire has a similar quote in the Garden Bench Collection, “If you can’t say something good about someone, Sit right here by me.”   I also remembered that I had in my Spellbinders’ stash the Shapeabilities Garden Bench.

JulySitByMe

I’m sure the first thing you’ll notice is that I did not use the entire quote for the card.  I went with the shorter version, Come Sit by Me, thinking to myself that if I did it this way, I could use the inside of the card for a personal note . . . whether it be funny or lending a shoulder to lean on.

I used the Prima Something Blue collection for the card and a cream card stock for the card base and sentiment.  The garden bench was die cut/embossed using a darker piece of the paper collection, and mounted on a coordinating lighter piece of paper.  The same dark paper was used for the Elegant Ovals base.

JulySitByMeCloseUP

The sentiment was stamped on cream card stock in Archival Potting Soil, then die cut/embossed with the label die from Spellbinders A2 Divine Eloquence.   The ribbon was some I had previously dyed that was in my stash jar.  I loved the way it picked up the colors in the flowers and stripes in the paper and decided it was perfect for the card.

JulySitByMeLeft

That’s all for me today!  Thanks for stopping by and joining me.

SHERRY SIGNATURE


Project Supplies:


br />

Friday, July 18, 2014

Believe in Yourself - Card Set by Yvonne van de Grijp, Guest Designer

Hello everyone, it's Yvonne here today.

First of all, thank you so much for your lovely comments on my first guest designer blogpost on July 9th....it´s such a pleasure to create with Quietfire´s beautiful stamps!


Today it´s time for my second guest designer blogpost.

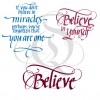
When I saw the Quietfire stamp set "If You Don't Believe in Miracles"(#5685), I immediately knew I had to have it....

I guess like most of us, I can relate so well to these stamps, for sometimes it can be hard to believe in yourself and that everything will be okay again eventually....

So, the cards I made,  made especially for all of you.... as a positive thought to remind that we should always believe in ourselves and in our strength.... 


Card 1:  If you don't believe in miracles".....  (additional suggested product links are at the bottom of this post)

* Trim white cardstock to a card base size 6"x6".

* Trim kraft cardstock to size 5¾"x5¾" and glue upon card base.

* Trim two pieces of patterned paper to size 5½"x5½", distress the edges using a TimHoltz  Paper Distresser.  Ink the edges using an Ink blending  tool and Distress  ink (color used: Brushed Corduroy) and glue upon card base.

* Glue lace ribbon over the card base and distress the edges by slightly pulling out some threads.

* Trim white cardstock to a banner size  2½"x 5¼" and ink the edges. Glue upon card base using foam squares.

* Cut a banner slightly smaller than the white one and glue upon the banner.

* Cut/emboss/stencil Spellbinders® S4-345 Picot Edge Circles #4 (with #1 being the smallest die template) . Glue upon card base using foam squares.

*

* Stamp  Quietfire "If You Don't believe in Miracles"sentiment on white cardstock using using Jet black Archival ink. Cut/emboss using Spellbinders S4-114 Standard Circles Large #5. Glue upon card base using foam squares.

* Embellish with rhinestones and lots of mulberry flowers....


Card 2: "Believe in yourself".....

* Trim white cardstock to a card base size 5"x7".

* Trim kraft cardstock to size 4¾"x6¾" and glue upon card base.

* Trim two pieces of patterned paper, one  to size 4½"x2½" and  one to size 4½"x4" . Distress and ink the edges. Glue upon card base.

* Glue  lace and glitter horizontally upon the card base.

* Cut/emboss Spellbinders S4-348 Postage Stamps #4 from white cardstock and ink the edges. Glue upon card base using foam squares.

* Cut/emboss Spellbinders S4-426 Luscious Labels One from patterned paper and glue upon card base.

*

* Stamp Quietfire  "Believe in Yourself" sentiment onto white cardstock. Cut/emboss using SpellbindersS4-126 Classic Squares Large #4 and glue upon card  using foam squares.

* Embellish with a large bow and self-adhesive pearls.


Card 3: "Believe".....

* Trim white cardstock to a card base size 6"x6".

* Trim kraft cardstock to size 5¾"x5¾" and glue upon card base.

* Trim two pieces of patterned paper, one  to size 5½"x2" and  one to size 5½"x3½". Distress and ink the edges. Glue upon card base.

* Glue lace ribbon over the card base and distress the edges by slightly pulling out some threads.

* Glue a piece of patterned paper size 3¾"x 2" on lower side of the card base.

* Cut/emboss/stencil Spellbinders S4-425 Elegant Ovals #3 and  S4-110 Classic Ovals Large #4 stacked from green cardstock.

* Cut Spellbinders S4-112 Classic Ovals Small #5 from white cardstock.

* Use the white left over frame to cut/emboss Elegant Ovals #3 to make a frame. Ink the edges and glue upon green oval.

*

* Stamp Quietfire sentiment upon white cardstock. Glue behind the green oval using foam squares. Cut of any edges that stick out from underneath the green oval. Glue upon card base using foam squares.

* embellish with lots of flowers and a strip of rhinestones.

I hope you like the cards and that they might inspire you to send someone a positive thought....  

It's been such a pleasure being guest designer for Quietfire and I would like to send  personal thank you to Quietfire's Suzanne Cannon for believing in me and giving me this opportunity.....


Big hug to all of you

Yvonne van de Grijp
http://phoebeez.blogspot.nl/ 


Related Posts Plugin for WordPress, Blogger...