Thursday, September 26, 2019

Something Wicked Halloween Card

Halloween Card / Quietfire Design Grid background / Quietfire Design Something Wicked stamp set/ card design by Kim Gowdy

Good Morning! Kim here with my first Halloween card on the Quietfire Creations blog! Now that autumn is officially here, it is NOT too early to share. Being an October ‘baby’, I have a special love of the season and am always drawn into autumn and Halloween stamps, papers & colours...they call my name while I sleep!

I started my card by stamping the Grid stamp to the lower 2/3 of my cardstock. It has a somewhat distressed look to it as I blotted off some ink with a baby wipe before placing on my paper. I punched out a circle from a Post-it note, and placed it where I wanted my moon to be. (if you leave the sticky part of Post-it note as part of your punched circle you do not required temporary adhesive)

Halloween Card / Quietfire Design Grid background / Quietfire Design Something Wicked stamp set/ card design by Kim Gowdy


Using multiple colours of Distress Oxide inks I layered up my inks to create the evening sky. Once I was happy with the sky, I removed the Post-it note mask and inked up my moon with the yellow. At this point I am not concerned with my yellow ink extending into the sky.


Halloween Card / Quietfire Design Grid background / Quietfire Design Something Wicked stamp set/ card design by Kim Gowdy


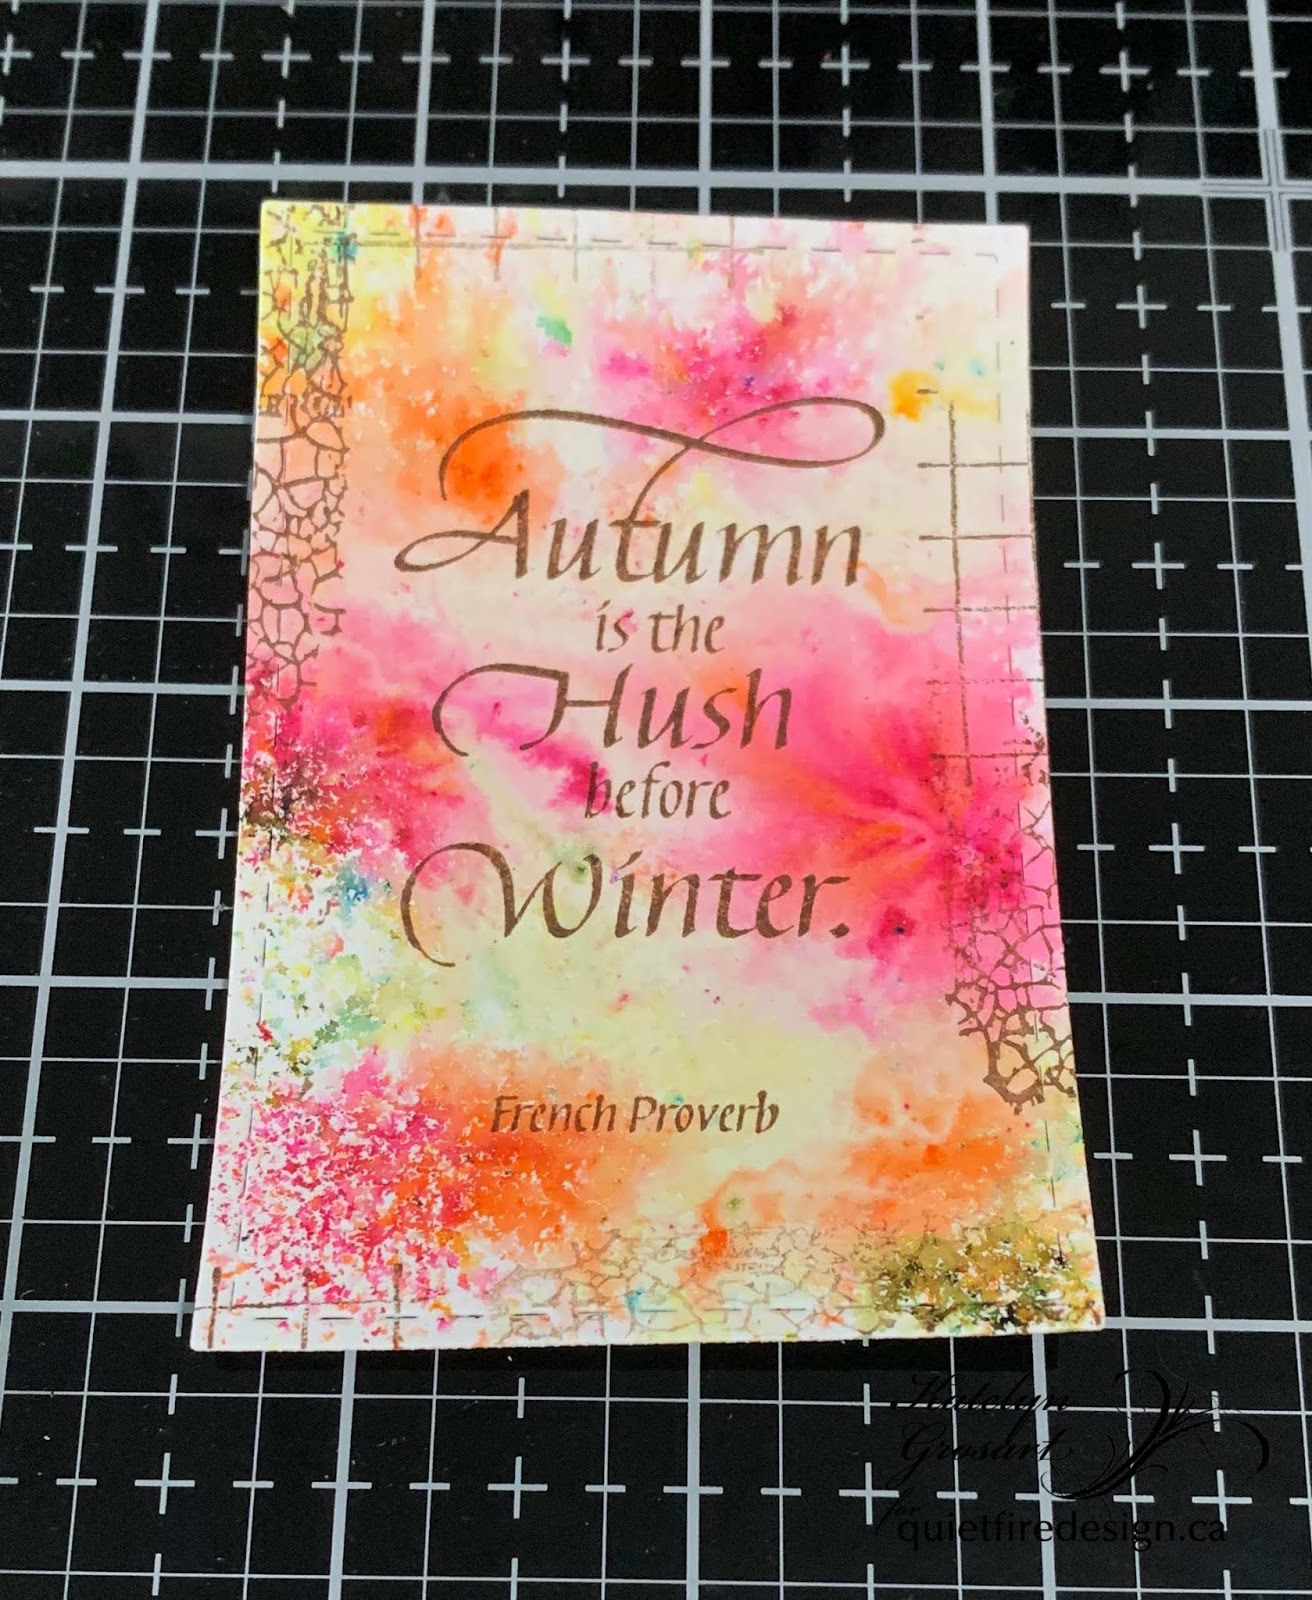
I inked up my stamps using Clearsnap Top Boss; any clear embossing ink will work, and sprinkled some Modern Gilding Powder in Gothic Black over top and heat set. It’s always a good idea to remove static from your card before embossing so the powder sticks only to the stamped image. I use an Embossing Buddy that I have had for years, but there are other options such as a Swiffer pad or Fleecy sheet that are supposed to work as well!

Halloween Card / Modern Gilding Powder - Gothic Black / Quietfire Design Grid background / Quietfire Design Something Wicked stamp set/ card design by Kim Gowdy


If you have not heard about Quietfire design’s Modern Gilding Powders...check them out! They are amazing, fine powders ready to add shine, dimension and interest to your die cuts and stamped images. There are six amazing colours and they are wonderful!

Halloween Card / Modern Gilding Powders / Quietfire Design Grid background / Quietfire Design Something Wicked stamp set/ card design by Kim Gowdy


I finished up my card by adding some ribbon, sequin stars and of course a card base. I also added a quick dot of yellow to the eyes using my Dylusions paint pen. Now to decide which ghoul to send it to!

Halloween Card / Quietfire Design Grid background / Quietfire Design Something Wicked stamp set/ Modern Gilding Powders / card design by Kim Gowdy


Supply List:

Quietfire Design: Grid Background stamp
Quietfire Design: Something Wicked stamp set
Quietfire Design: Gothic Black - Modern Gilding Powder


Ranger Industry: Distress Inks + Dylusions Paint Pen [to pop the cat eyes] Clearsnap: Top Boss
Scrapbook Adhesives by 3L
SpiegleMom sequins


Thanks for checking out my card! Looking forward to seeing how you use these fun products! Share them on the Suzanne Cannon Fan Group on Facebook!

Tuesday, September 24, 2019

Boo Treat Box


Hey Quietfire Fans! Halloween is only 37 days away and I'm thrilled to be back on the blog as I've been busy in my craft room creating this spooky Boo Treat Box. By combining a variety of stamps as well as dies from A Way With Words, they were the perfect for my treat box. You'll want to grab a cup of your favourite fall beverage and learn how to recreate my treat box at home.

To start, apply Emboss It Ink to the Bat stamp from the Something Wicked stamp set and stamp onto a piece of white cardstock. Reapply ink to the bat stamp and stamp three more times on the white cardstock piece. Sprinkle Gothic Black Modern Gilding Powder over top of the stamped bats. Stamp off the excess powder and emboss with a heat tool. Fussy cut five of the bats out. Ink the edges of the bats using Black Soot Distress Ink and a blending tool with foam.


Apply Jet Black Archival Ink to the Boo sentiment from the Something Wicked stamp set and stamp onto a piece of white cardstock. Apply Jet Black Archival Ink to the Tree stamp from the Something Wicked stamp set and stamp onto the same piece of white cardstock. Fussy cut the Boo sentiment and tree out. Ink the edges of the sentiment and tree using Black Soot Distress Ink and a blending tool with foam.


Die cut the 1 1/8" Diagonal Stitched Fishtail out of a piece of white cardstock. Apply Emboss It Ink to the Leafy Acanthus Background stamp and stamp onto the fishtail. Sprinkle Gothic Black Modern Gilding Powder overtop of the fishtail. Tap off the excess powder and emboss with a heat tool. Cut the fishtail down to 3 1/4". Distress the edges of the fishtail. Ink the edges of the fishtail using Black Soot Distress Ink and a blending tool with foam.


Choose some Halloween patterned paper to cut the Gable Box out of. 


From some coordinating Halloween paper, cut out a 1 3/4" Stitched Square. Distress the edges of the square. Ink the edges of the square using Black Soot Distress Ink and a blending tool with foam.


From some coordinating Halloween paper, cut out a 1 1/2" Stitched Indented Square. Distress the edges of the square. Ink the edges of the square using Black Soot Distress Ink and a blending tool with foam.


Use adhesive to adhere your gable box together. Ink the edges of the box using Black Soot Distress Ink and a blending tool with foam.


Adhere the stitched square to the fishtail. Foam square the indented square to the stitched square on an angle.


Adhere the tree to the right hand side of the indented square. Use foam squares to adhere the Boo sentiment to the left of the tree.


Adhere three of the bats around the tree and sentiment.


Use a clothespin to attached the Boo fishtail to the gable box. Adhere the other two bats as desired on the gable box around the Boo fishtail.


Here are a few closeup photos of the finished treat box.


Here is the finished Boo Treat Box.


Quietfire Design Supplies Used:


Other Supplies Used:

- Elizabeth Craft Designs: Stitched Squares, Diagonal Stitched Fishtails and Indented Stitched Squares
- Ranger Ink: Jet Black Archival Ink and Emboss It Dabber
- Tim Holtz for Ranger Ink: Black Soot Distress Ink and a Blending Tool with Foam
- Wild Whisper Designs: Halloween Night Paper Pack
- Misc: White Cardstock and Mini Clothespin

Thanks so much for joining me today and I hope that I have inspired you to recreate your own version of my Boo Treat Box!

- Katelyn


Tuesday, September 17, 2019

Christmas cards with new stamps using one layout


Are you loving the new Christmas stamps by Suzanne?  It's just so classy and perfect!  I quickly realized that any of them would work with a favorite holiday layout and so I wanted to show you a couple of them with the same layout - just different colors for a different look.


My first card using the simple wreath from Rosebud Wreath & Elements die set in green.  The background is a snowy blue background against a white snowbank with snowy evergreen silhouettes.  I stamped the new May the holiday spirit stamp in black Versafine ink and then diecut it out with a stitched circle die.  The circle die was slightly smaller than the wreath and so some of the blue sky showed through.


For my second card, I did the same layout but instead of using a stitched circle die, I used the same wreath die to give it an inlay look.  I also changed the background to a night time sky and streaked the black card stock with oxide inks - need to get better at that to make it a more recognizable Aurora Borealis.  The wreath was diecut out of silver mirror cardstock.


Notice anything else different? The snowbank is in front of the stamped circle instead of behind.  This was because the scrap of mirror card stock  I had was not big enough to cut the whole wreath!  Lol!  Who else has a collection of scraps and find moments of justification like this to keep on to those pieces?


May Peace be your Gift, Set of 2 - Mounted

May the Holiday Spirit, Set of 2 - Mounted

Rosebud Wreath & Elements - Metal Cutting Dies


Saturday, September 14, 2019

A Bit of Fragrance stamp with 3 different backgrounds

Hi, I'm over on the Elizabeth Craft Design Blog today with instructions and supply lists on how I made 3 different backgrounds to go with this one stamp.  Check it out!  Thanks!


Thursday, September 12, 2019

Fiddleheads' Scrapbooking Layout

Hello again! It’s Kim [instagram] here with project share using Quietfire Design’s Fiddleheads stamp set.

Quietfire Design's Fiddlehead stamp set / scrapbooking layout by Kim Gowdy


This sweet little stamp set is one I knew I wanted after visiting Big Island Volcano Park in 2018. After walking through the Thurston Lava Tube, we entered this sweet trail that meandered back to the parking area. There were lots of lush tropical plants and trees, but what grabbed my interest were the huge fiddleheads [maybe not their true name?] …they were beautiful!

My layout was created using some patterned papers from Wild Whisper [another Canadian company], some Ali Edwards embellishments and the new Chameleon Fineliner pens.

Quietfire Design's Fiddlehead stamp set / scrapbooking layout by Kim Gowdy / Wild Whisper / Chameleon Finaliner


Of course, the Fiddleheads stamp set became my number 1 supporting element to my photos. I love that it plays perfectly to emphasize the photos and story. 

Quietfire Design's Fiddlehead stamp set / scrapbooking layout by Kim Gowdy


I used Versamark with an Emerald Creek embossing powder to stamp the image, as well as to create a border around it. The word stamp was inked with Versafine ink. I love how they ‘pop’ off the page!

Quietfire Design's Fiddlehead stamp set / scrapbooking layout by Kim Gowdy / Emerald Creek embossing powder / Versamark

All papers and elements were adhered using Glue Dots’ adhesives. 

Quietfire Design's Fiddlehead stamp set / scrapbooking layout by Kim Gowdy/ Glue Dots


Bring your stamps onto your scrapbooking projects! They make beautiful, customized embellishments to help tell your story!

Supply List:

*Wild Whisper:   World’s Best paper collection
*Chameleon Fineliner pen:  colour OL3
*VersaMark
*VersaFine
*Emerald Creek Embossing Powder
*Glue Dots adhesives
*Ali Edwards:   Travel collection

Quietfire Design's Fiddlehead stamp set / Scrapbook Layout designed by Kim Gowdy


Tuesday, September 10, 2019

To Give Thanks Card

Hello, everyone!

It's Nancy back with you today! I have a new card to share with you,
using a combination of a fabulous Fall stamp set from Quietfire Design,
along with a fantastic Fall card cut file from the Silhouette Design Store.

With our Canadian Thanksgiving fast approaching,
I decided it was time for a Happy Thanksgiving card.
These wonderful products made it so easy!

Here's my card:


I began with the cut file.
This is the Autumn Pumpkin Doily Card.
Here's what the pieces look like all cut out:


I opted to use all plain cardstock for my card this time. 
The front focal piece has some intricate cuts that I didn't want lost in patterned paper.
I knew I wanted to do some stamping with black ink, so I chose black for my card base.
It adds a great frame around the finished piece.


Then I moved on to the stamping, using the To Give Thanks Stamp Set.
I began by stamping the "Happy Thanksgiving" in the center of the front piece.
For my layered piece behind it I chose the orange cardstock.
That way all the little pumpkins would show orange through the green.
Using a stamp positioning tool, I positioned the little pumpkin in the corner and stamped.
Then I just had to rotate the cardstock, and the pumpkin was stamped the same in each corner.
Then I adhered all the layers in place, using foam tape under the top lay for added dimension.
Finally, I added a double-loop bow out of shimmery ribbon.


I didn't take a picture of them but all the little pumpkin cutouts are adorable.
They'd make wonderful confetti to add to the inside of the card! ;o)
  

Quietfire Design Products Used:


Other Materials Used:

Cardstock: Recollections, American Crafts;
Ink: Imagine Crafts - Memento Tuxedo Black;
Ribbon: Celebrate It.


* * * * *

Thanks so much for stopping in today!
I hope you liked looking at my card! I sure enjoyed making it! 
See you again soon! 
Nancy :o)

Monday, September 9, 2019

Autumn is the Hush Notecard


Hey Quietfire Fans! I'm excited to be back on the blog today as I've been busy my craft room creating this fabulous Autumn is the Hush Notecard. By combining a variety of stamps as well as dies from A Way With Words, they were the perfect for my notecard. You'll want to grab a cup of your favourite fall beverage and learn how to recreate my notecard at home.

To start, die cut a 3" stitched rectangle out of white cardstock. Die cut a 2 3/4" stitched rectangle out of white cardstock. Put the two rectangles side by side and sprinkle Magenta Nuance - Orange, Red, Olive and Chartreuse on both rectangles. Spritz each rectangle with water. Allow the rectangles to dry. Apply Potting Soil Archival Ink to the Grid Background stamp and stamp randomly on both rectangles. Reapply ink to the stamp as needed. Apply Spiced Chai Ink to the Crackle Background stamp and stamp randomly on both rectangles. Reapply ink the to the stamp as needed.


Apply Potting Soil Archival Ink to the Autumn Hush stamp from the Autumn Collection and stamp on the middle of the 2 3/4" rectangle. 


Sprinkle Magenta Nuance - Orange, Olive and Chartreuse on a piece of white cardstock. Spritz the paper with water. Allow the paper to dry. Choose three of the leaves from the the Leaves stamp set. Apply Potting Soil Archival Ink to one of the leaves and stamp onto the now coloured paper. Reapply ink to the same leaf and stamp on the same piece of paper. Apply Potting Soil Archival Ink to one of the next leaf and stamp onto the same paper. Reapply ink to the same leaf and stamp on the same piece of paper. Apply Potting Soil Archival Ink to one of the last leaf and stamp onto the same paper. Ink the edges of the leaves using Potting Soil Archival Ink and a blending tool with foam.


Die cut two Wreaths from the Wreath & Elements die. Using a blending tool with foam, blend Peeled Paint Distress Oxide Ink over the entire surface of the two wreaths. Spritz the wreath with water. Let the wreaths dry. Apply Potting Soil Archival Ink to the Grid Background stamp and stamp randomly onto the first wreath. Reapply the Potting Soil Archival Ink to the Grid Background stamp and stamp randomly on the other wreath. 


Distress the edges of each rectangle. Ink the edges of the rectangles using Potting Soil Archival Ink and a blending tool with foam.


Choose a fall piece of patterned paper and die cut a 3 1/2" Stitched Rectangle out of it. Distress the edges of the rectangle. Ink the edges of the rectangle using Potting Soil Archival Ink and a blending tool with foam.


Foam square the 3" stitched rectangle to the 3 1/2" stitched rectangle.


Adhere the two wreaths as desired to the middle of the 3" stitched rectangle.


Foam square the 2 1/2" stitched rectangle to the 3" stitched rectangle. In the bottom right corner of the 2 1/2" rectangle, adhere three leaves. In the top left corner of the 2 1/2" rectangle, adhere the other two leaves. 
To finish the card, cut a cardbase out of white cardstock that measures 3 1/2" x 9 1/2", score at 4 3/4". Adhere the cardfront to the cardbase.


Here are a few closeup photos of the finished notecard.


Here is the finished Autumn is Hush Notecard.


Quietfire Design Supplies Used:


Other Supplies Used:

- Elizabeth Craft Designs: Stitched Rectangles 
- Tim Holtz for Ranger Ink: Distress Oxide Ink - Peeled Paint and Blending Tool with Foam 
- Ranger Ink: Potting Soil Archival Ink and Mister
- Imagine Crafts: StazOn - Spiced Chai
- Magenta Nuance: Orange, Red, Olive and Chartreuse
- Prima Marketing: Autumn Sunset Collection - Fall Flight
- Misc: White Cardstock

- Katelyn


Related Posts Plugin for WordPress, Blogger...