Friday, December 28, 2018

Get Well Soon Notecard


Hey Quietfire Fans! Christmas has come and gone and I'm excited to be back on the blog today sharing with you my Get Well Soon Notecard which features a variety of Quietfire Design Stamps. You'll want to grab a cup of your favourite winter beverage as you learn how to recreate my notecard at home.

To start, cut a piece of white cardstock that measures 3" x 3". Swipe Cracked Pistachio, Spun Sugar and Worn Lipstick Distress Oxide Ink on a craft mat. Spritz the ink with water. Press the white cardstock into the ink cover the entire surface. Dry the piece of cardstock with a heat tool. Apply Potting Soil Archival Ink to the Grid Background stamp and randomly stamp on the edges of the cardstock piece. Distress the edges of the cardstock piece. Ink the edges of the cardstock piece using Ground Espresso Distress Ink and a blending tool with foam.


Choose a piece of patterned paper from the ModaScrap - Wood Effect Paper Pack. Cut the piece of patterned paper to 3 1/4" x 3 1/4". Distress the edges of the patterned paper piece. Ink the edges of the patterned paper piece using Ground Espresso Distress Ink and a blending tool with foam.


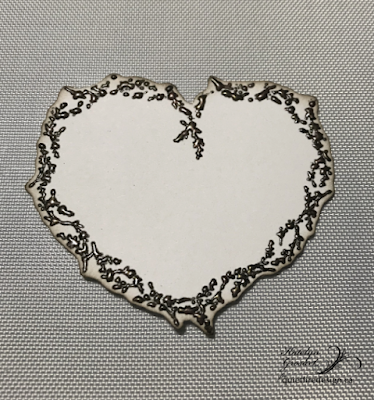
Apply Emboss It Ink to the heart stamp from the Twiggy Heart Wreath & Sentiments stamp and stamp onto a piece of white cardstock. Sprinkle Burnt Copper Leaves Embossing Powder overtop of the stamped image. Tap off the excess powder and emboss with a heat tool. Once the embossing powder has cooled, fussy cut the heart out. Ink the edges of the heart using Ground Espresso Distress Ink and a blending tool with foam.


From the same Twiggy Heart Wreath & Sentiments stamp, apply Ground Espresso Distress Ink to the Get Well Soon sentiment and stamp in the middle of the heart.


Tie a piece of twine into a bow 3/4" from the bottom of the inked cardstock piece. Foam square the heart in the middle of the inked cardstock piece. To adhere the middle of the twine bow down, use a glue dot.


Foam square the inked cardstock piece to the 3 1/4" patterned paper piece.


Cut a piece of white cardstock that measures 3 1/2" x 7", score at 3 1/2". Adhere the 3 1/4" patterned paper piece to the cardbase.


Here are a few close up's of my Get Well Soon Notecard.


Thanks so much for joining me today and taking a look at my project! I hope that I've inspired you to want to recreate my notecard at home. 


Quietfire Supplies Used:


Other Supplies Used:

- Tim Holtz for Ranger Ink: Distress Ink - Ground Espresso, Distress Oxide Ink - Spun Sugar, Cracked Pistachio & Worn Lipstick and Blending Tool with Foam
- Ranger Ink: Emboss It Dabber and Potting Soil Archival Ink
- Emerald Creek Craft Supplies: Burnt Copper Leaves Embossing Powder 
- Elizabeth Craft Designs: ModaScrap - Wood Effect Paper Pack
- Misc: White Cardstock, Twine and Heat Tool

- Katelyn


Thursday, December 27, 2018

Journal pages: Butterflies and inspiration


Hello Crafty Friends!

How is your end of 2018?  Are you thinking of 2019 goals or activities?  It looks like a busy first couple of months for me so I am working on my January and February journal pages now.  Today I would like to share the week at a glance for Jan 6-12. 

There was no plan for the pages as I just wanted to play and see where the playing led me.  It may seem strange to see butterflies in January but I wanted some color and "happy" in my layout.

The quote is great for the New Year.  It is from the Where Flowers Bloom collection:

The month and numbers are from the the Months & Numbers collection and the butterflies (so cute!!) are in the Soar collection.  Funny how the numbers fit so well in the largest butterfly. 
The foliage is also from the Where Flowers Bloom collection:
Do you use Quietfire Design product in your planners or journals?  We would love to see them!  Feel free to share on Facebook and tag us @QuietfireDesign.  Are you on Instagram or Twitter?  Use #qfdcalligraphy and we will leave some love on your post.  :)

Oh!  And did you check out the Boxing Week Sale at Quietfire Design? 
40% off Christmas stamps
15% off A Way With Words dies
50% off Almost Gone Forever goodies

Thanks for stopping by!  Have a great day!
Hugs,
Kathy Jo

Thursday, December 20, 2018

One Way to Brayer A Background


Happy Thursday!!!  It's Wanda here today sharing a way to make a background with Distress Oxide reinkers and a brayer.  I love being able to use reinkers for more than just a dry ink pad.  

I use very little ink for this.  I don't want to cover the paper but just make random patterns.  I've used a mini brayer but a regular rubber brayer works fine too.  Squeeze a little bit of reinker onto a craft sheet... 


... lightly roll the brayer through the ink a couple of times, lightly roll the brayer across the paper multiple times to use all the ink, roll the brayer through any ink left on the craft sheet and repeat rolling across the paper.  


Repeat with another color of rinker.  I usually use 2 or 3 colors but maybe your project just needs 1 color or more than 3.


In THIS post I shared about cutting a stencil from a transparency using the Snowfall cut file.  I've used that stencil here to add green dots (Distress Oxide Twisted Citron) to the background. 


Random stamping with the Crackle Background.


More Crackle Background with another color.


The stamped quote is from the set, Every Day Is A Journey, Set of 4 Stamps.  It is stamped with Versafine Onyx Black onto Specialty Stamping Paper (Ranger Ink).  

The die cut ovals were inspired by the ECD December Designer Challenge found Here.  I really like how some of the designers created layers with the Frame-It/Stitched dies.  Here I've used the ovals.  I cut the circle from my background using the 3rd largest oval.  The next size down oval is cut from Silver Metallic Kraft (Tim Holtz).  The smallest oval is cut from white cardstock and then I inked it with Distress Oxide Wilted Violet and embossed it with Clear Embossing Powder.  I adhered all these layers together and onto my stamped quote panel.


Around the edges of the background I've embossed 2 layers of Mixed Media Powder, Lilac (Ranger Ink).  The background and attached layers down to the quote are adhered to a white panel and then to a folded purple card.

The flowers (ModaScrap Lacy Poppies - ECD) are cut from black cardstock and attached as shown. 


 Tiny holeless beads are glued in the center of the largest flower.  


To finish I've glued on some dew drops.


I hope you like this card.  I'm quite pleased with it.  Please let me know what you think.

Hugs, Wanda


Tuesday, December 18, 2018

Elizabeth Craft Designs December Designer Challenge


I'm excited to be sharing a post for the Elizabeth Craft Designs Designer Challenge for December.  This month the challenge is to use any of the Garden Notes - Frame It/Stitched Nested Dies.  There are four different die sets in this collection … squares; rectangles; ovals and circles.

You can join in the challenge for a chance to win a prize OVER ON THE ECD BLOG by answering the challenge question, Which of the Garden Notes - Frame It/Stitched die sets would you use on a project and how would you use it?


These dies are a wonderful addition to your collection as they leave the stitch marks on the piece the shape falls out of.  I thought it would be really fun to use them to make a shaker card.  

Cut a 6" square piece of 100# Soft Finish Cardstock.  Die cut the Frame-It Square and Heart Spray from the piece as shown.


Add adhesive around the square opening on the back of panel and attach a piece of clear plastic (transparency) over the opening.


Cut another piece of 100# Soft Finish cardstock to 3 3/4" square.  Stamp hearts (I used the heart created with all the little "love" words) across paper with Archival Ink.


Back to the first panel.  On the back (the side you adhered the clear panel to) add foam tape all the way around the square opening.  You want the foam tape to match up at the corners and not leave any gaps so that nothing can fall out.  *I did take a picture of this but somehow that picture is damaged*  Add whatever you want on the inside of your shaker to this area.  I used some small beads, some holeless round beads, and chunky glitters.  Carefully remove the liners from the foam tape taking care that none of your pieces pop up and sticks to the tape.  Place the stamped square of cardstock over your shaker area, stamped side down so it will show through the window.


Add pieces of foam tape for support around the edges of the panel and in the Heart Spray area.


Cut a piece of red cardstock to attach over the back.  This will finish the back and show through the Heart Spray cut out area.  Back another piece of the same red cardstock with Clear Double Sided Adhesive and cut the word Love and the Hanging Heart element.


Stamp "Mine! You're all mine!" on a scrap of card, ink the edges and add a gold bow.


Die cut the Ladder Fern three times, ink and shape.  Die cut the pieces for Rose 2, ink, shape and assemble.


Ink the edges of the front panel.  Attach all elements as shown. 


I hope you've enjoyed this project.  If you have any questions, please don't hesitate to ask.

Hugs, Wanda


Supplies --

A Way With Words, Hearts & Pawprints - (QF or ECD)
A Way With Words, Love - (QF or ECD)
A Way With Words, Calligraphic Elements 3 - (QF or ECD)
Love & Hearts Collection Clear Stamp Set - (QF or ECD)
Garden Notes, Frame It/Stitched Squares - ECD
Garden Notes, Rose 2 - ECD
Garden Notes, Ladder Fern - ECD
Soft Finish Cardstock - 100 lb. - ECD
Clear Double Sided Adhesive - ECD

Cardstock - Red, Green
Gold Ribbon
Archival Ink - Ranger Ink
Distress Ink - Ranger Ink
Foam Tape
Clear Plastic or Transparency
Beads & Chunky Glitter


Monday, December 17, 2018

CAS Not all who wander

Hi, there!  How crazy has your December been?  Mine is just shy of hectic so when this simple card came together, it gave me such a good feeling.  Sometimes simpler is better - especially in December!

I rearranged my craft room (will share pics later) and I found so much scrap paper - including this bit that I made into a background.  I added the Memory Box Evergreen trio to the front and I just loved how it looked.  It was perfect for one of the quotes from the Every Day is a Journey stamp set.


I'm not one to wander into a forest with just the stars as my guide but this is exactly the feeling this background with the tree silhouettes remind me of - just a sense of wonderment.


The quote was embossed in white on brown cardstock and I had matted the background with a 1/16 matting of white cardstock.  I wish I knew who made that paper - I am thinking a Recollection - Christmas theme paper pack but you can reproduce something similar with any starry night sky inking or stamping.


Hope you like it and that your season has been merry and meaningful!


Every Day is a Journey, Set of 4 Stamps - Mounted

Related Posts Plugin for WordPress, Blogger...