Showing posts with label stencils. Show all posts

Sunday, November 6, 2016

Merry Christmas....


Hello everyone,
Yvonne here with  a CAS (clean and simple) Christmas card using the Quietfire Design/ECD A Way With Words metal cutting die "Merry Christmas 2" (set of 2 dies).

The trees and snowflakes were created using ECD stencils and Structure paste.
After taking of the stencil (while the structure paste is still moist) I sprinkled on some white glitter for an extra snowy effect.


To give an extra 3D effect to the card the die-cut was glued upon the card using little pieces of 3D foam tape.

I hope you like the card.
Thanks so much for stopping by!

Hugs from Holland,
Yvonne

Friday, April 17, 2015

Hello!

Good morning!  Sherry here today and I have a very quick and clean card to share with you.  I’ve been so taken by all the clean and simple watercolor cards I’ve been seeing on Pinterest and other social media sites.  Now typically this is SO NOT my style, but I decided to give it a try anyway.  I’m afraid I didn’t get all the white space that I’ve been seeing, but believe me . . .  I will be trying again!


The background was made my mixing up some Color Burst with water and first misting the watercolor paper with Aquamarine Blue adding just a hint of Orange.  Once that was dry, I used a flourish stencil (from a prior Quietfire hop with Dreamweaver Stencils) which was placed on the background and misted with more orange.


The sentiment “Hello” was die cut/embossed from blue paper with the new Quietfire Design Metal Cutting Die - Hello.  Hello was then affixed to the card front using a Quickie Glue Pen.  A second layer for the card with cut from the same blue paper.


Thanks for stopping by and joining me today!!


SHERRY SIGNATURE


Project Supplies:


Wednesday, September 17, 2014

Give Thanks!

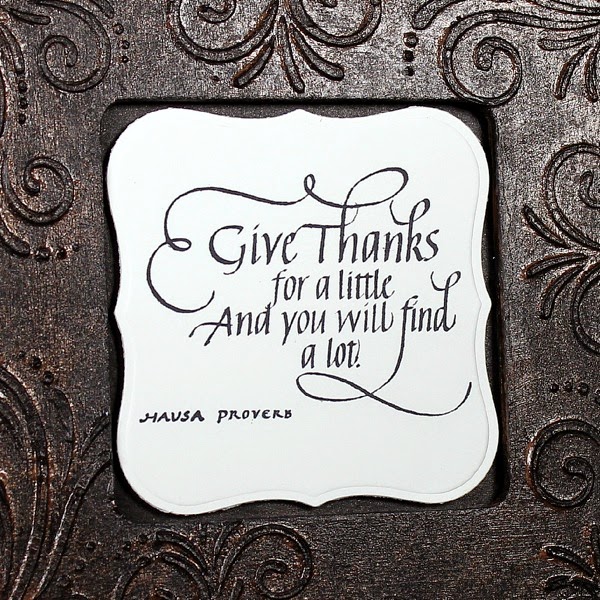
Good morning!  Sherry here today and I have an altered frame to share using the new Quietfire Design set, Give Thanks.  I debated on whether to make a card or alter a craft frame, and I settled on the frame.

GiveThanksFrame2

I began by using a Dreamweaver stencil of a flourish and added Crackle Embossing Paste to the front of the frame.  Once the paste was dry, the frame was painted black.    To highlight the embossing paste, a bronze metal paint was brushed over the black paint.

GiveThanksFrameCloseUPBottom

The Quietfire Design sentiment was stamped on a cream card stock and then die cut/embossed with Spellbinders Labels One.

GiveThanksFrameCloseUP

I think I’ll set this frame out for the fall holidays and then sentiment can be changed for the seasons.

GiveThanksFrame

Thanks for stopping by and joining me today!

SHERRY SIGNATURE


Project Supplies:


Wednesday, February 19, 2014

If I Had A Star!


Good morning!  Sherry here with you today and I have a quick and easy card using Quietfire Design, If I Had a Star for Every Time You Made Me Smile, and some chipboard stencils that I made with Spellbinders die templates.

SCIfIHadAStar

To begin, I stamped the sentiment in black on watercolor paper and then lined up my die template around the stamped image, to make sure the sentiment was straight.  (Hint:  this saved me time from re-creating the front of the card again, after already completing it once and then stamping the sentiment crooked!)  The base of the card and all the other panels were die cut/embossed with Spellbinders 5x7 Matting Basics A and B. 

SCIfIHadAStar CloseUPSentiment 

Using Spellbinders Stars Five, a stencil was die cut from chipboard, which was then stippled with Mustard Seed and Wild Honey Distress Inks.  While the stencil was still taped down, VersaMark was stamped over the image.  The stencil was then removed and the star was embossed with clear embossing powder.  

Another stencil was made from chipboard using Spellbinders CrissCross Expandable Pattern, which was then stippled in Tumbled Glass Distress Ink.  Using an ink spritzer, the same colors were spritzed across the front of the card.  

Some outlining was added with a Pigma Micron pen, and the ribbon (from the stash jar) was added.

SCIfIHadAStarLeft

That’s all for me today.  Thanks for stopping by and joining me!


SHERRY SIGNATURE


Project Supplies:


Related Posts Plugin for WordPress, Blogger...