Showing posts with label foil. Show all posts

Monday, March 5, 2018

Acrylic Paint on an Acrylic Block; Mothers Hold their Children's Hands


Hello!!!  It's Wanda (Art By Wanda) here today with a couple of cards to share including a tutorial for creating the background color.  It's hard to believe it's March already and as quickly as March has come, May will be here in a flash so it's not too early to think about Mother's Day.  My first card uses a stamp just perfect for that occasion.  

For my background I'm using acrylic paint, specifically Fresco Finish Chalk Acrylics (colors - coral, orchid).  I put a small puddle of each color on my craft sheet.


I spread the color using my finger, blending where the colors came together, and making sure it was a large enough area for the acrylic block I wanted to use.


Press the acrylic block into the paint.

Tuesday, June 6, 2017

Moments Together Pull Toys – ECD Designer Challenge June 2017


Okay, so maybe not pull toys, but that’s what they look like!  It’s Suzanne here today with a fun idea with a vintage shabby chic look for your home décor! Inspired by something I saw in Prims magazine many months ago, I thought it would be fun to make something totally different; a pull toy with the A Way With Words dies!  This project is for the Elizabeth Craft Designs June Designer Challenge which was.... Not a card!

Here is what I did.


Instructions:
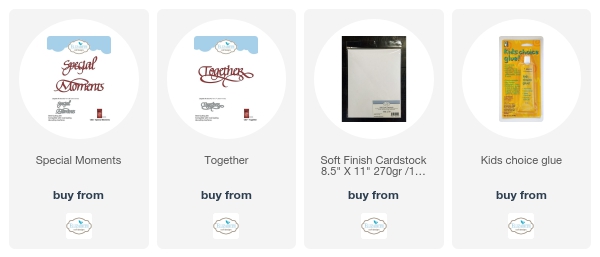
  1. Die cut two each of A Way With Words Moments (from Special Moments) and Together from white Soft Finish Cardstock.
  2. Brush Walnut Ink on all surfaces.  Allow to dry.
  3. Rub glue stick randomly on spots on the front of one Moments diecut and one Together diecut. Place gold transfer foil over the surface of the diecuts (gold side up!) and rub.  If the foil doesn’t come off right away, wait a few seconds for the glue to become more tacky and try again!  You’ll get this wonderful hit and miss gilding.  Love it!
  4.  Place the gilded Moments diecut on top of the other Moment diecut.  Apply a small amount of glue at the very top of the flourish and the t and allow to dry. Repeat with the Together diecuts.
  5. Tie twine around one spool (or use a pretty ribbon). This will be the front of the pull toy.
  6. Gently spread the bottom of the paired diecuts. Apply two dots of glue along the shaft of each spool and stand the word so that it is touching the glue.  Allow to dry.  Repeat with other word. Designer Tip: If you’re particular about the word being parallel to the surface it will be sitting on, adjust the position of the spool on the flourish of the letter.  The flourishes are usually not symmetrical within the word – I never planned for this possibility!
  7. Give to a special friend who will remember a special moment together with you!
Thanks for having a look!
Suzanne

Supplies:
Imagine Crafts Walnut Ink
Docrafts bare basics Wooden Bobbins
Ranger Collage Gluestick
Decofoil Gold Foil


Elizabeth Craft Designs Supplies:


Monday, May 1, 2017

Always Believe That Something Wonderful is About to Happen


Hello and Happy May Day!!!  It's Wanda with you today.  It's been very wet and chilly here in Southern Iowa and I'm ready for the warm weather to come back.

I recently bought a Royal Sovereign Laminator (Model CL-1223) and have been testing it out with foil.  Very fun!!!!  For this card I wanted to try using Transparent Embossing Paste.  Onto a piece of Mixed Media Paper (Ranger), I put the paste through the Butterfly Kaleidoscope stencil scraping it mostly flat, removed the stencil (clean your stencil before the paste dries), let the paste completely dry on the paper, put a piece of foil over the paper (Therm-O-Web iCraft deco foil, Emerald Watercolor), placed the paper with the foil on top inside a folded piece of parchment paper,  ran it through the heated up laminator, pulled the piece of foil off and, ta-da!!, gorgeous foiled, dimensional butterflies!!! 

I added background color to the piece with Distress products.  I sprayed some water on the paper first, then sprayed Distress Spray Stain Picked Raspberry just in the center of the paper (but, of course, you get speckles toward the edges of the paper), blotted with a paper towel and dried it.  Around the edges I inked with Distress Ink Mustard Seed and Squeezed Lemonade and then also distressed the edges.  When I was putting the card together I decided to add a bit more to the background and did some random stamping with the Crackle Background using Distress Ink Mustard Seed. 


For my center piece I also started with Mixed Media Cardstock (Ranger), inked the Crackled Background with Distress Oxide Ink Cracked Pistachio, gave it a very light spray with water and then stamped it onto the paper, dried it, stamped the quote (Always Believe) with Archival Ink Jet Black, sprayed the paper with Distress Spray Stain Squeezed Lemonade, blotted it, dried it, dripped on some water, blotted it, dried it, cut it out with a Stitched Circled die (Elizabeth Craft Designs), and inked the edges with Distress Ink Mowed Lawn.  


The "flowers" are Elizabeth Craft Designs ModaScrap Dandelion Fluff diecut from colored cardstock, inked with Embossing Ink (Ranger), embossed with clear powder, and white dots added to the ends with a Posca Paint Marker.  The butterfly is metal (Finnabair Mechanical Grungy Butterflies, Prima).  I used my finger to dab on some Ranger Ink Enamel Accents (a mix of Classic Cherry and Wild Orchid).  I've also used a paper doily and some twine on the card. 

I hope you've enjoyed this card.  If you have any questions, don't hesitate to ask.

Thanks for following along!!!!

Hugs, Wanda


Wednesday, March 23, 2016

Believe - Easy Flourished Embossing on Gold Foil

This one word can mean so much.  The special person who receives this card will think of you and smile every time its reflected shimmer catches their eye.

You can have so much fun with this technique!  It will be your customized creation.


Here is what you'll need to make this project:

 
Elizabeth Craft Designs Believe die  Quietfire Site | Elizabeth Craft Designs Site
Core’dinations cardstock: Purple Grandeur and Wisteria
Thermoweb iCraft Deco Foil Transfer Gold
Thermoweb iCraft  Easy-Cut Adhesive
Thermoweb 3D Foam Squares
Stylus
Smooth Cardstock
Diecutting machine


Instructions:
1.       Form a 7.5 x 5.5” card base from dark purple cardstock.  Cut one panel measuring 6.5 x 4.25” from light purple and one panel measuring 6 x 3.75” from dark cardstock.
2.       Die cut one Believe from dark and one from light cardstock. Adhere them together, using Glue Dots, with the light coloured diecut on top and the dark diecut slightly offset behind so it appears as a drop shadow.
3.       Cut a panel of smooth cardstock measuring approximately 6 x 3.5”.  Cut a piece of Easy-Cut adhesive to 5.75 x 3.5”. Remove one side of the release paper and adhere it to the smooth panel.  Run this through your diecutting machine for even adhesion.
4.       Remove remaining release paper and lay foil, gold side up, over the whole adhesive surface.  Place this panel inside a folded sheet of copier paper to protect it and run it through your die cutting machine again. Trim to 5.75 x 3.25”
5.       Adhere Believe into the middle of the foiled panel using Glue Dots.
6.       Place foiled Believe panel onto the foam pad and use your stylus to emboss the surface  by pressing firmly.  Draw flourishing designs and leaves and dots around the diecut.
7.       Assemble panels as shown in the photo using foam adhesive.
 
Thanks for stopping in to have a look!  Happy creating, Suzanne


I'd like to thank Thermoweb for supplying their product for this project and Prime Publishing (publishers of favecrafts) for sponsoring their Blogger Networking Event at CHA in January!
This project is entered in the Prime Best Blogger Craft 2016 Contest.
Related Posts Plugin for WordPress, Blogger...