Showing posts with label Let it Snow. Show all posts

Tuesday, December 19, 2017

ECD December Challenge - Backgrounds


This month's challenge over at Elizabeth Craft Designs was a background challenge.

So this was fun!  All you have to do is die cut your words from a removable mask, lay them on your paper, sponge colour over them, spritz with water and repeat!  The variety is endless!  My theme is winter, but I could easily stamp Merry Christmas on the inside and voila!  a Christmas card!  Or what about a birthday card, or anniversary.... or .... or.....or...!

For today's challenge, Elizabeth Craft Designs will be giving away Gift Card to use on their website to 3 lucky winners.  To enter, simply leave a comment on the Elizabeth Craft Designs Challenge Blog Post!  Good luck!

Here is how to make this card.  It's such a fun technique!

Supplies:

ECD Supplies: Elizabeth Craft Designs, Inc.
A Way With Words Brrrrrr die  QFD site
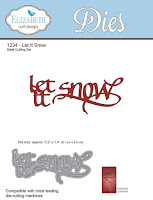
A Way With Words Let it Snow QFD site
Soft Finish Cardstock in white 
QFD Clear Double Sided Adhesive 


Others:
Ranger Specialty Stamping Paper
Ranger Distress Oxide Ink – Salty Ocean, Faded Jeans, Broken China
Ranger Ink Mini Blending Tool
Ranger Specialty Stamping Paper
Spritzer bottle
Core’dinations cardstock in Nassau Blue and Royal
Inkadinkado Stamping Mask Paper
Avery removable labels (I used name tag sized ones)
Scrapbook Adhesives by 3L 3D Foam Squares 


Instructions:
  1. Form a 7 x 5" tent-fold card base from blue (Nassau) cardstock. Cut a piece of Specialty Stamping Paper about 7 x 5".  You will trim this later to fit the card front.
  2. Die cut Brrrrrr and some snowflakes from masking paper (see supply list).  Designer Tip: I used both the Avery and Inkadinkado products. The Avery was more sticky, but both did the job well!  Remove the release paper from the back of the words and place them on your Specialty Stamping Paper.  Sponge Salty Ocean Distress Oxide ink over the whole surface including the masked words.  Spritz the surface with water and allow to dry.  You will see the small "snowflake" speckles appear in the inked surface. Larger drops will give bigger "snowflakes". (This almost looks like a crackle!  It appears crackled from multiple layers of spritzing.)
  3. Remove the masked images and move them to a new place on the paper. Yes, they'll still be sticky enough to work!  Now sponge Broken China over and around parts of the masked words.  Spritz again and allow to dry.  Repeat with Faded Jeans Distress Oxide Ink. Remove the masking words.  Trim to 6.5 x 4.5".  Cut a mat from white cardstock approximately 1/8" and adhere together.  Mount this panel on the card base with foam adhesive.
  4. Die cut Let it Snow twice, once from white cardstock and once from dark blue (Royal). Die cut one snowflake from white. Layer them with the dark words slightly offset to create a slight dropshadow effect.  Adhere the words and snowflake to the paper as shown.

Have fun with this technique. The effect can be very subtle or very stark. Try them both.  Mix up your Distress Ink colours. And there are lots of words you can use as a background!!
Thanks for visiting.  Now head over the the Elizabeth Craft Designs blog to enter to win! 
Good luck, Suzanne

Thursday, September 22, 2016

A Way With Words kisses Stampin' Up!


My friend Jacoline Fitzgerald knew what a panic I was in as I prepared for the Great Canadian Scrapbook Carnival in Edmonton earlier this month!  She had purchased the Buy It All complete set of A Way With Words dies, so she was ready to create and lend a much-needed and unexpected helping hand.  What a sweetheart!


I wanted to share her beautiful cards with you.  Jacoline is a Stampin' Up! demonstrator who doesn't mind stepping out every once in a while - and boy, am I glad she does.  All products used in these cards are Stampin' Up!, except for the A Way With Words dies, of course, and the poinsettia on the Noel card which is Susan Tierney-Cockburn's Garden Notes Poinsettia available from Elizabeth Craft Designs.


Just click on each card to see it larger!
If you have any questions about the Stampin' Up! items Jacoline used, you may contact her on Facebook: https://www.facebook.com/jacoline.b.fitzgerald  
Thank you so much Jacoline!


Wednesday, August 31, 2016

Let's Party & - Celebrate HB - Easel Macarons

Yogi here today with a tutorial on making faux "Macarons"... I love Macarons but since they have too much refined sugar which I try to abstain from, I have to be happy with the faux ones. Sigh!!! Click on any image to enlarge. Enjoy

I'm using several A Way With Word dies from Elizabeth Craft Designs, "It's A Party"; "Let It Snow"; "Calligraphic Elements 2 - Ampersand" all 3 also available on Quietfire Design HERE, HERE and HERE

I'm also using several sentiment stamps from Quietfire Design "Just For You" 4pce set; "Twirl and Enjoy" 3pce set; "Happy Birthday Plain and Simple" 7pce set


Folded my white card in half (5" square") and then used the outside edge as a guide from the largest die of the Beaded Circles (Elizabeth Craft Designs) to cut my circle. Scored and folded the front half in half to create the easel. Cut another white circle for the front piece. Ran it through my embossing machine using the "Coffee Bean" embossing folder (Elizabeth Craft Designs), inking one side with Distress "Old Paper" and clear embossing after dry embossing. Hit the high points with "Ground Espresso" pad. Adhered to card front.

Die cut the largest beaded circle, keeping the negative piece for the floor. Inked the beaded circle using the espresso pad and adhered to card.

Created my Macrons - see tutorial at bottom.

Die cut the
party  from "It's A Party" from pink cardstock and the 's & "Let" from  "Let It Snow" from aqua cardstock, cutting off the bits I needed to create the word "let's"

Adhered all my elements to the front. Adding some colored enamel dots.

On the Floor: Sponged the negative of the beaded circle using "Fossilized Amber". Sponged some espresso around the edge of the floor. Adhered the negative piece to the floor.

Stamped the words "
"Just For You - Celebrate" 4pce set", "Twirl and Enjoy" 3pce set", and "Happy Birthday Plain and Simple" 7pce set, masking off the areas I didn't want to stamp using Versafine Black Onyx and clear embossing.

Die cut the "
Calligraphic Elements 2 - Ampersand" from a red cardstock and adhered.

Adhered the bottom edge of the red Macarons to act as my stopper.


MACARONS TUTORIAL:
Step 1: Created the Macrons by cutting fat oval shapes (use a die or punch or electronic cutter, or cut by hand...) - you need 3 the same size ovals for each Macarons. Keep one of your negative pieces as well to use as a stencil.

Step 2: Place the stencil approx 3/16" above the bottom edge (you can see this with the open space from the negative cut out), hold the negative piece and your oval firmly and sponge with your meringue color, laying down a heavier color around the edges going to nothing in the center.


Step 3: Remove stencil and sponge the upper edge


Step 4:  then sponge the lower edge where the traditional feet of Macarons is.


Step 5: Sponge the 2nd oval in a similar way placing the stencil approx 1/4" above the bottom edge and sponge. Remove stencil and sponge the bottom edge white area.

 Step 6: With a matching colored pencil that is slightly darker than your sponged color add little nicks and dots to create the "feet" look. (pay attention to what area your are adding the nicks...)

You can color the 3rd oval which is your filling or leave it white and use Viva Pearl Pens or Liquid Pearls to give that glossy filling look. 


Step 7: Adhere the 3 layers.


Step 8: add the Viva Pearl or Liquid Pearls in a thin bead.


Friday, August 19, 2016

New Elizabeth Craft Designs, A Way With Word Dies! Cherish-Cozy-Let it Snow-Warm Thoughts and Peace

Hi Y'all, Robyn here getting carried away with the new Away With Word Dies!
The new dies are just a tad smaller than the last release, perfect for my love of ATCs!
The new ElizabethCraft Designs dies are available pre order at Quietfire Design.

Add some embossing folders, ECD glitter, dimensional adhesive, and you have a little bit of love to give away!


Let it snow                                                                               Brrrrrrr and snowflake


 Try as I might, I had to go 5x7 to fit theses beauties in!

Warm Thoughts                                              Caligraphic Elements 2


 The rest of the Quietfire Design team is just as excited as I am so be sure to visit here often for more inspiration!
I can't wait to see what you do with your new dies!
Comments and Questions welcomed!


Thursday, June 2, 2016

Have Yourself A Merry Little Christmas


Yogi here today. Since I'm in Christmas Card mode again..., thought I'd start off with an easy peasy one, and what could be easier than using one of Suzanne's 3pce Xmas sets "Have Yourself A Merry Little Christmas" and if you do the inside as well, I used "Let It Snow - large".

Scored and folded my white card (5.5"w x 4.25"h).

Stamped the tree (
"Have Yourself A Merry Little Christmas") on a piece of white cardstock using Distress "Mowed Lawn", and sprinkled some "Queen's Gold" embossing powder on the star area and clear embossed the rest.

Stamped the snow a couple times using Distress "Picket Fence" and embossed with white embossing powder.

Stamped the quote using Versafine "Vintage Sepia" and embossed with the gold.

Sponged all over with "Tumbled Glass".

Die cut using Elizabeth Craft Designs "Stitched Rectangles", die cutting the design portion and at the same time die cutting the outer border.

Inked the outer border using "Broken China" and embossed with Emerald Creek Hot Stuff "Blue Sparkle" embossing powder.

Adhered my elements to the card front.

On the inside: Stamped the snow as per the front.

Stamped the sentiment (
"Let It Snow - large"), inking with the Broken China and then hitting here and there with "Chipped Sapphire", stamped and clear embossed.

Sponged all over with the tumbled glass. 


Voila, all done...

Friday, December 21, 2012

Let it Snow - Teabag Folded Snowflake Card

I just love how this turned out.  I love the colours - and lack thereof!  This is one of the medallions designer Sharon Reinhart teaches in her online class, Fabulous Paper Folds. I left the teabag folded "snowflake" pretty puffed up and added the simple pearl to the middle.


Let it Snow was stamped with Versa Magic Turquoise Gem, but the shading on the Holly Motif was done with the lighter coloured Aquatic Splash. I use Echo Park's Winter Park paper for the teabag snowflake.


Thanks for having a look today!
Happy creating, Suzanne

Here are some thumbnail links to the products I used for this card.  If the link doesn't work, the product may be sold out.

Related Posts Plugin for WordPress, Blogger...