Tuesday, September 3, 2019

"If you don't believe in miracles" Butterflies card


Hello Crafty Friends!

Are you looking for an inspirational card for someone special?  Quietfire Design has the most beautiful and inspirational stamps to choose from!  Today's card has a heart warming stamp as the focal point, If you don't believe in miracles from the same named stamp set:

If You Don't Believe in Miracles - Set of 3 Stamps
The butterfly background was created using the sweet butterflies from the Butterflies/Dragonflies stamp set:
Butterflies/Dragonflies set of 7 stamps
The background used both butterflies.  The butterflies were randomly stamped using two different shades of pink.  On a separate sheet of card stock I stamped another butterfly and fussy cut it out.  It was used on top of the gorgeous stamped quote.
The stamp sets look so lovely together!  If you are not a fan of pink then try it out in different colors.  Imagine how pretty it would be in a cobalt blue...hmm...I think I need to try that next!

Thank you so much for stopping by!  Have a happy, crafty day.
Big Hugs,
Kathy Jo

Monday, September 2, 2019

Using Quietfire Design dies with mixed backgrounds

How often do you change your mind on a design as you're making the card?  For me, lots! Only once in a while does it actually turn out how I pictured it.

So my projects today utilizes Quietfire Design dies combined with those perfectly good "leftovers."  There are quite a few dies to pick out of but with back to school still in mind, I went with Be Yourself and Good Luck.  From my stash of backgrounds I found a couple of wreaths I had just painted to make table setting number placards as well as a colored stamp from a recent play date.  (The older the scrap, the longer they stay in the scrap pile unfortunately.)


These first two cards could easily be swapped with any word die (I was really tempted to use the small Happy Birthday in them).  The wreaths were my first attempt at painting tiny roses and greenery - my Koi clean color brush made it very easy to mass produce these.  If you have other tiny artwork that are in your practice piles, consider turning them into cards! 


This cute boy card combines Be Yourself with this tiny superhero from My Favorite Things - just another good fit, I thought.  Hope you like my rather random post.  :)


Be Brave Bold Yourself - Metal Cutting Dies


Good Luck - Metal Cutting Die

Tuesday, August 27, 2019

Sending Hugs - Betsy Birge, Guest Designer


Betsy Birge is sharing her second post as guest designer today.  Simply gorgeous!
Thanks so much for joining us Betsy!


Hello everyone!  So excited to be sharing this “Sending Hugs” card with you today.  There are so many ways to use this stamp set, as well as the dies.  I have chosen a very soft palette of pinks and greens.

First I stamped my hearts using 2 shades of Tombow Markers – keeping the darker shade along the outside edges.  I then lightly misted it with water to get a watercolor effect.  I used a stamp positioner to do this on Strathmore Bristol card stock.


Next I cut out the hearts leaving a small white edge.  I die cut my “Sending” and “Hugs” from lime green pearlescent card stock.


I next put my base together.  For the main base I used an A2 size white top folding card.  I covered that completely with a piece of lilac pearlescent card stock.  Then I cut a piece of the lime green pearlescent card stock to 4.125” x 5.75” and my patterned paper measures 4” x 5.25”.  I adhered all of these together.

I adhered my die cuts to the card gluing the “sending” and “Hugs” flat and popping up the hearts with foam tape.

For an added embellishment I used Nuvo Jewel Drops in Honeysuckle.  And that completed my card.


Quietfire Design Supplies Used:


Other Supplies Used:

Misti Stamp Positioning Tool
Tonic Pearlescent Card Stock – Lime Light/Gleaming Lilac
Strathemore Bristol Smooth Card Stock
Nuvo Jewel Drops – Honeysuckle
Tombow Markers - #703, #761
A2 Size white top folding card base – Neenah Classic Crest Solar White 80lb.
3M Foam tape – Art Glitter Adhesive
ModaScrap Patterned Paper – Let Your Soul Bloom


Betsy

Monday, August 26, 2019

Using Photos to Make Quick Cards

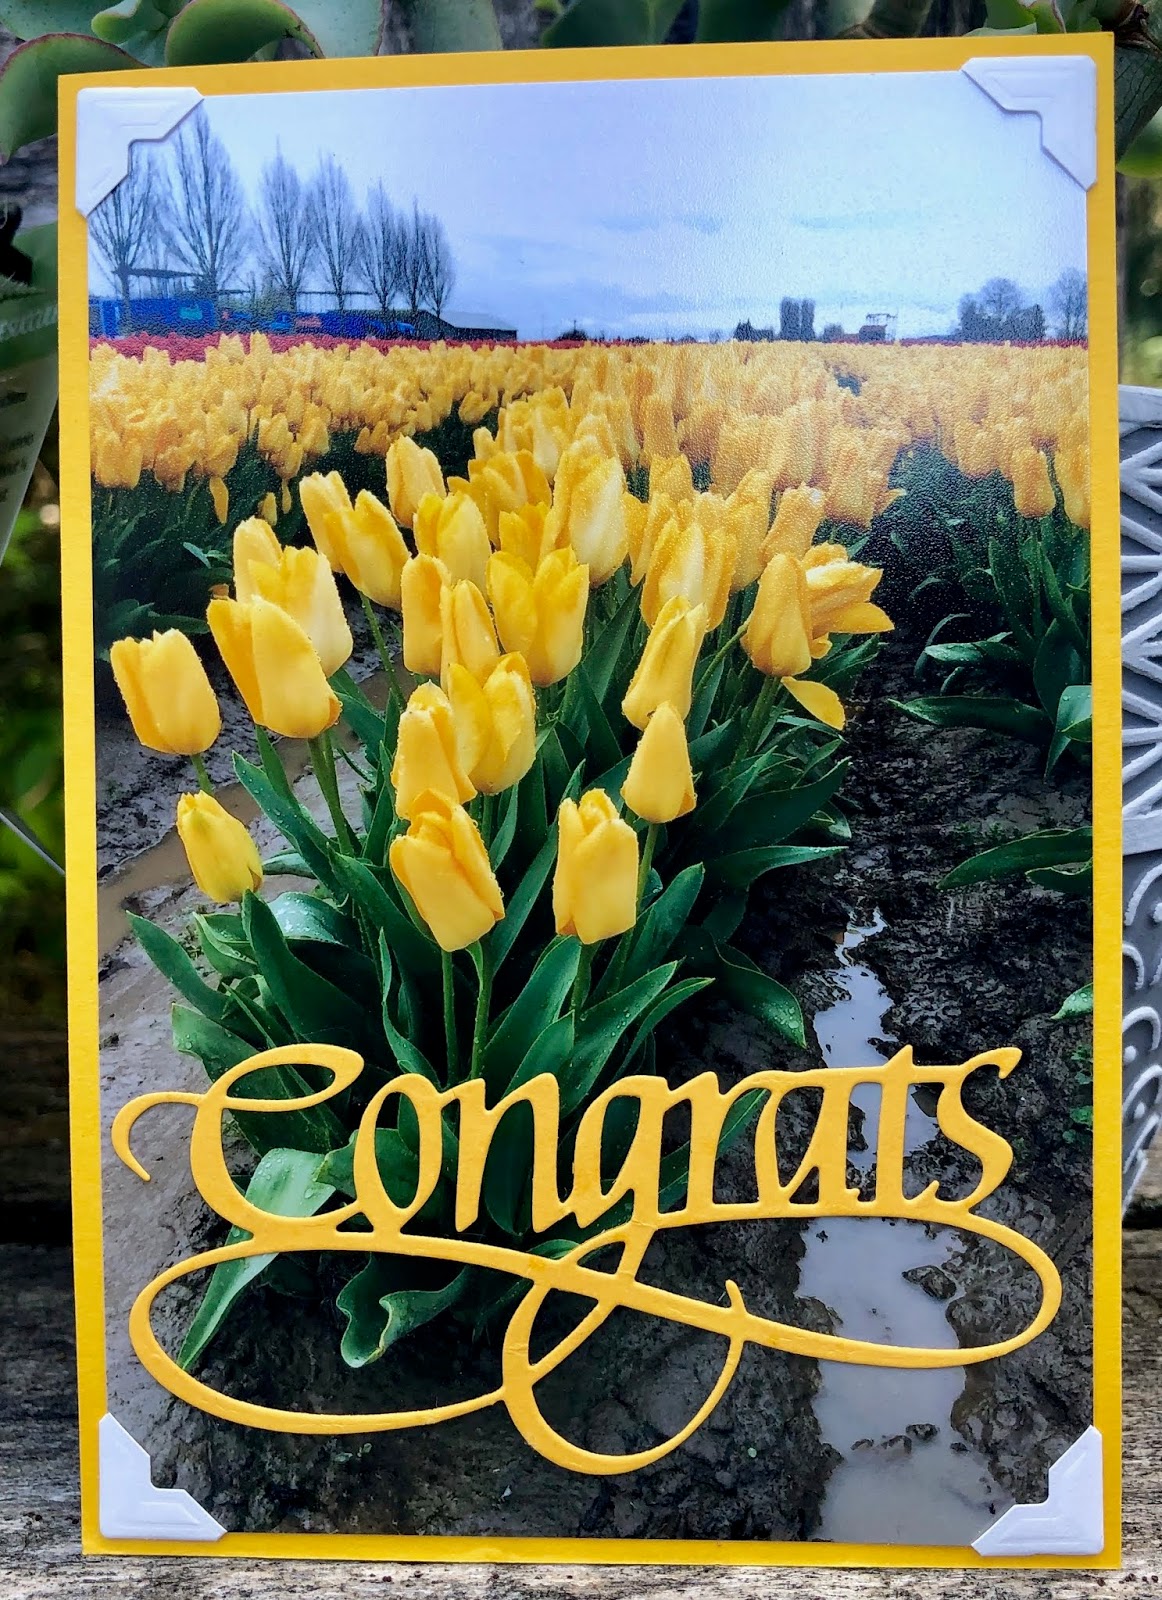
Hi Connie Nichol here today with some super quick  cards using photographs as a base.  Simply add a Way with Words die of your choice from Quietfire Design.  I used this idea a couple of years ago on this blog and felt the urge to make some more of these kinds of cards.  If you need some more ideas, check out the posts from 2017 here and here.

Simply take a 4x6 photo of landscapes, flowers, animals or other interesting things, adhere a die cut word to the photograph and mount on a cardstock base.  You can embellish lightly, but really, it's all about the photo and the word.  Simple, huh?  Here's some ideas:


You can even cut out part of the picture and use it as an embellishment.  I had this 4x6 photo of a rooster, so I just fussy cut him out and glued him to a sewing pattern background.


Quietfire Design Supplies Used:


Other Supplies:  Bazzill cardstock, Crafter's Companion mirrored cardstock, dollar store gems, unknown ribbon


Thursday, August 22, 2019

A Friend is Someone...card

Friends card / Quietfire Design stamps / Elizabeth Craft Designs die / card by Kim Gowdy

Hello again! Kim here on the Quietfire Creative Blog with another card share! My card was inspired by my recent summer holidays in Nova Scotia and a few visits with my long time BFF. This card will eventually find it’s way to her mail box!

I started by going through my Quietfire Design stash and pulled out the following products: Grid Background stamp, A Friend is Someone stamp and an Elizabeth Craft Designs’ Friends die - designed by Suzanne Canon.

Friends card / Quietfire Design stamps / Elizabeth Craft Designs die / card by Kim Gowdy


I created a background using Ranger Distress Oxide inks. I added each of the colours to a nonstick surface, sprayed with water and tapped my cardstock onto the colours and they adding droplets of water to create the pattern. I did this several times, drying my cardstock between layers. I finished by stamping the background with the grid pattern.

Friends card / Quietfire Design stamps / Elizabeth Craft Designs die / Ranger Distress Oxide Inks/card by Kim Gowdy


Friends card / Quietfire Design stamps / Elizabeth Craft Designs die / Ranger Distress Oxide Inks/card by Kim Gowdy


From the top of the background I cut the word Friends using the Elizabeth Craft Designs die. I trimmed the remaining cardstock down to approximately 2 inches and adhered to another piece of white cardstock. With the grid stamp I added the pattern to the white portion of my card. I adhered my word “Friends” to top, lighter portion of the card. I stamped the quote to the colourful lower portion of the card. A piece of ribbon separates the top from the bottom while adding another texture for interest!

Friends card / Quietfire Design stamps / Elizabeth Craft Designs die / card by Kim Gowdy


My card front was adhered to my card base and contrasting mat. I can’t wait to drop it into the mailbox...maybe you should send one off to your BBF as well!

Be sure to follow Quietfire Design as well on FacebookInstagram, Twitter, Pinterest and YouTube for lots of inspiration everyday! Don't forget to tag your shared projects on social media so we can see what you are creating with Suzanne's amazing designs!

Thanks for checking out my project ~ KIM 😀

SUPPLY LIST:

Elizabeth Craft Designs - #1052 Friends die
Ranger - Distress Oxide Inks [worn lipstick/spiced marmalade/abandoned coral], Distress Ink [black soot]
Creative Scrapbooker Magazine - Superstock

Scrapbook Adhesives by 3L permanent tape runner

Tuesday, August 20, 2019

You are Amazing Tag


Hey Quietfire Fans! I'm thrilled to be back on the blog today as I've been busy my craft room creating this awesome You are Amazing Tag. By combining a variety of stamps as well as dies from A Way With Words, they were the perfect addition to my tag. You'll want to grab a cup of your favourite summertime beverage and learn how to recreate my tag at home.

To start, you'll need a 3 1/8" x 6 1/4". Use a blending tool with foam to blend Peacock Feathers, Mermaid Lagoon and Cracked Pistachio over the entire surface of the tag. Spritz the tag with water. Dry the tag with a heat tool. Apply Emboss It Ink to the Leafy Acanthus Background and stamp it at the top of the tag. Reapply the ink to the Leafy Acanthus stamp and stamp just below the previously stamped image on the tag. Sprinkle Molten Dimensions - White Wonder Embossing Powder over the entire surface of the tag. Tap off the excess powder and emboss with a heat tool. Distress the edges of the tag. Ink the edges of the tag using Black Soot Distress Oxide Ink and a blending tool with foam.


Die cut a 2 1/4" Stitched circle out of white cardstock. Apply Cracked Pistachio Distress Oxide Ink to the Grid Background stamp and stamp off. Then stamp onto the stitched circle. Distress the edges of the circle. Ink the edges of the circle using Black Soot Distress Oxide Ink and a blending tool with foam.


Die cut the Love, Joy & Peace Christmas Ornament out of a piece of white cardstock. Apply a coat of Emboss It Ink to the ornament. Sprinkle Midnight Black Embossing Powder over the entire surface of the ornament. Tap off the excess powder and emboss with a heat tool. 


On a piece of white cardstock, use a blending tool with foam to blend Cracked Pistachio Distress Oxide Ink on part of the cardstock. Use a blending tool with foam to blend Cracked Pistachio and Mermaid Lagoon Distress Oxide Ink to another portion of the white cardstock. Use a blending tool with foam to blend Peacock Feathers and Mermaid Lagoon Distress Oxide Ink to another portion of the white cardstock. Spritz each inked portion with water. Dry the ink with a heat tool. Apply Jet Black Archival Ink to the small butterfly from the Butterflies/Dragonflies stamp set and stamp onto the Cracked Pistachio ink. Reapply Jet Black Archival Ink to the small butterfly from the Butterflies/Dragonflies stamp set and stamp onto the Cracked Pistachio/Mermaid Lagoon ink. You'll need to repeat the last step one more time. Apply Jet Black Archival Ink to the large butterfly stamp from the same stamp set and stamp onto the Peacock Feathers/ Mermaid Lagoon ink. Fussy cut each butterfly out. Ink the edges of each butterfly using Black Soot Distress Oxide Ink and a blending tool with foam. If you want the middles of your butterflies sparkly, colour the middles with a clear glitter pen.


Use a blending tool with foam to blend Cracked Pistachio, Mermaid Lagoon and Peacock Feathers Distress Oxide Ink on part of the cardstock. Apply Jet Black Archival Ink to the You are Amazing stamp set and stamp onto the inked area. Fussy cut each word out. Ink the edges of each word using Black Soot Distress Oxide Ink and a blending tool with foam.


Adhere the ornament to the stitched circle. Foam square the stitched circle 3/8" from the left and 1 3/4" from the top of the tag.


Foam square one of the small butterflies to the top right corner of the ornament. Adhere one of the small butterflies to the large butterfly. Place foam squares to the back of the large butterfly and wrap silver thread on behind. Adhere the large butterfly to the middle of the ornament on an angle. 


Adhere the last small butterfly to the bottom right side of the large butterfly. Adhere the You are Amazing sentiment to the middle of the two butterflies.


To finish the tag, tie a piece of twine through the top of the tag.


Here are a few closeup photos of the finished tag.


Here is the finished You are Amazing Tag.


Quietfire Design Supplies Used:


Other Supplies Used:

- Elizabeth Craft Designs: Stitched Circles
- Tim Holtz for Ranger Ink: Distress Oxide Ink - Black Soot, Cracked Pistachio, Mermaid Lagoon & Peacock Feagthers, Blending Tool with Foam and Distress Sprayer
- Ranger Ink: Jet Black Archival Ink and Emboss It Dabber
- Emerald Creek Craft Supplies: Molten Dimensions - White Wonder Embossing Powder
- Misc: White Cardstock, Tag, Twine, Silver Thread and Clear Glitter Pen

- Katelyn


Monday, August 19, 2019

And the Day Came - Betsy Birge, Guest Designer


Hello everyone!  I’m Betsy Birge and I am the Guest Designer for Quietfire Design for August.


For my project today I used the Butterfly Flourish Dies and And the Day Came stamp.  I started by cutting my cardstock: the base is A2 size top fold in gray, the dark violet panel is 4” x 5.25” and the focal panel is 3.75” x 5”.    

Next I heat embossed the sentiment on the smaller gray panel which I stamped in a violet hybrid ink and used clear embossing powder.


I next die cut my butterflies.  I used the same violet paper to die cut the solid image and a pearlized vellum for the single butterflies.  On the small butterfly I cut away the the curled bits.


For the bigger butterfly I curled the vellum wings with the handle of a small paintbrush.  I adhered them on to the corresponding shapes of the violet die cut adding glue just to the very middle of the butterflies.  Then I adhered them to my panel.  I cut away a small portion of the flourish where it overlapped the stamped text.  I added the curl bits from the small white butterfly die cut and added small violet and white pearls.


I hope you’ll give this easy card a try!  So beautiful with Quietfire Design elements!

Supplies I used:


Gray card stock
Violet Pearlized card stock
Pearlized platinum vellum
White and Violet pearls


Betsy Birge is a fine artist working in watercolor and soft pastel showing in local galleries.  She brings her knowledge of color and design to her card making.  She started her paper crafting journey 12 years ago and has been on several design teams, loving the challenges that they present.  She also enjoys digital stamping and says the techniques involved in card making are endless and fun!  You may visit her blog Caring Heart Cards but we found her on Instagram here where you'll see all sorts of good stuff!

Thursday, August 15, 2019

Elegant "The best thing I ever did" card

Hello Crafty Friends!

Do you know what I love about Quietfire Design stamps?  Suzanne's stamps are elegant calligraphy and with wonderful quotes.  "The best thing..believe in you" stamp is no exception:
The Best Thing - Believe in You - Mounted
Isn't it beautiful?  It is a great stamp to create an encouraging or supportive project for someone special.

Card instructions:
  1. Create a top fold card 3" x 5.5" from white card stock.
  2. Mat floral patterned paper to card front.
  3. Use black ink to stamp quote onto white card stock.  Die cut using circle die.
  4. Die cut gold card stock.  Mount quote onto gold die cut.
  5. Mount stack from step 4 to card front using double sided foam tape.
  6. Create triple bow and mount to card front using hot glue.  Mount coordinating wee flowers to bow center.
  7. Add die cut corner to card front using foam tape and liquid adhesive.  Mount flower to corner.
Such a pretty stamp and looks magnificent as the focal point on this sweet card!
Did you know that there is also the Believe in Me stamp?  
The Best Thing - Mounted

Thanks for stopping by!  I do hope you enjoyed the project.
Have a happy, crafty day!
Big Hugs,
Kathy Jo

Related Posts Plugin for WordPress, Blogger...