Showing posts with label Valentine's Day. Show all posts

Thursday, January 3, 2019

A Focus on "Love": elegant handmade card


Hello Crafty Friends!

Over the holidays I spent a lot of my free time in the craft room.  It felt so good to relax and let the crafty mojo flow.  One of the projects created used one of the newly released stamps (the twiggy wreath...so cute!) and two dies: Love and Heart.  Love how the heart dies look in each corner- so ornate and beautiful!


Card Instructions:

  1. Create 5.75" x 5.75" top fold card base from white card stock.
  2. Cut patterned paper to 5.5" x 5.5".  Apply gold marker along edges.  Mount to card base.
  3. Apply pink ink along edges of a 5" doily.  Mount to card front.
  4. Stamp twiggy heart to white card stock using pink ink. Die cut using ornate circle die.  Apply pink ink and then gold marker along edges as shown.  Mount to card front using double sided foam tape.
  5. Die cut Love from gold card stock.  Mount to card front using liquid adhesive.
  6. Die cut four hearts from gold card stock.  Mount to corners using liquid adhesive.
  7. Add wee gems as desired.


The calligraphy is gorgeous in gold!  Such pretty flourishes in both dies.

Quietfire Design product used:
Love die
Calligraphic Elements 2 die set
Twiggy Wreath and Sentiments stamp set

Thank you for stopping by!
Have a happy, crafty day.
Big Hugs,
Kathy Jo

Tuesday, December 18, 2018

Elizabeth Craft Designs December Designer Challenge


I'm excited to be sharing a post for the Elizabeth Craft Designs Designer Challenge for December.  This month the challenge is to use any of the Garden Notes - Frame It/Stitched Nested Dies.  There are four different die sets in this collection … squares; rectangles; ovals and circles.

You can join in the challenge for a chance to win a prize OVER ON THE ECD BLOG by answering the challenge question, Which of the Garden Notes - Frame It/Stitched die sets would you use on a project and how would you use it?


These dies are a wonderful addition to your collection as they leave the stitch marks on the piece the shape falls out of.  I thought it would be really fun to use them to make a shaker card.  

Cut a 6" square piece of 100# Soft Finish Cardstock.  Die cut the Frame-It Square and Heart Spray from the piece as shown.


Add adhesive around the square opening on the back of panel and attach a piece of clear plastic (transparency) over the opening.


Cut another piece of 100# Soft Finish cardstock to 3 3/4" square.  Stamp hearts (I used the heart created with all the little "love" words) across paper with Archival Ink.


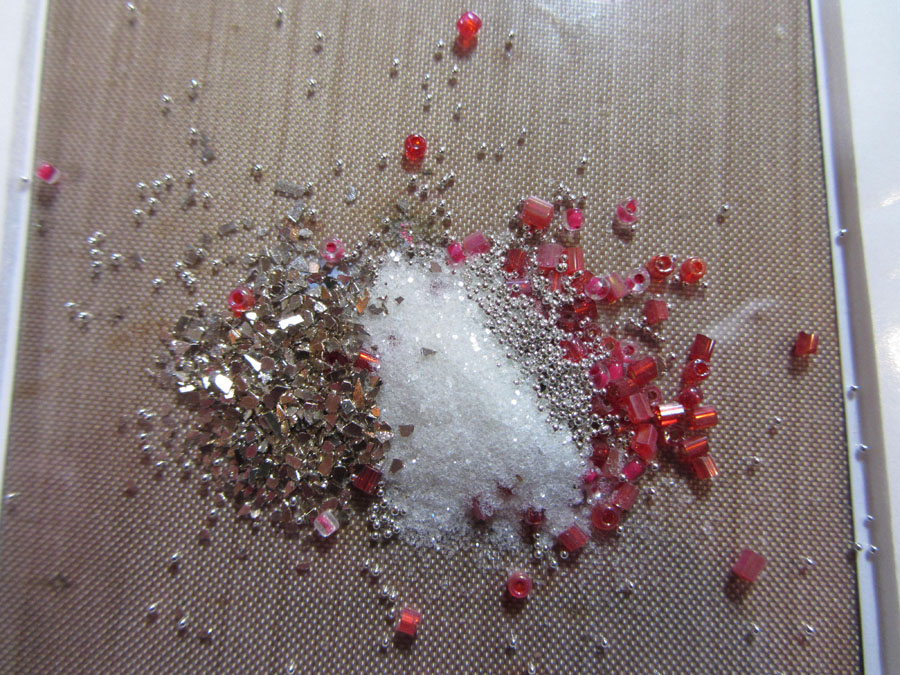
Back to the first panel.  On the back (the side you adhered the clear panel to) add foam tape all the way around the square opening.  You want the foam tape to match up at the corners and not leave any gaps so that nothing can fall out.  *I did take a picture of this but somehow that picture is damaged*  Add whatever you want on the inside of your shaker to this area.  I used some small beads, some holeless round beads, and chunky glitters.  Carefully remove the liners from the foam tape taking care that none of your pieces pop up and sticks to the tape.  Place the stamped square of cardstock over your shaker area, stamped side down so it will show through the window.


Add pieces of foam tape for support around the edges of the panel and in the Heart Spray area.


Cut a piece of red cardstock to attach over the back.  This will finish the back and show through the Heart Spray cut out area.  Back another piece of the same red cardstock with Clear Double Sided Adhesive and cut the word Love and the Hanging Heart element.


Stamp "Mine! You're all mine!" on a scrap of card, ink the edges and add a gold bow.


Die cut the Ladder Fern three times, ink and shape.  Die cut the pieces for Rose 2, ink, shape and assemble.


Ink the edges of the front panel.  Attach all elements as shown. 


I hope you've enjoyed this project.  If you have any questions, please don't hesitate to ask.

Hugs, Wanda


Supplies --

A Way With Words, Hearts & Pawprints - (QF or ECD)
A Way With Words, Love - (QF or ECD)
A Way With Words, Calligraphic Elements 3 - (QF or ECD)
Love & Hearts Collection Clear Stamp Set - (QF or ECD)
Garden Notes, Frame It/Stitched Squares - ECD
Garden Notes, Rose 2 - ECD
Garden Notes, Ladder Fern - ECD
Soft Finish Cardstock - 100 lb. - ECD
Clear Double Sided Adhesive - ECD

Cardstock - Red, Green
Gold Ribbon
Archival Ink - Ranger Ink
Distress Ink - Ranger Ink
Foam Tape
Clear Plastic or Transparency
Beads & Chunky Glitter


Sunday, February 11, 2018

Stamp Smudge & Color: 10-minute Valentines and Envelopes By Judi Kauffman for Quietfire Design


Need some Valentine’s Day cards and envelopes in a hurry? These are easy and lightning-fast! Simply STAMP with red ink, SMUDGE with some of the same ink, and COLOR with your favorite pencils. Optional: If you enjoy doodling or have a dot-pattern stamp, add dotted lines.

Add a patterned cardstock border, layer onto a white side-fold card base. Done!


Supplies:
Calligraphic Love Bits
Cardstock – Pink, white, patterned
Ink – Red
Pencils – Prismacolor

Other – White envelopes, double-sided adhesive tape or glue stick

Monday, February 5, 2018

Masculine Valentines by Judi Kauffman for Quietfire Design


My husband has always scoffed at Valentine’s Day, declaring it a conspiracy between florists and candy makers, but since it’s one of my favorite holidays (I love chocolate!) he gives in and celebrates. Of course, this leaves me with two tasks: Making a special dinner and a special card.

Masculine Valentines can be tricky. The usual color combination often skews too far toward feminine. My solution: Start with Suzanne Cannon’s elegantly hand lettered word die – Love. Combine it with simple motifs – hearts and stars – and a quirky color combination. I chose speckled red cardstock for a weathered feel and mixed it with ivory, gray, and bright orange!


The cards are 5.5” and 6” top-fold squares. I used black ink to stamp a striped background, creating a wonky plaid when it’s turned crosswise. Good alternatives include crackle pattern or wood grain.


Thursday, February 1, 2018

"Love" pretty in pink card

Hello Crafty Friends!

Kathy Jo here to share a pretty in pink "Love" card using Quietfire Designs' beautiful "Love" die,
Love - Metal Cutting Die
Excluding the "Love" die cut, all of the papers used were ivory card stock.  A wonderful medium, Cosmic Shimmer Metallic Gilding Polish was used to add the metallic pink luster to the ivory card stock.
Card Instructions:
  1. Create a tent fold card from ivory card stock.
  2. Cut ivory card stock smaller than front of card base.  Apply gilding polish.
  3. After gilding polish is dry (it dries in a zip!), apply gold marker along edges.  Mount to card base.
  4. Die cut ivory card stock.  Mount to base.
  5. Emboss ivory card stock.  Lightly apply gilding polish.  Note: the larger the gaps in between the raised areas, the more likely you will get gilding polish in non-embossed areas.  
  6. Die cut with oval die and mount to card.
  7. Die cut oval frame.  Apply gilding polish.  Add gold marker along edges.
  8. Die cut "Love" using ivory card stock and gold card stock.  Slightly offset both die cuts and mount to card using liquid adhesive.
  9. Create triple ivory bow.  Mount using liquid adhesive.
  10. Create three roses of different size. (Or take roses from your crafty stash.)  Apply gilding polish as desired.  (I applied polish evenly over the entire large rose and just on the edges of the smaller roses.)
     
  11. Add crystal gems and Sitckles, if desired.

Thank you for stopping by!  I do hope you enjoyed the pretty in pink "Love" card.
Have a happy, crafty day!
Big Hugs,
Kathy Jo

Product used:
Quietfire Design "Love" die
Ecstasy Craft, Cosmic Shimmer Metallic Gilding Polish "Blossom"
Becca Feeken dies (Spellbinders), "Hemstitch Oval", "Anabelle's Trousseau"
Gold marker
Ivory and gold card stock
Ivory ribbon
Gems
Stickles
Paper Roses

Tuesday, January 30, 2018

January Designer Challenge - Elizabeth Craft Designs


The Elizabeth Craft Designs Designer Challenge for January is "You Fill My Heart", just in time for Valentine's Day!  

I wanted to use this simple thought which says it all....  You're never getting rid of me!  ;-)   I chose delicate colours, I even used the same paper to cut Forever that I used on the background.  A black diecut used as a dropshadow made all the difference!

For today's challenge, Elizabeth Craft Designs will be giving away Gift Card to use on their website to 3 lucky winners.  To enter, simply leave a comment on the Elizabeth Craft Designs Challenge Blog Post!  Good luck! 

Here is how you can make this card.  It's so simple. Choosing the paper is fun!

Instructions:
1.       Form a 6 x 7” side fold card base from pink cardstock.  Cut a green panel measuring 4.75 x 5.5” and a white mat that is about 1/8” larger.  Adhere panels together with Clear Double Sided Adhesive.  Adhere the panels to the card base with foam squares to give some dimension.
2.       Die cut Believe from white cardstock, Forever from green cardstock and the flourished heart from pink cardstock.  Die cut all three dies from black cardstock as well. 
3.       Layer the words together so the black diecut is slightly offset.  Designer tip: make sure each of the black diecuts is offset the same way (distance offset and direction of offset) in each pair of diecuts!  You don’t have to use lots of Glue Dots, just a few placed in the widest parts of the letters.
4.       Use Glue Dots to adhere Believe and Forever to the green panel as shown.  Cut small pieces of the Kool Tak Clear Foam to raise up the heart as shown so it appears to float above.  Voila! You’re done!
5.       Give the card to someone you love!
        
This would make an wonderful wedding card when done in white!


Thanks for dropping by for a peak.  Don’t forget to hop over to the Elizabeth Craft Designs blog to be eligible for their giveaway!


Supplies from Elizabeth Craft Designs:
Believe  QFD | ECD
Forever   QFD | ECD
Calligraphic Elements 2   QFD | ECD
Beacon Kids Only Glue  ECD
Clear Double Sided Adhesive  ECD

Others:
Micro Glue Dots
Maja Designs Papers – Sofiera collection and other pink
White cardstock
Black cardstock
Ranger Distress Ink – Mahogany
Ranger Ink Blending Tool

Scrapbook Adhesives by 3L 3D Foam Squares
Kool Tak Clear Foam Tape


Monday, January 15, 2018

Mixed Media Valentine's Card


Hello and a Happy Monday to You!!!  Yes, Mondays can be happy... if we let them be :-)  

It's Wanda (Art By Wanda) here today to share a Valentine's mixed media card using products from Suzanne's A Way With Words line from Elizabeth Craft Designs.  

I started with a 5" square of watercolor paper adding Grit-Paste through the hearts of the Hearts & Paw Prints Sprays Stencil in 3 lines flipping the stencil for the center line so the hearts sit together better.


Once the paste was dry I added color with Distress Spray Stains.  The Brushed Pewter was dripped on instead of being sprayed on.  I was heavy handed when spraying the Tattered Rose and Picket Fence getting puddles of color and allowing colors to blend and run and then dried it with a heat tool.


I deepened the color around the edges with Distress Ink Fired Brick.


Next I added embossing around the edge with Fran-tage Powder.  I rubbed an embossing ink pad on the edge, added the powder and heated.  When the edges were done I added some random spots/piles of powder on the card and heated it from underneath so I didn't blow the powder around.  I love these spots as you can really see the different grains in the powder.


"love you" (Love & Hearts Collection) is stamped on white cardstock with Archival Ink Jet Black.  I then drew a heart around the words, cut it out and added embossing.  Since I loved those spots of embossing on the card so much, I put more powder on the edges of the heart and heated it from the bottom.  I did get a few specks in the center but thought it looked fine for the card.


Gold mesh ribbon and cheesecloth start my grouping.


"love" from the Baby Love cutting die set was cut from red cardstock.


I made the Garden Notes Rose 2 flower for my card.  There is a video on the Elizabeth Craft Designs You Tube channel for this flower Here.  I used green cardstock for the stem, cutting 2 to layer.  Shading was done with Distress Ink Peeled Paint and Highlights with Pan Pastel Bright Yellow Green.  The pieces for the rose and rosebud were cut from White Soft Finish Cardstock.  I inked the edges with Distress Ink Worn Lipstick.  For the rose I punched a small circle and built my flower on that because once it was built I sprayed it and the pieces for the bud with Ranger Mica Spray Pearl.  This way I could spray the rose without spraying everything else.  I attached the stem to the card, glued on the rose and built the bud right on the card. 


The love you heart was attached with foam tape.  I also added some wet glue onto the tape so it would press through the cloth and ribbon giving a good bond to the card.

The red hearts are Tim Holtz Idea-ology Mirrored Hearts colored with Red Pepper Alcohol Ink.


In this picture you can see the shimmer from the Mica Spray on the rose.  I also added some dots of Nuvo Glitter Drops Honey Gold onto the card.  You can see a couple in this picture.


I'm very pleased with how this card came out!!!  I hope you are too!!

Thanks for following along and, please, if you have time, leave us a comment.

Hugs, Wanda


Tuesday, January 2, 2018

Love and Hearts Always


Hello on this 2nd day of a new year.  I hope you got to spend some time with loved ones over the holidays!!  Valentine's Day is just a quick hop, skip, and jump away (maybe not even that far as it seemed 2017 went by in just a hop, skip, and jump) so my card today is totally Valentine's worthy.

I've used the A Way With Words Love & Hearts Clear Stamp Collection and the A Way With Words Always cutting die.


My background panel is kraft cardstock.  
  • Stamp the hearts border along the top and bottom with VersaMark Ink and emboss with Queen's Gold powder. 
  • Ink around edges with Distress Ink Festive Berries, splatter with water, blot and dry.
  • Color inside the hearts with Wink of Stella Gl. White.
  • Ink edges with Versamark and emboss with Queen's Gold. 
Hearts panel is Specialty Stamping Paper.
  • Using a craft mat, add Distress Oxide Inks (worn lipstick, candied apple, picked raspberry) to paper spritzing with water, drying, and redipping into ink until you like the color.
  • Stamp solid outline hearts with Archival Ink Jet Black
  • Stamp insides with Archival Ink Vermillion.  Dry well and tap with an anti-static bag.
  • Stamp solid outline hearts again with Versamark ink and emboss with Queen's Gold powder.
  • Add white around hearts with Gel Pen.
  • Add Wink of Stella to inside of little hearts. 
  • Distress edges.
Finishing Up.
  • Cut "Always" from both red and white cardstock.  Attach together so you see a bit of white. Glue to card as shown.
  • Attach everything to folded white card.
  • Add dots of Classic Cherry Enamel Accents as shown.
Finished card measures 6" x 4 3/4".


Thanks for following along.  If you have time, I hope you leave a comment and let me know what you think - good or bad.  

Hugs,  Wanda


Related Posts Plugin for WordPress, Blogger...