Thursday, February 19, 2015

The Weekly Cut- 15 Minute Wonders- Bunny, Tulip and Shamrock Doily Cards

Hi y'all, Robyn here with this weeks new files from 
If you want to make the card in 15minutes- don't get carried away with creativity! 
LOL!
I did change the size of the mats because, well, because I did!
The bunny is popped up with a dimensional glue dot.
 On the mat
On the mat.
Well, I got a little carried away!
I've been tidying and found some metallic cord, and a jar of green glitter texture paste.
The focal panel is popped up with fun foam.
 On the mat.

Are these screen shots helpful?
What would like to know about creating with Suzanne's digital files?

How are you using the files?
Please post on our FB page or leave a link in the comments.

Hop over to my blog and leave a comment and I'll send one of the cards to three random commenters!

Leave a comment and questions are always welcomed!

Wednesday, February 18, 2015

Butterfly Circles

Hello!  I hope you are staying warm!  It's really cold here:  5 degrees with windchill of -18.  New record low!  Still glad I'm not in Massachusetts but it's strange that my friends in Alaska are experiencing warmer weather than I am here in Virginia.  All to say that I'm creating my own spring in my craft room!  And what better way to signal spring than butterflies?  Suzanne had just sent me this sweet Butterfly Circles set and I love love love this big stamp.  The letters and flourishes intertwine in the coolest way and there's a perfect space in the center for my butterfly dies.  

Quietfire Design, butterfly circles, Diana Nguyen

I first did a rainbow color wash on watercolor paper.  I used Memory Box's Darla and Vivienne Butterflies for my focal point and added some layered, punched butterflies.  The large stitched circle die is from Lil' Inkers and the paper from Colorbok was sponged around the edges with distress ink Salty Ocean.   Some pearls for the butterfly body for my final touch.  Hope you like it!


Butterfly Circles, May the Wings, set of 5 stamps - Mounted

 Stay warm and safe!

Monday, February 16, 2015

"Always Be My Friend" Pop Up Box

Hi All!  Kathy Jo here sharing a pop up box using two stamps from the oh-so-happy Quietfire Design stamp set Always Be My Friend:
Always Be My Friend, Set of 3 Stamps - Mounted
This is one of my favorite Quietfire stamp sets because the beautiful calligraphy and wonderful sentiments can make any project cheerful!  

The card details: Black card stock was used on the card base.  All of the patterned paper is Graphic 45's French Country 6x6 and 8x8 pads. There are a lot of details with the card so I hope you don't mind all of the photos!  Here is a close up of the front flap:
Isn't the stamp heartwarming?  

Here is the top of the card showing a garden scene:
Left card flap:
Right card flap:
The back contains the lovely "I love that you will always be my friend" stamped sentiment.
The ribbon is solid crinkled ribbon that was dyed using Distress Stains in Scattered Straw and a hint of Dried marigold.
Another view of the card.
Thanks so much for stopping by!  I do hope that the card brought some sunshine and a smile to your day!
Hugs,
Kathy Jo

Friday, February 13, 2015

Have A Heart That Never Hardens

Hello Everyone, Terre here with another beautiful sentiment stamp from Quietfire Design.
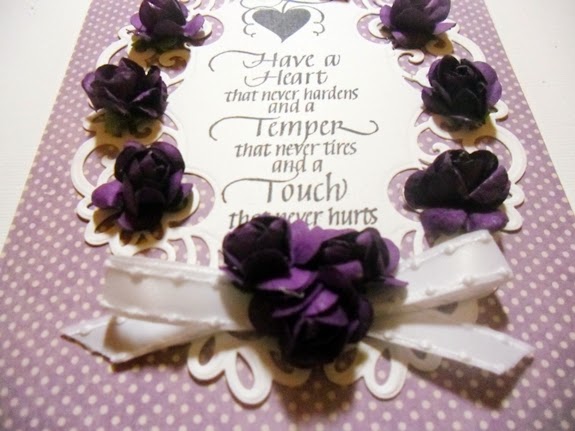
This card uses one of my favorite colors, Purple! Yes any shade of purple will do, just like I have used in this card. The beautiful sentiment "Have A Heart That Never Hardens" is one of the new stamps featured on Quietfire Design.
I used one of the new releases from Spellbinders featured at CHA for the die template, the ink is Memento Tuxedo Black from Tsukineko, the white ribbon is from May Arts, the purple paper flowers are from Want2Scrap and it is all put together with Beacon Adhesives Zip Dry.
I hope you have enjoyed this blog post and remember to visit the blog and Facebook often for more creative inspiration. Crafty Smiles, Terre

Thursday, February 12, 2015

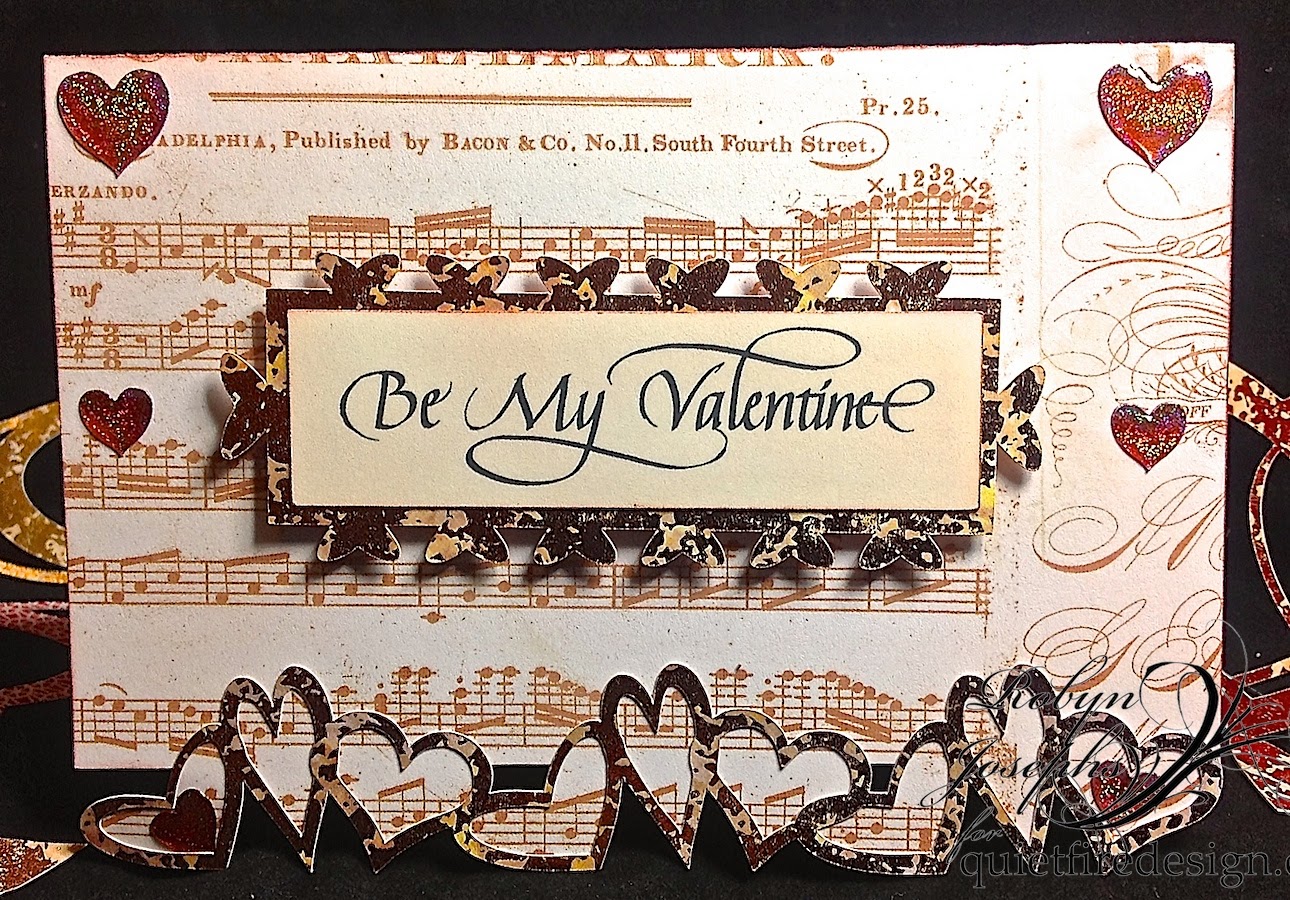
The Weekly Cuts- Tangled Hearts, Be My Valentine, Heart Doily

Hi Y'all, Robyn here with the digital cuts of the week!
Not just for V-day!
All files available in Suzanne's Silhouette Store
 My fav this week is the tangled hearts!
Scattered on holiday tables- mobiles- holiday trees!
Bet you can't make just one!
Leave a comment with your suggestions.
 The pinwheel pizza  box stole my heart as well.
 No glue required!
On the mat.
(those tangled hearts are everywhere!)
On the mat.
The be my valentine heart border card- Print and Cut
On the mat.

It looks just like Suzanne came and hand lettered on your card
even with my crumby printer!
Just by changing the sentiment any of these files could be used everyday of the year to spread a little love around.
Right now all but the Pizza box are on sale for 75 cents!

You can hop over to Rainbow Weaves for some backstory.

Comments and Questions always welcomed!


Wednesday, February 11, 2015

If You Don't Believe in Miracles


Happy Wednesday!!!  It's Wanda here today to share a tag.

Supply List --

If you don't believe in miracles Quietfire Rubber Stamp
Distress Stains - aged mahogany, weathered wood, antiqued bronze
Dylusions stencil Dotted Flowers 5x8
Distress Ink - mustard seed
Archival Ink - jet black
Embossing powder - clear
Lace scraps and Metal Butterfly

Directions --

1) Put all three stains onto craft sheet, spray with water, pull tag through color and dry dabbing off excess stain as you go.

2) Sponge paint through stencil as shown and dry.

3) Edge tag with bronze stain and dry.

4) Ink over stenciled areas with mustard seed, dab with damp cloth to take some of the ink off the paint, but not all, and dry.

5) Stamp quote with jet black and emboss with clear powder.

6) Add lace and butterfly. 


Below is another picture on green paper just to help with showing the color.


Monday, February 9, 2015

Sunshine to my heart card..

Hi Everyone it's Teresa here today to share a different kind of Valentine card with
all of you.  I wanted to do something pretty but not so mushy and pink like all the 
rest of the cards they have at this time of year.  So many of my students tell me that
they like other styles to give so i used the "You are the Sunlight" stamp for this one 
and i had the perfect paper in my stash to make it just right.


I have been all inspired to do easel cards lately so i created this one 
with a sunlight paper that i had in an Avery Elle 6x6 paper pad 
and lots and lots of flowers. The border paper also went perfect and
i just got that from Authentique.  


The circle die that i stamped on is from Spellbinders and is called
Splendid Circles and kind of reminded me of a big huge sun
 and all the foliage is from a die called Sprigs and a few from Foliage Flourish. 
 The flowers are from Prima and the rhinestone swirl is from Want2Scrap. 
And the pearls i did with Liquid pearls from Ranger. 
 It's different but i really like the yellow and white :)

Thanks for stopping over and hope you all have a wonderful day!

Friday, February 6, 2015

A smile that you send out....


Hello everyone,

Yvonne here with a new card using the lovely Quietfire stamp "A smile that you send out".
I love this sentiment...doesn't it make you smile the moment you read it?... I do, every time I read it!
So...with a happy card also happy colors and thus chose a lovely brighter pink (p.s. also suitable for upcoming Valentine's Day!).


The card is really easy to make: it's all about stamping, die-cutting and layering using 3D foam squares.
And of course embellishments ;-)

For my card I used:
- Quietfire Design: A Smile that you sent out... (#5595)
- Black Archival ink and an acrylic stamp block
- Spellbinders: Majesty (S4-445), Labels 41 (S4-468), Grand Squares (LF-126)
- 3D foam squares white (Scrapbook Adhesives)
- cardstock: white and pink, pink patterned, and old book page
- self-adhesive pearls white
- Distress ink: Brushed Corderoy and ink blending tool
- mulberry flowers, leaves, glue

I hope you like my card and am looking forward to your (ever so appreciated)  comments!

Have a nice day!
Hugs,
Yvonne

Thursday, February 5, 2015

The Heart Has Its Reasons

Hello Everyone, Terre here with a festive Valentine's Day Card or simply a card to tell someone you love them..you choose!
For this card, I used Quietfire Design The Heart Has Its Reason Stamp. This stamp set is one of the new creatives that you will find at Quietfire Design. The die template is from Spellbinders new releases at CHA The ink is Memento Tuxedo Black from Tsukineko, the beautiful red ribbon is from May Arts and to hold it all together I used Beacon Adhesives Zip Dry. Thank you for stopping by my blog post today, I hope you are inspired to use these beautiful new stamps from Quietfire Design. Crafty Smiles, Terre

Wednesday, February 4, 2015

LOVE Fill 'er Up card


detail of letter "L"
Front of card closed
Yogi here today with an involved accordion card using the newest "LOVE Fill 'er Up" letters from Quietfire Design.

Now can you think outside the box... what words can you create with these letters?? and if you have the "Fill 'er Up JOY" word, OH... the possibilities.

And on the front I'm using an Xmas quote... I masked off the word "Christmas" and put in the word "Birthday" instead. BIG GRIN.

I die cut several of the Spellbinders Label 41 Decorative Accents from white cardstock, sponging with Distress "Seedless Preserves".

Used the negative of the die cut to create an eCut file that is the same size as my die cut as an under layer and cut with my Cameo from white cardstock. Completely sponged it with the preserves.

eCut a larger piece and then a shadow of the larger piece. Ran the large piece through my embossing machine with Cuttlebug "Kassie's Brocade", hit the high points with "Mustard Seed". Left the shadow layer plain white.

Adhered a piece of yellow satin ribbon as hinges, adhering a piece to the front and back. Adhered my large yellow embossed piece. Adhered the preserves under layer.

Stamped the large Fill 'er Up letters on white cardstock using Versafine Black onyx. Created a mask from tracing paper, leaving a nice white border around the letter, then stamping with various floral stamps (Flourishes "Orchids" & "Clematis") with the black stamp pad. Colored with Prisma colored pencils. Adhered to under layer and then adhered the die cut.

Applied Quickie glue pen to the inside of each letter, again leaving a white border, then sprinkling with Stickles dry glitter "Cinnamon".

Inked the butterfly (7 pce set - Quietfire Design) using the Distress "Spun Sugar" & "Seedless Preserves", misted with water and stamped, fussy cut around it and adhered to the "V" piece"

 On the front, hit the high points of the embossed layer with the preserves. Used the under layer sponged with the mustard, stamped the quote on the center drop out piece of the die cut using the black and clear embossed.

Added a piece of the yellow ribbon and a bow. Wrote on the ribbon with a colored pencil "xoxo". Added white pearl flourishes, and as a final touch added a quilled yellow ladybug.

On the back, eCut the large piece from gold parchment stationary.

Click on any image to enlarge. Enjoy
Back of card


Related Posts Plugin for WordPress, Blogger...